
- SIGNA™ Hero 3.0T Service Methods
- 5852800-8EN Revision 1.0
- 00000018WIA30B0B350GYZ
- id_20208391.13
- Aug 6, 2021 3:36:30 PM
Removing the P2/P4 cable from the dockable table cradle
Removes the cable assembly containing the P2 and P4 coil connectors from the dockable table cradle.
Prerequisites
| Personnel requirements | |||
|---|---|---|---|
| Required persons | Preliminary requirements | Procedure | Finalization |
| 2 | - | 30 minutes | - |
| Tools and test equipment | |||
|---|---|---|---|
| Item | Quantity | Part number | Manufacturer |
| Nonmagnetic Titanium Service Tool Kit, Small Set | 1 | 5113258 | - |
| Required conditions |
|---|
| The cradle is raised for service. |
Procedure
- Remove the two screws securing each of the two balun holders securing the P2 port cable to the cable routing track.
Figure 1. P2 cable balun holders 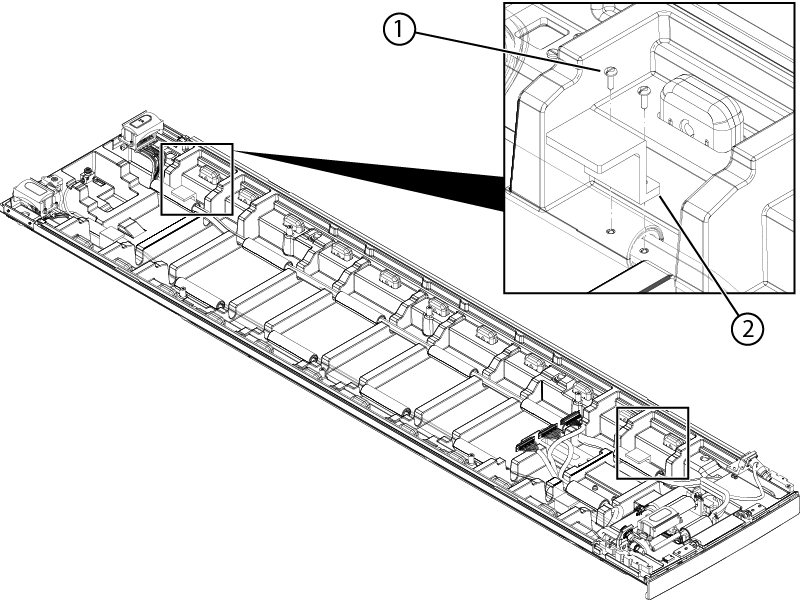
1 Screw 2 Balun holder - If not previously removed, remove the four screws securing the P4 port to the handle-end cradle cover.
Figure 2. Handle-end cover components 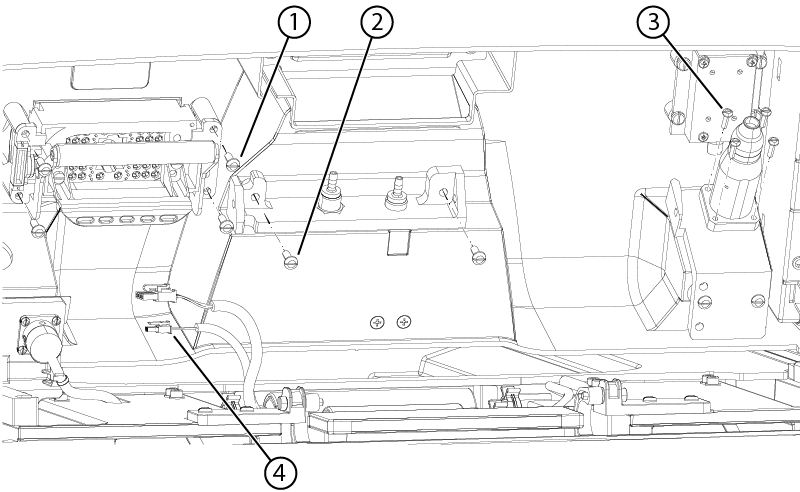
1 P4 screw 2 Pneumatic connection bracket screw 3 Peripheral Gating (PG) connector screw 4 Emergency egress connector - Remove the brass screw securing the cable block to the cradle.
Figure 3. Cable block 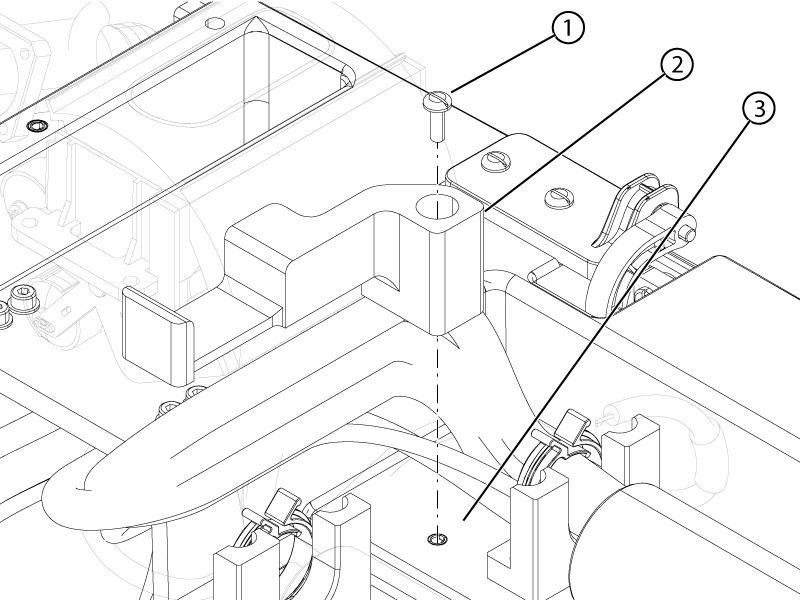
1 Brass screw 2 Cable block 3 Cradle - Open the balun holder to remove the balun and cut any cable ties securing the cables to the cradle and handle-end cradle cover.Note: Take a photo of the existing cable routing and cable tie locations for use during installation.
Figure 4. P4 balun holder latches 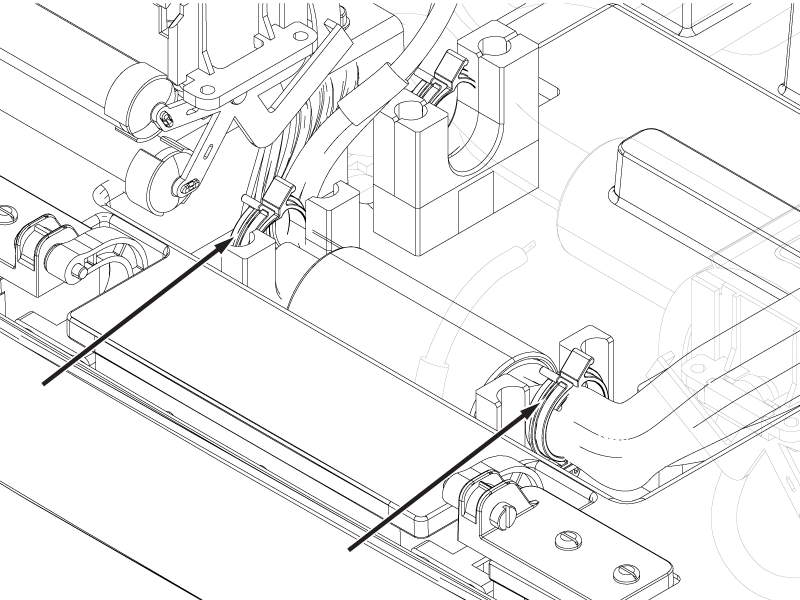
- Remove the four brass screws and four brass washers securing the brass cable track mounting blocks (underneath the cradle) to the bottom of the cradle.
Figure 5. Cradle cable track mount 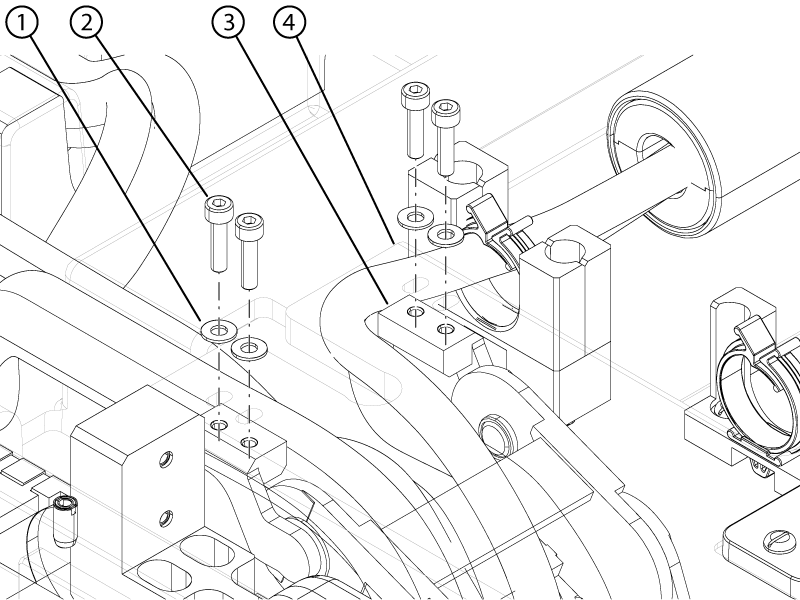
1 Brass washer 2 Brass screw 3 Brass cable track mounting block 4 Cradle bottom - Remove the brass cable track mounting blocks and plastic bearings from the cable track.
Figure 6. Cable track mounting blocks 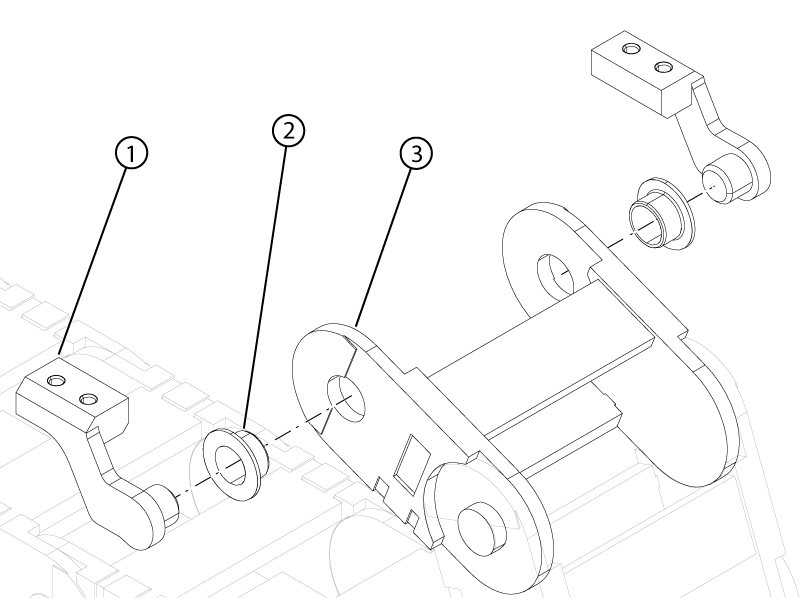
1 Brass cable track mounting block 2 Plastic bearing 3 Cable track