
- SIGNA MR355 / SIGNA MR360
- Service Manual
- 5856356-3EN Revision 5.0
- Basic Service Documentation. Copyright General Electric Company.
- 00000018WIA30DC0030GYZ
- id_131061731.5
- Aug 23, 2019 2:44:02 AM
ICN Replacements (Dell R620/R630)
Prerequisites
| Required persons | Preliminary requirements | Procedure | Finalization |
|---|---|---|---|
| 1 | 10 minutes | 30 minutes | 30 minutes |
| Item | Quantity | Effectivity | Part number | Manufacturer |
|---|---|---|---|---|
| Dell R-620 – Image Compute Node (ICN) (Requires minimum software release of 25) | 1 | - |
Refer to FRU | - |
| Dell R-630 – Image Compute Node (ICN) (Requires minimum software release of 25.1) | 1 | - |
Refer to FRU | - |
| ||||||||
About this task
This procedure provides instruction to replace the Image Compute Nodes (ICNs): Dell R620/R630.
Replacing ICN (Dell R620/R630)
Procedure
- Disconnect all the cables from the rear of the ICN. Note the
locations for reinstallation.
Figure 1. Dell R630 Rear View 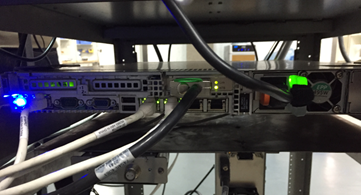
- On the front of the ICN, lift up the locking tabs on both side
of ICN, and remove the 2 screws.
Figure 2. Locking Tab on Left Side of Dell R620/R630 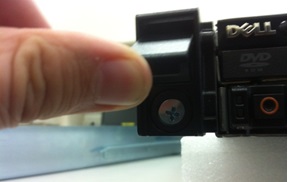
- Pull out the ICN, and Place it on the side in a safe area.
Figure 3. Remove 4 screws 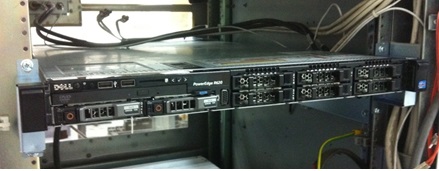
- Install the new ICN follow reverse sequence
Figure 4. Install the new ICN 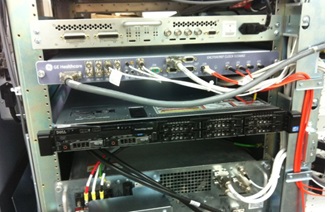
Finalization
Finalization
-
Restore the Power. Refer to System Cabinet PDU Main Breaker LOTO Procedure.
-
Turn the ICNs on per ICN On/Off Procedure.
Note:For the first 3 or 4 minutes, LEDs come on only at the rear of the ICN, next to the power cables. After 3-4 minutes, you will hear the ICN fans come on and then the LED at the front of the ICN starts flashing.
-
Configure the new ICN VRE Reconfiguration.
-
Perform a test scan to ensure the system is working properly.