- SIGNA™ Hero 3.0T Service Methods
- 5852800-8EN Revision 1.0
- 00000018WIA30835450GYZ
- id_20222751.10
- Oct 11, 2021 6:31:30 PM
Removing the shaft linkage-right, shaft extension, and bearing IGUS
Removes the existing shaft linkage-right, shaft extension, and bearing IGUS from a dockable patient table.
Procedure
Lower the table lock safety bar, then lower the table to make sure weight is resting on the safety bar.Warning 
Figure 1. Table lock safety bar 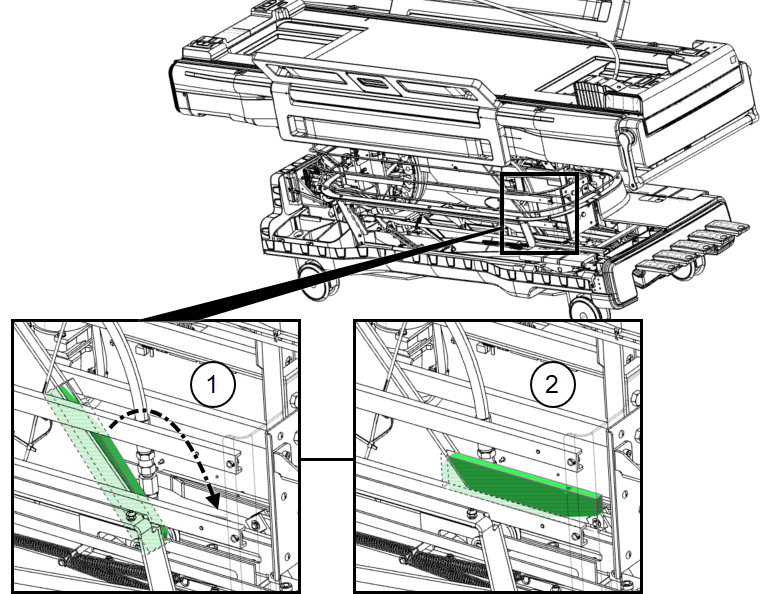
1 Safety bar up (unlocked) 2 Safety bar down (locked) Figure 2. Isometric assembly 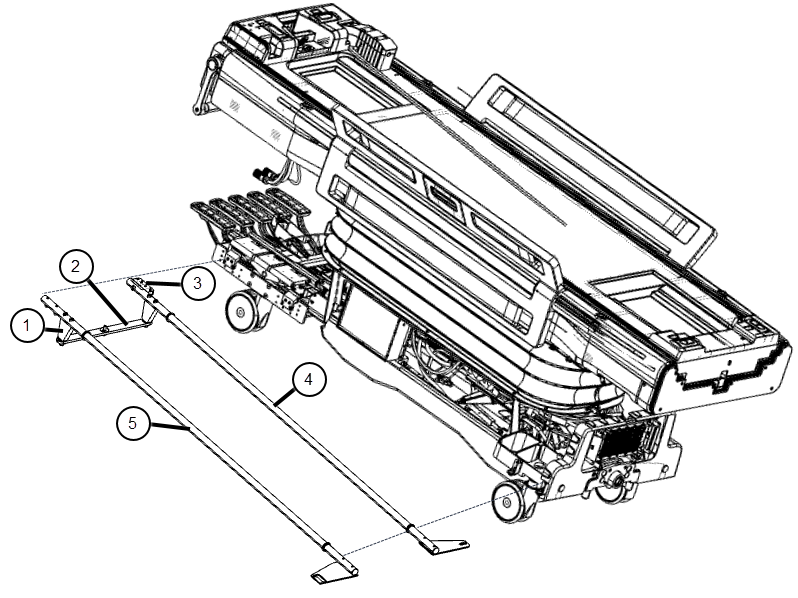
1 Shaft extension 2 Reversing link 3 Mounting block 4 Shaft linkage-left 5 Shaft linkage-right - Note: Note the positions of the brake link plates. The brake link plates may need to be adjusted in the finalization process while checking the casters.Remove the screws that attach the shaft linkage-right to the link-right rear, located at the right rear side of the table. Also remove the two screws that attach the link-right front on the opposite side of the table in the same location.
Figure 3. Shaft linkage, right front 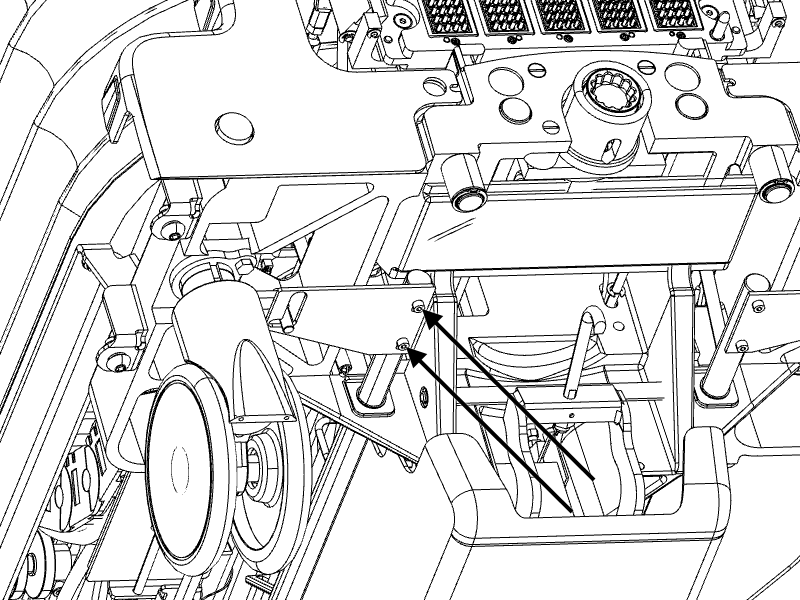
- Remove the shaft extension from the shaft linkage right.
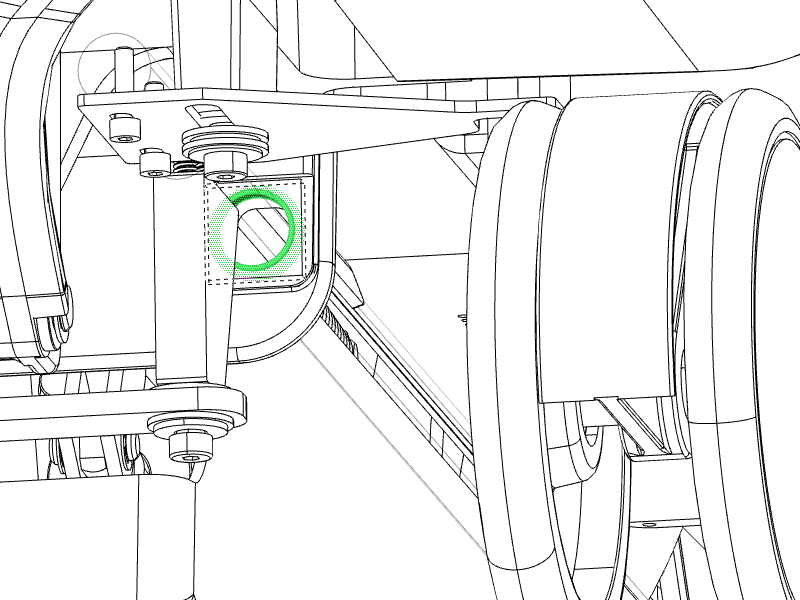
- Remove the shoulder screw, as shown below.
Figure 4. Removing the shoulder screw 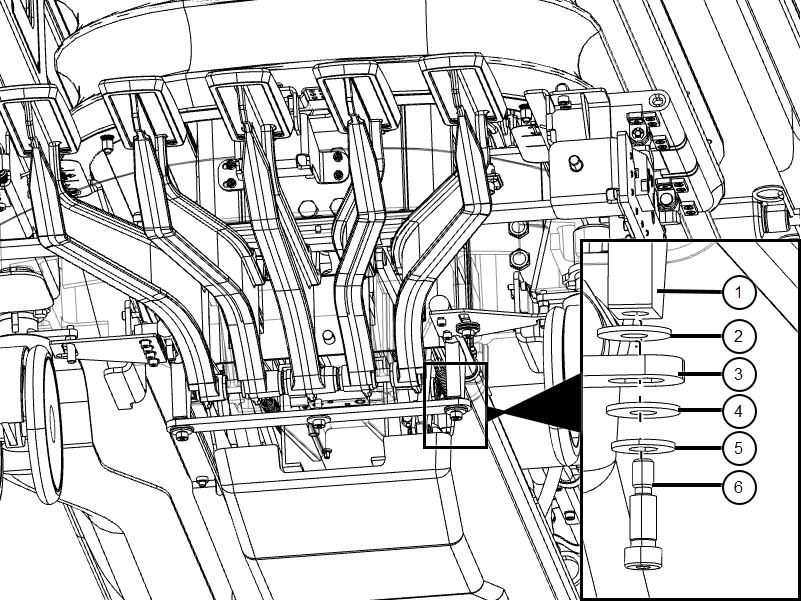
1 Shaft extension 2 Nylon washer 3 Link reversing 4 Nylon washer 5 Brass washer 6 Shoulder screw - Remove the shaft extension mounting screws (if more space is needed to access the shaft extension mounting screws or for better torque, rotate the bottom of the shaft extension out).
Figure 5. Shaft extension mounting screws 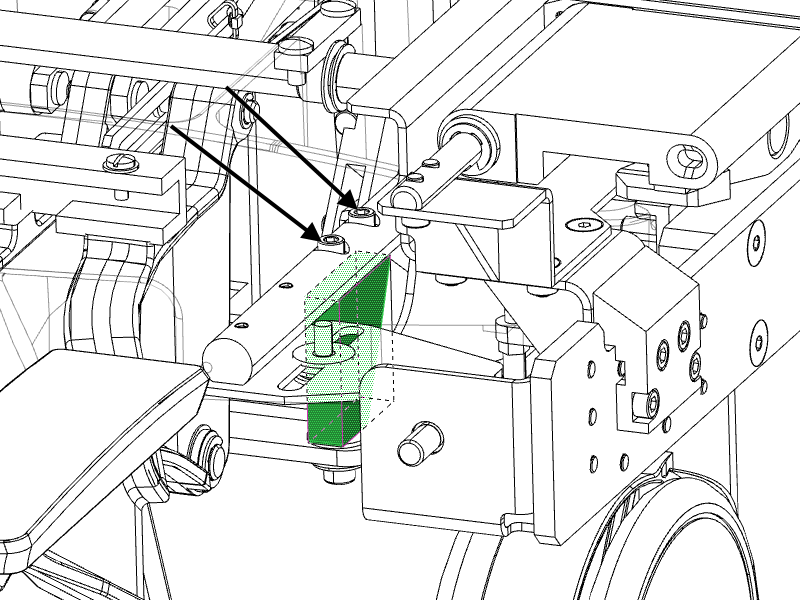
- Remove the shoulder screw, as shown below.
- If replacing front or rear bearing IGUS, remove the bearing IGUS by hand.
Figure 6. Bearing IGUS