
- Discovery MR750 3.0T System Service Methods
- 5690009-2EN Revision 4
- 00000018WIA30C7ED20GYZ
- id_131057804.0
- Feb 14, 2020 4:10:57 PM
3.0T HD T/R Knee Array Coil Setup for MCQA or SNR Test
Prerequisites
| Required persons | Preliminary requirements | Procedure | Finalization |
|---|---|---|---|
| 1 | Not Applicable | 15 minutes | Not Applicable |
| Item | Quantity | Effectivity | Part number | Manufacturer |
|---|---|---|---|---|
| Phantom | 1 | Legacy phantom kit |
5160254-4 | - |
| Phantom Positioner | 1 | Legacy and unified phantom kit |
5114356-12 | - |
| Large Cylindrical Unified Phantom | 1 | Unified phantom kit |
5342679-2 | - |
| Condition | Reference | Effectivity |
|---|---|---|
|
The following coil configuration names must be installed to run this tool: HD TR Knee PA. | - | - |
About this task
Note:
Coils do not ship with phantoms. Phantoms come in a unified phantom set with the MR system.
Legacy Phantom Setup
Procedure
- Note:Place the 3.0T HD knee array coil, phantom positioner, and phantom on the patient cradle. Take note of the serial number of the coil.
If installing the coil for the first time on a system, refer to Auto Coil Install.
Figure 1. Coil and Phantom Setup 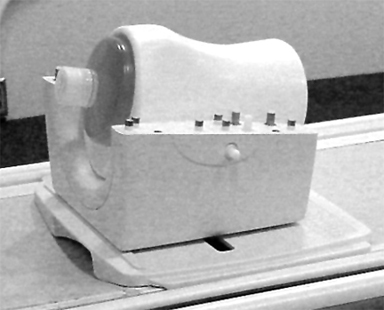
- Ensure that the phantom positioner is aligned with the posterior
coil section as indicated by the marks on the positioner.
Figure 2. Phantom Positioner Alignment Marks 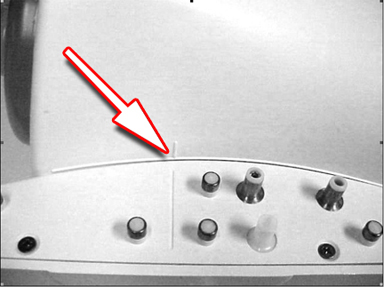
- Being careful to align the connector pins, place the anterior
coil section onto the posterior coil section and latch into place.
The scanner will not operate if the coil sections are not latched
correctly.
Figure 3. Anterior Coil Section in Place 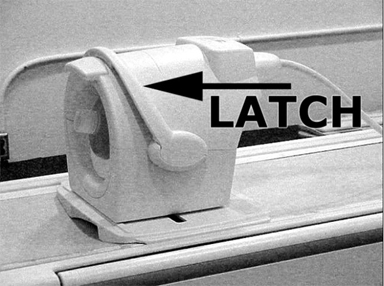
- Ensure that the coil is aligned and centered with respect to
the baseplate as indicated by the arrows on the baseplate offset scale.
Figure 4. Align and Center Coil 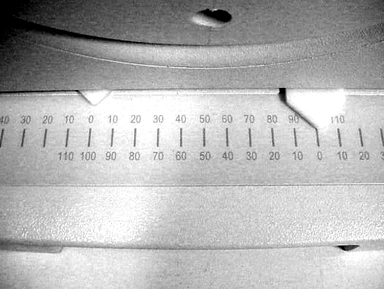
- Establish an axial landmark using the reference mark on top
of the coil. Advance to scan.
Figure 5. Establish Landmark 
Unified Phantom Setup
Procedure
- Place the lower section of the coil on the patient table.
Figure 6. Coil Placement 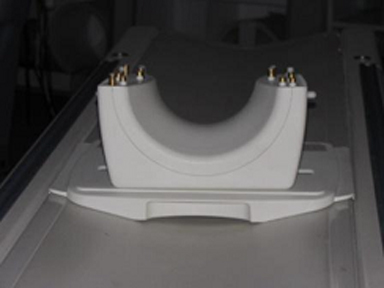
- Align the alignment mark on the coil to zero position on the
scale.
Figure 7. Alignment Marks 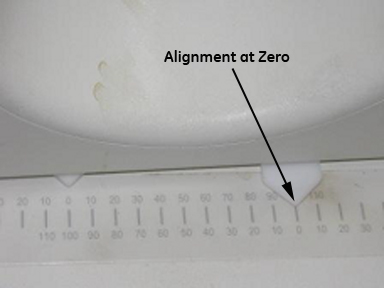
- Place the large cylindrical unified phantom into the positioner.
Figure 8. Phantom Placed into Positioner 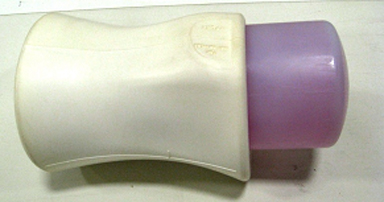
- Place this phantom positioner setup on the lower part of the
coil.
Figure 9. Phantom Positioner Placement 
- Ensure that the phantom positioner is aligned with the posterior
coil section as indicated by the marks on the positioner and the coil.
Figure 10. Positioner Aligned with Posterior Coil Section 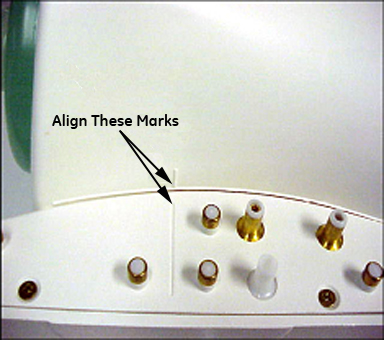
- Carefully align the connector pins on the lower part of the
coil with the upper part of the coil and latch both the coil sections
into place. The scanner will not operate if the coil sections are
not latched correctly.
Figure 11. Coil Sections in Place 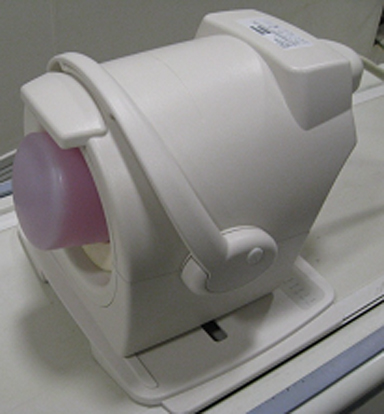
- Connect the coil to port A of the system LPCA. Landmark the
coil at the cross mark available near the handle of the coil. Advance
to scan.
Figure 12. Landmark Coil 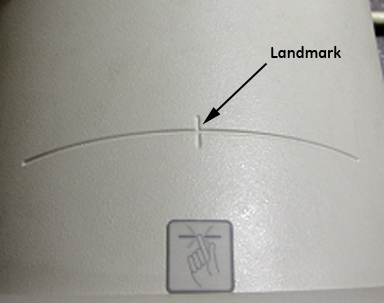
Finalization
Finalization
No finalization steps.