
- Discovery MR750 3.0T System Service Methods
- 5690009-2EN Revision 4
- 00000018WIA30A3DE20GYZ
- id_131069432.0
- Feb 22, 2021 1:47:14 AM
3.0T HD 8-Channel Torso Array Coil Setup for MCQA Test
Prerequisites
| Required persons | Preliminary requirements | Procedure | Finalization |
|---|---|---|---|
| 1 | Not Applicable | 15 minutes | Not Applicable |
| Item | Quantity | Effectivity | Part number | Manufacturer |
|---|---|---|---|---|
| 3T 8-Channel Torso Phantom | 1 | Legacy Phantom Set |
2381683-3 | - |
| Torso Phantom Positioner | 1 | Legacy and Unified Phantom Set |
2381683-4 | - |
| TL Unified Phantom, SiOil | 1 | Unified Phantom Set |
5343347-2 | - |
| Condition | Reference | Effectivity |
|---|---|---|
|
The coils are already preinstalled; however, the following coil configuration names are to be installed in the system to run this tool: 8US TORSOPA | - | - |
About this task
This procedure will setup for the automated MCQA test using the 3.0T HD 8-Channel Torso Coil by GE/USAI catalog M3335LN.
Note:
Coils do not ship with phantoms. Phantoms come in a unified phantom set with the MR system.
Legacy Phantom Setup
Procedure
- Note:Position the coil in the cradle, connect the cable as shown in Figure 1:
If installing the coil for the first time in a system, please refer to Auto Coil Install.
Figure 1. Connecting the Coil 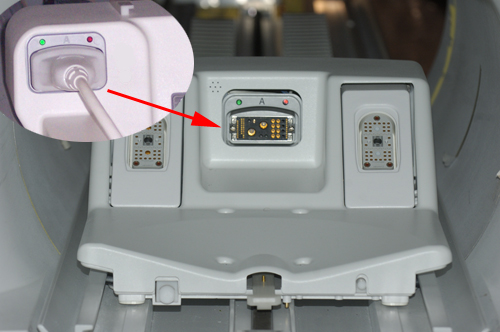
- Place phantoms and phantoms positioner in the coil as shown
in Figure 2:
Figure 2. Positioning Phantom and Positioner 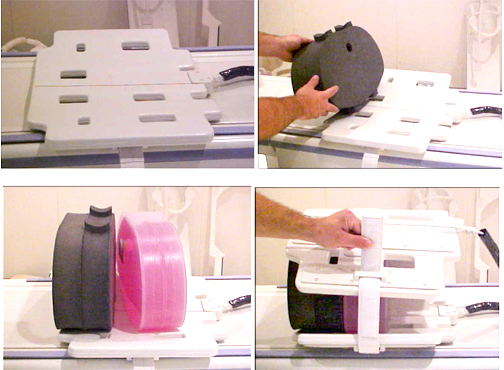
- Establish an axial landmark on the line on top of the coil.
Advance to scan. See Figure 3.
Figure 3. Landmarking Coil 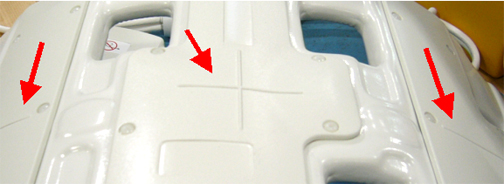
Unified Phantom Setup
Procedure
- Note:Place the posterior section of the coil on the table as shown in Figure 4.
Connect the coil to the system as shown in Step 1.
Figure 4. Placing the Posterior Section of the Coil 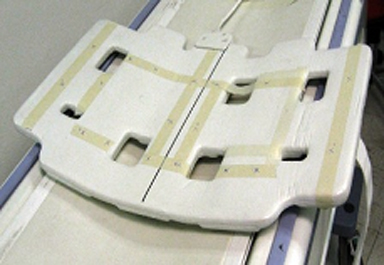
- Place the positioner (2381683-4) of Torso into gaps present
on the posterior section of the coil as shown in Figure 5.
Figure 5. Placing the Torso Positioner into Gaps 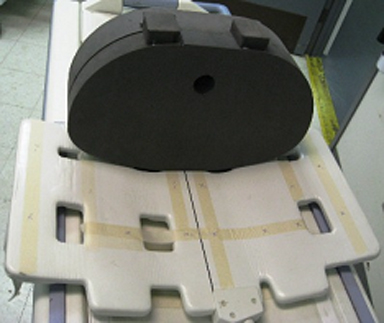
- Place the TL Unified phantom as shown in Figure 6.
Figure 6. Placing the TL Unified Phantom 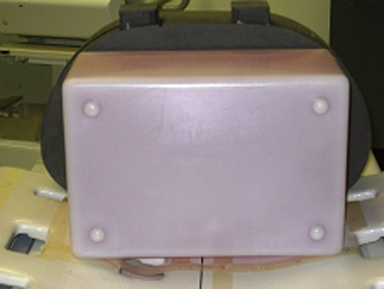
- Place the TL unified phantom such that the phantom is well centered
on both S/I and R/L directions as shown in Figure 7 and Figure 8.
Figure 7. Aligning Phantom in S/I 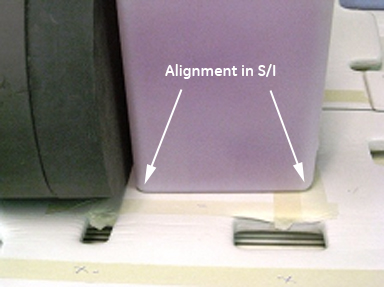
Figure 8. Aligning Phantom in R/L 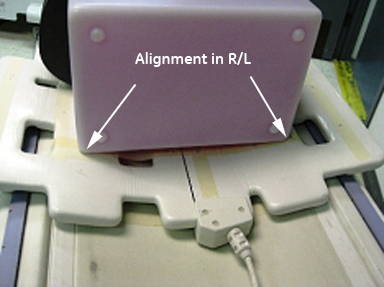
- Place the anterior section (Figure 9) in such a way
that the anterior of the coil is well set in to the positioner as
shown in Figure 10 and fasten the Velcro straps so that the coil firmly snugs the
phantom (Figure 11).
Figure 9. Anterior Section 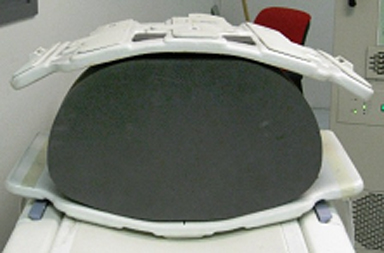
Figure 10. Placing Anterior Section into Positioner 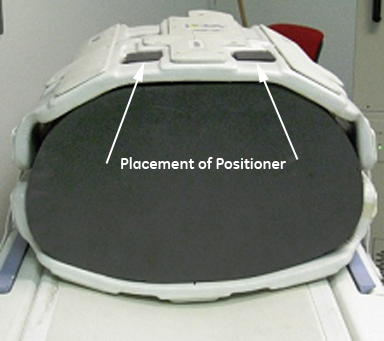
Figure 11. Secure Coil in Phantom 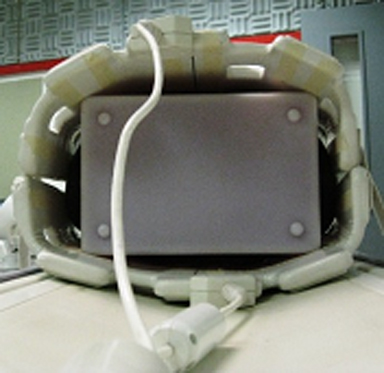
- Connect the coil to respective port of the system LPCA. Landmark
the coil on the cross mark as shown in Figure 12. Advance to
scan.
Figure 12. Landmarking the Coil 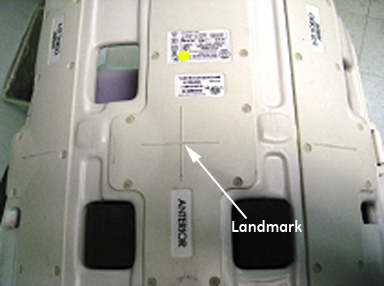
Finalization
Finalization
No finalization steps.