
- Discovery MR750 3.0T System Service Methods
- 5690009-2EN Revision 4
- 00000018WIA309CED20GYZ
- id_131057833.0
- Aug 29, 2019 1:56:19 AM
3.0T HD Cardiac Array Coil Setup for MCQA or SNR Test
Prerequisites
| Required persons | Preliminary requirements | Procedure | Finalization |
|---|---|---|---|
| 1 | - | 15 minutes | - |
| Item | Quantity | Effectivity | Part number | Manufacturer |
|---|---|---|---|---|
| Phantom | 1 | Legacy phantom set |
2381683-3 | - |
| Phantom Positioner | 1 | Legacy phantom set |
2412782 | - |
| Phantom Anterior Positioner | 1 | Legacy and unified phantom set |
2413102 | - |
| TL Unified Phantom (Si Oil) | 1 | Unified phantom set |
5343347-2 | - |
| Condition | Reference | Effectivity |
|---|---|---|
|
The following coil configuration name must be installed to run this tool: HD Cardiac. | - | - |
About this task
Follow this process to set up for the automated MCQA or SNR test using the 3.0T HD Cardiac Array by GE/USAI (M3334TS) .
Note:
Coils do not ship with phantoms. Phantoms come in a unified phantom set with the MR system.
Legacy Phantom Setup
Procedure
- Position the posterior coil component on the system table. Ensure
that the Velcro straps hang free on either side of the table.
Figure 1. Posterior Coil Component Placement 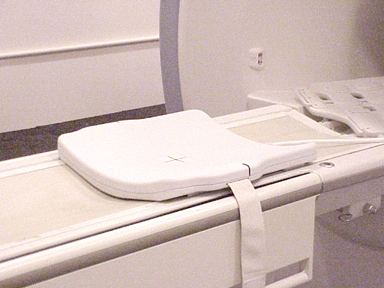
- Position the bottom phantom positioner on top of the posterior
coil component.
Figure 2. Bottom Phantom Positioner Placement 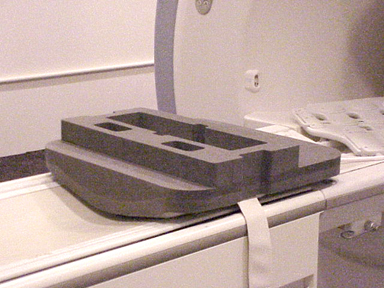
- Insert the phantom into the positioner.Note:
Low SNR could result if phantom is incorrectly placed.
Figure 3. Positioning Phantom 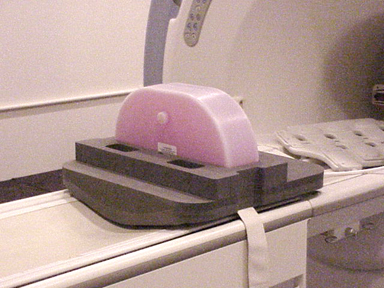
- Place the anterior phantom positioner as shown below.
Figure 4. Placement of Anterior Phantom Positioner 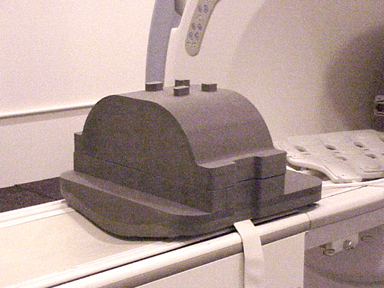
- Place the anterior portion of the coil over the phantom positioner.
Figure 5. Placement of Anterior Coil 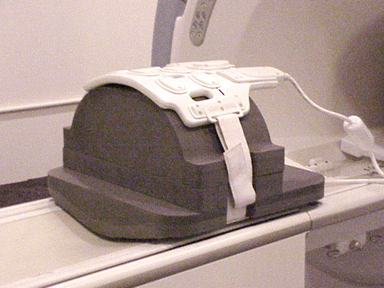
- Move the table toward the bore, and landmark in the center of
the anterior coil portion on the lines provided.
Figure 6. Landmarking Cardiac Coil 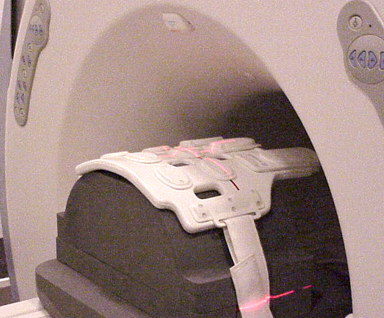
Unified Phantom Setup
Procedure
- Place the posterior section of the coil on the table.
Figure 7. Posterior Coil Component Placement 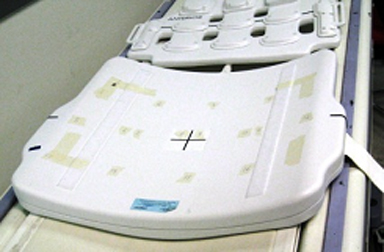
- Place the TL unified phantoms over the posterior section so
that the phantom is well centered in both the S/I and R/L directions.
Figure 8. Aligning TL Phantom in S/I Direction 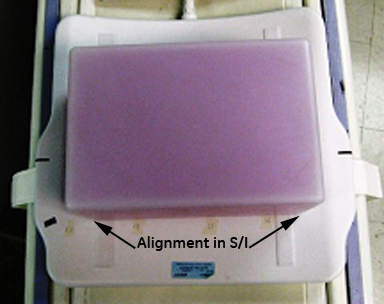
Figure 9. Aligning TL Phantom in R/L Direction 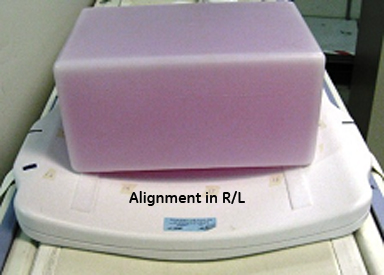
- Place the anterior section on the phantom set so that the coil
is well centered in both the S/I and R/L directions with respect to
the phantom. Fasten the Velcro straps so that the coil firmly snugs
the phantom.
Figure 10. Placement of Anterior Section 
- Landmark the coil at the cross mark, and press advance to scan.Note:
Make sure to align the markings to keep the posterior aligned with the anterior part of the coil.
Figure 11. Landmark Coil 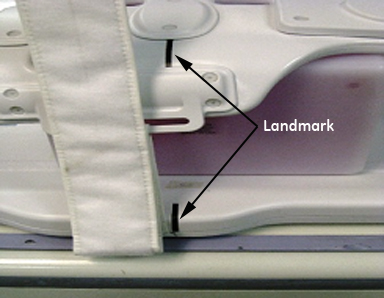
Finalization
Finalization
No finalization steps.