
- Discovery MR750 3.0T System Service Methods
- 5690009-2EN Revision 4
- 00000018WIA3018DE20GYZ
- id_131058652.0
- Feb 22, 2021 1:47:31 AM
3.0T 8-Channel Foot/Ankle Coil Setup for MCQA Test
Prerequisites
| Required persons | Preliminary requirements | Procedure | Finalization |
|---|---|---|---|
| 1 | Not Applicable | 15 minutes | Not Applicable |
| Item | Quantity | Effectivity | Part number | Manufacturer |
|---|---|---|---|---|
| Small, Cylindrical Unified Phantom | 1 | Unified phantom set |
5342680 | - |
| Cubical Unified Phantom | 1 | Unified phantom set |
5342681 | - |
| Item | Quantity | Effectivity | Part number | Manufacturer |
|---|---|---|---|---|
| See 3.0T HD 8-Channel Foot/Ankle Coil FRUs | - | - | - | - |
| ||||
| Condition | Reference | Effectivity |
|---|---|---|
|
This coil configuration name must be installed to run the SNR test tool: HD Foot Ankle. Install this coil configuration with Config File Manager. | - | - |
About this task
Note:
Coils do not ship with phantoms. Phantoms come in a unified phantom set with the MR system.
Legacy Phantom Setup
About this task
Follow this process to prepare for the automated SNR test using the 3.0T 8-Channel Foot/Ankle Coil by Invivo (M3340CB).
Procedure
- Place the baseplate of the coil on the table:
- Lock the baseplate to ensure that the coil position is in the
center.
Figure 1. Lock Baseplate 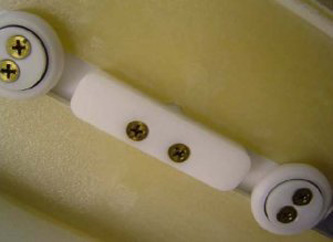
- Insert the phantom.
Figure 2. Insert Phantom 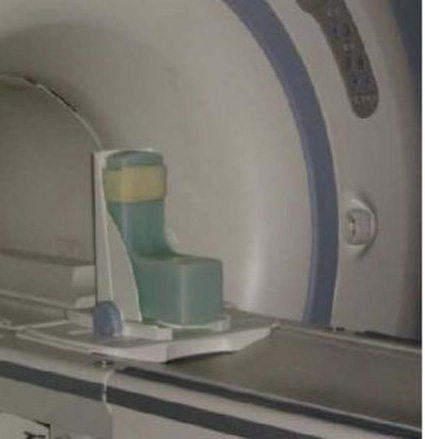
- Lock the baseplate to ensure that the coil position is in the
center.
- Place the coil on the baseplate, and connect the coil to the
Hypertronics connector, port A in the LPCA.
Figure 3. Hypertronics Connector 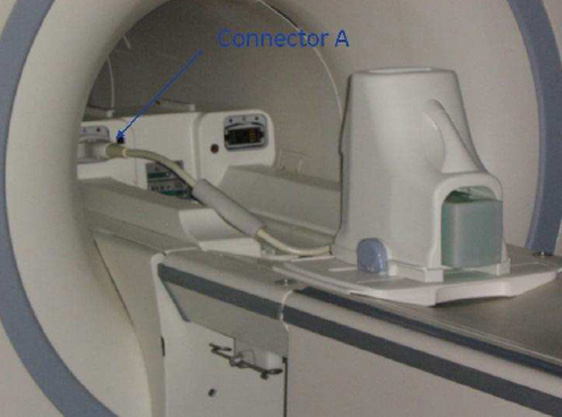
- Landmark on the top of the coil, and advance to scan.
Figure 4. Landmark Position 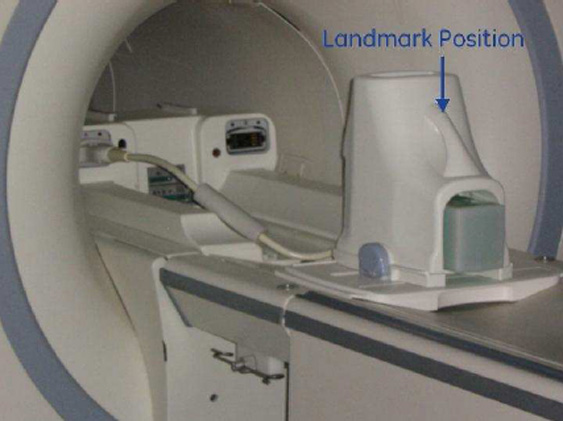
Unified Phantom Setup
About this task
Follow this process to prepare for the automated SNR test using the 3.0T HD 8-channel foot/ankle coil by Invivo (M3340CB).
Procedure
- Place the foot/ankle coil baseplate on the table.
Figure 5. Foot/Ankle Coil Baseplate on Table 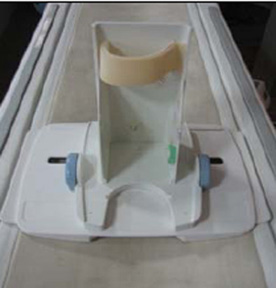
- Place the small cylindrical unified phantom horizontally on
the baseplate.
Figure 6. Cylindrical Unified Phantom on Baseplate 
- Place the cubical unified phantom vertically, and fix the phantom
to the baseplate using the Velcro.
Figure 7. Cubical Unified Phantom on Baseplate 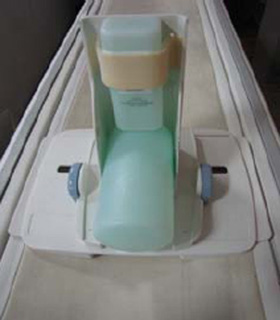
- Cover the baseplate with the coil.
Figure 8. Coil over Baseplate 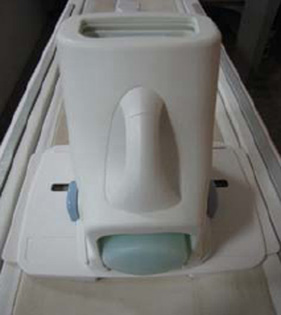
- Connect the foot/ankle coil to port A of the LPCA, and landmark
the coil at the crossmark on the coil handle.
Figure 9. Crossmark on Coil Handle 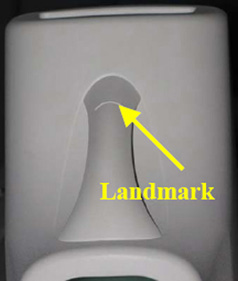
Finalization
Finalization
No finalization steps.