
- Discovery MR750 3.0T System Service Methods
- 5690009-2EN Revision 4
- 00000018WIA309FCE20GYZ
- id_131074542.0
- Feb 22, 2021 1:47:19 AM
3.0T 8-Channel Wrist Coil Setup for MCQA Test
Prerequisites
| Required persons | Preliminary requirements | Procedure | Finalization |
|---|---|---|---|
| 1 | Not Applicable | 15 minutes | Not Applicable |
| Item | Quantity | Effectivity | Part number | Manufacturer |
|---|---|---|---|---|
| 3.0T HD 8-Channel Wrist Array Legacy Phantom | 1 | Legacy phantom set |
5160986-5 | - |
| Cubical Unified Phantom | 1 | Unified phantom set |
5342681 | - |
| Wrist Array Baseplate with Baseplate Riser | 1 | - |
5160986-12 | - |
| Condition | Reference | Effectivity |
|---|---|---|
|
For Discovery MR750, the following coil configuration names must be installed to run this tool: GE_HDx Wrist. | - | - |
About this task
Follow this process to prepare for the MCQA test using the 3.0T 8-Channel Wrist Array by Invivo, catalog M3340CA.
-
(For curved table) 3.0T HD 8-Channel Wrist Array by Invivo, catalog number M3340CA
-
(For flat table) 3.0T HD 8-Channel Wrist Array by Invivo, catalog number M7000GW
Note:
Coils do not ship with phantoms. Phantoms come in a unified phantom set with the MR system.
Legacy Phantom Procedure
Procedure
- Note:Place the baseplate on the table.
If installing the coil for the first time on a system, refer to Auto Coil Installation.
Figure 1. Baseplate on Table 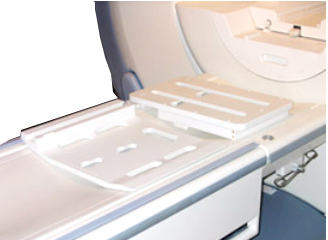
- Attach the baseplate riser to the baseplate. Align the knobs
and lock by pulling back.
Figure 2. Baseplate Riser on Baseplate 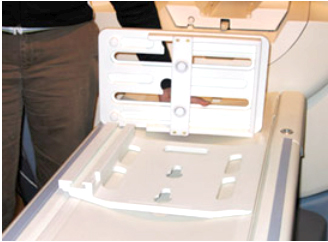
Figure 3. Baseplate and Riser in Locked Position 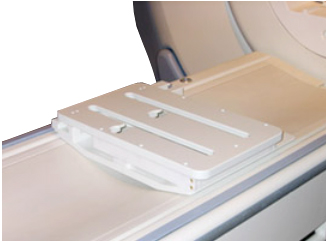
- Attach the 3.0T HD 8-channel wrist array to the cradle. Use
the knobs to align and lock the coil. Note the serial number of the
coil.
Figure 4. Placement of Coil on Baseplate Assembly 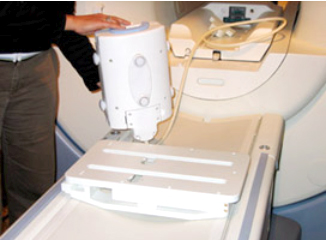
- Slide the locked coil to the center position and mechanically
locate and align it. Line it up to the baseplate alignment marker.
Figure 5. Locked Coil Alignment 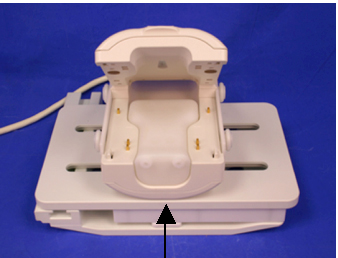
- Establish an axial landmark on the line on top of the coil.
Advance to scan.
Figure 6. Landmark Reference Marks 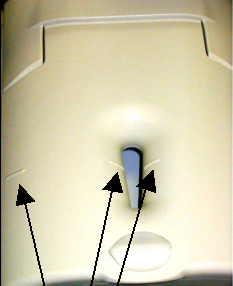
Unified Phantom Procedure
Procedure
- Place the baseplate of the wrist coil on the patient table.
Figure 7. Baseplate of Wrist Coil on Patient Table 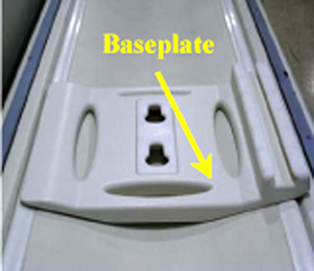
- Attach the base plate riser to the base plate.
Figure 8. Baseplate Riser Attached to Baseplate 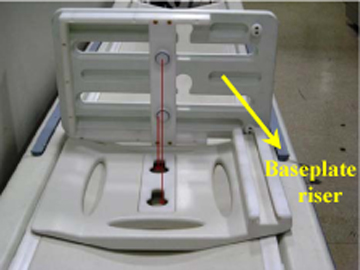
Figure 9. Baseplate and Riser in Locked Position 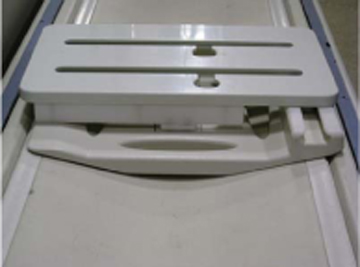
- Attach the 3.0T HD 8-channel wrist array to the baseplate assembly
using the knobs. Slide the locked coil to center and align properly.
Figure 10. Wrist Array Attached to Baseplate 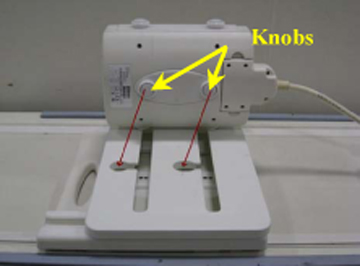
- Place the cubical unified phantom in the coil by lifting the
upper portion of the coil.
Figure 11. Cubical Unified Phantom Positioned in Coil 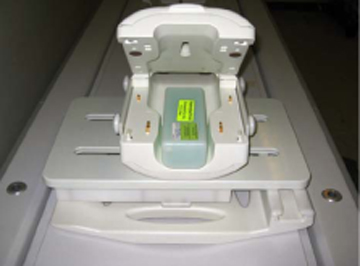
- Close the coil and lock it.
Figure 12. Coil Closed and Locked 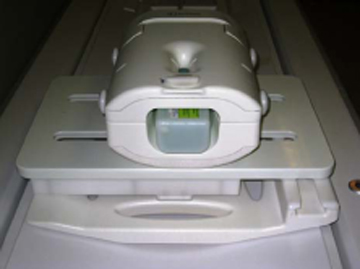
- Connect the coil to port A of the LPCA. Landmark the coil at
the marks and advance to scan.
Figure 13. Lock and Landmark the Coil 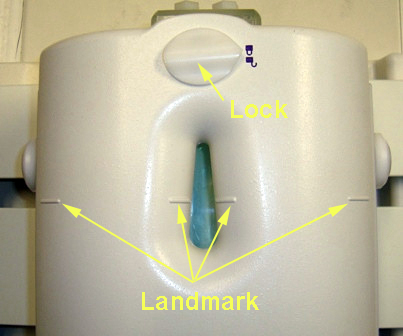
Finalization
Finalization
No finalization steps.