- id_2021359
- Version: 2.0
- Date: Jan 20, 2020 12:54:55 AM
Removing the hydraulic filter
Removes the hydraulic filter from the dockable patient table.
Prerequisites
|

Procedure
- Undock the patient table and remove it from the magnet room.
- Raise the patient table to the full up position.
- Lower the table lock safety bar.
- Lower the table to make sure all of its weight is resting on the lock safety bar.
Figure 1. Table lock safety bar
- Remove the lower base covers. See Patient Table Upper and Lower Base Cover Removal.
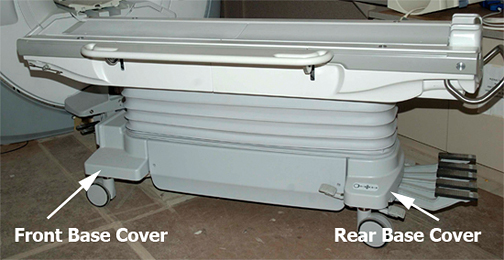
- Remove the front base cover.
Figure 2. Front base cover
- At the lower front of the table chassis, cut the tie-wraps securing the hydraulic line to the frame. If the Table Interface Panel (TIP) is present, remove the TIP screws (shown below) from both sides. This will allow sufficient backward movement of the board to loosen the screws on the front cable connectors with a small flat-blade screwdriver.
Figure 3. Lower right front table chassis
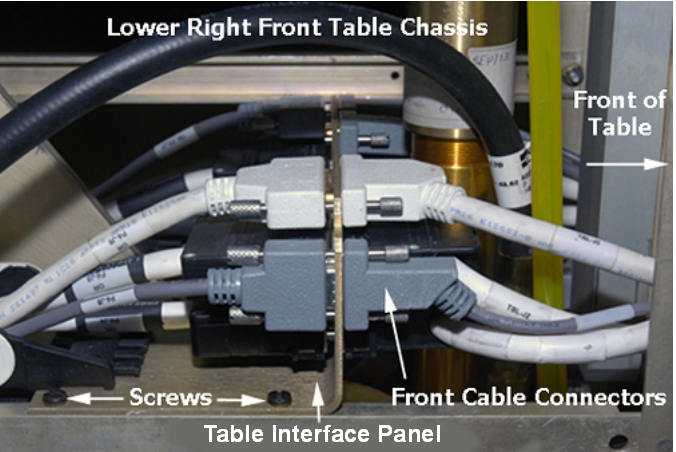
- If a TIP is present, disconnect all front and right-side cable connectors from the TIP. Record all cable designations and positions for proper reinstallation.
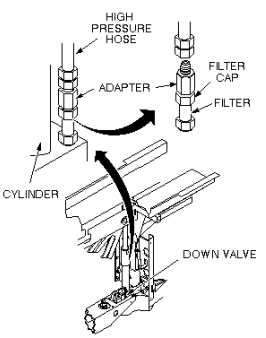
- Place absorbent towels under the reciprocating pump.
- Raise the patient table until the lock safety bar is out of the way (three to four pumps). This provides enough clearance to place a pair of 13/16 inch wrenches onto the high pressure hose fittings.
Figure 4. Hydraulic filter location
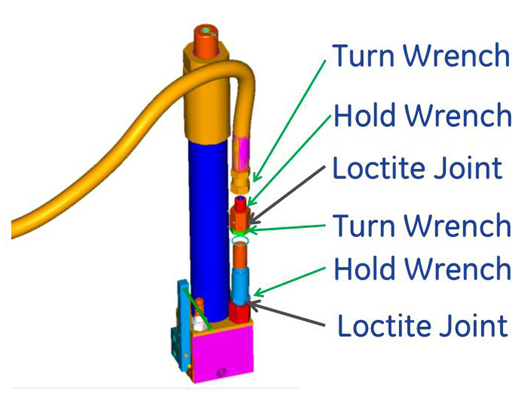
- Using two wrenches (one to hold the hose fitting), turn the second wrench just enough to loosen the hose fitting, but avoid allowing any oil to leak out.
Position the wrenches to avoid breaking the Loctite joints.
Figure 5. Positions for wrenches on hydraulic hose connectors
- Lower the table using the Down foot pedal until the table is supported by the lock safety bar.
- Remove the high-pressure hose from the adapter. A small amount of oil will spill out of the hose during removal; raise the hose as high as possible to limit oil spillage.
- Remove the filter cap from the filter using two 3/4 in. wrenches. See Figure 5 for positioning wrenches.
Figure 6. Removing filter element and gasket
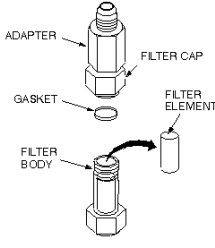
- Clean the dirty oil off the top of the filter.
- Remove the gasket and filter element from the filter body.