
- SIGNA™ Hero 3.0T Service Methods
- 5852800-8EN Revision 1.0
- 00000018WIA30BB1E40GYZ
- id_20196832.4
- Apr 23, 2020 8:52:04 PM
Installing the dockable table string encoder
Installs the string encoder into the dockable table.
Prerequisites
| Personnel requirements | |||
|---|---|---|---|
| Required persons | Preliminary requirements | Procedure | Finalization |
| 1 | - | 15 minutes | - |
| Tools and test equipment | |||
|---|---|---|---|
| Item | Quantity | Part number | Manufacturer |
| Nonmagnetic Titanium Service Tool Kit, Large Set | 1 | 5112581 | - |
Procedure
- Install the encoder assembly into the table.
Figure 1. String encoder 
1 String encoder 2 Screw - Route the encoder ring and string over the guide roller.
Figure 2. String encoder string routing 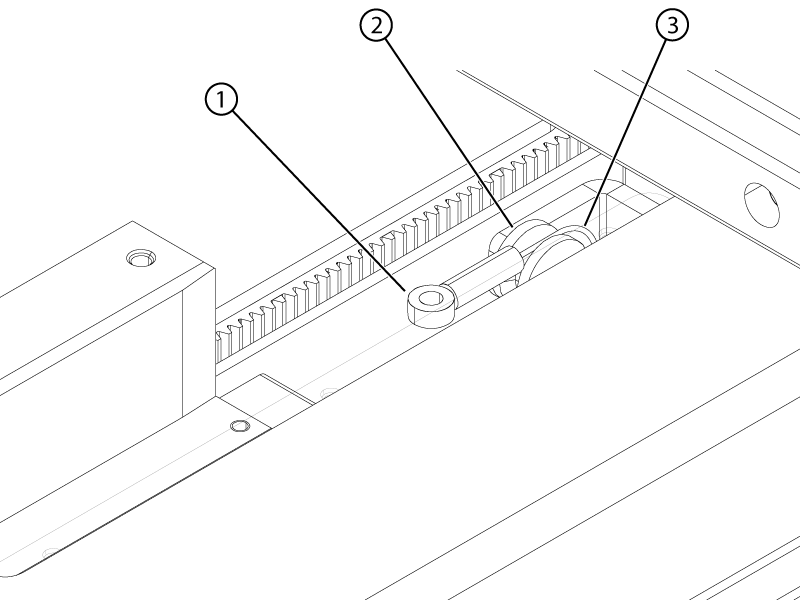
1 String encoder ring 2 Guide roller 3 String - Install the screw securing the encoder ring to the rigibelt mounting block.
Figure 3. String encoder ring 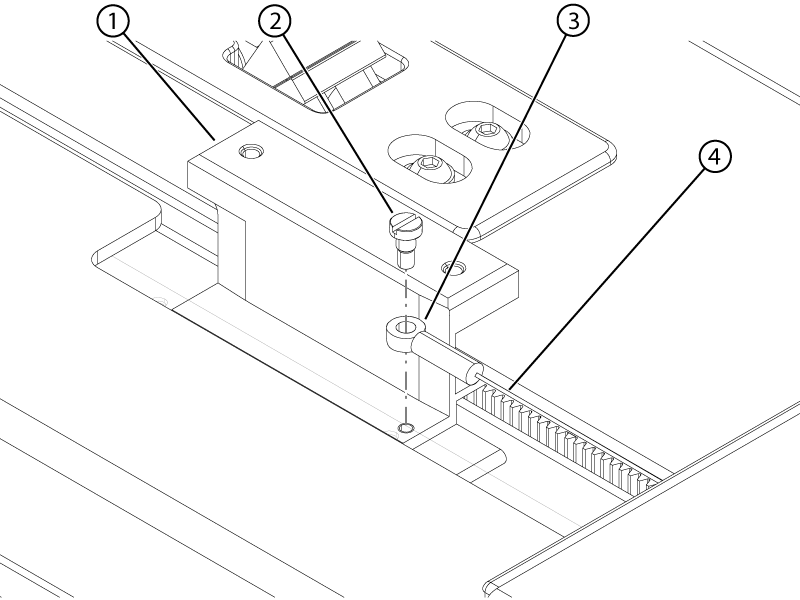
1 Rigibelt mounting block 2 Screw 3 String encoder ring 4 String - Install the encoder cover plate onto the tabletop.
Figure 4. String encoder cover plate 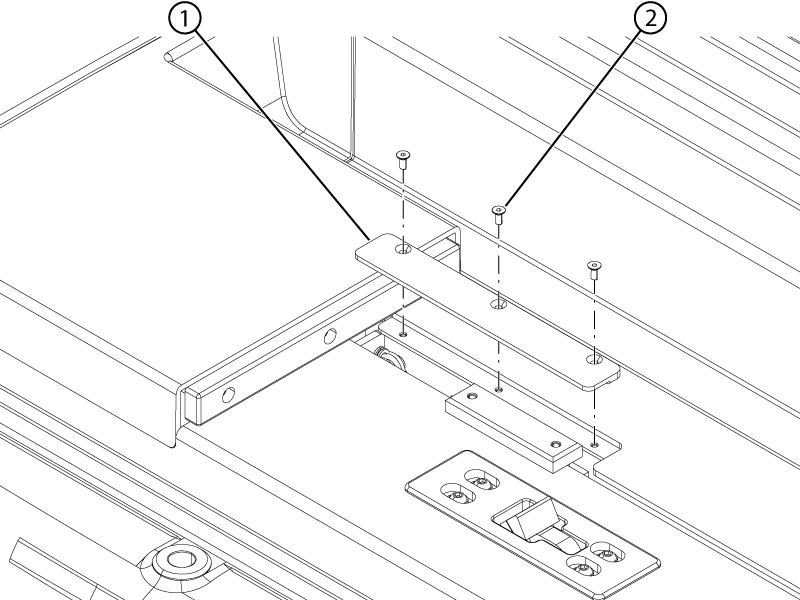
1 String encoder cover plate 2 Screw - Install the two washers and two screws securing the cradle to the tabletop.
Figure 5. Cradle hardware alignment 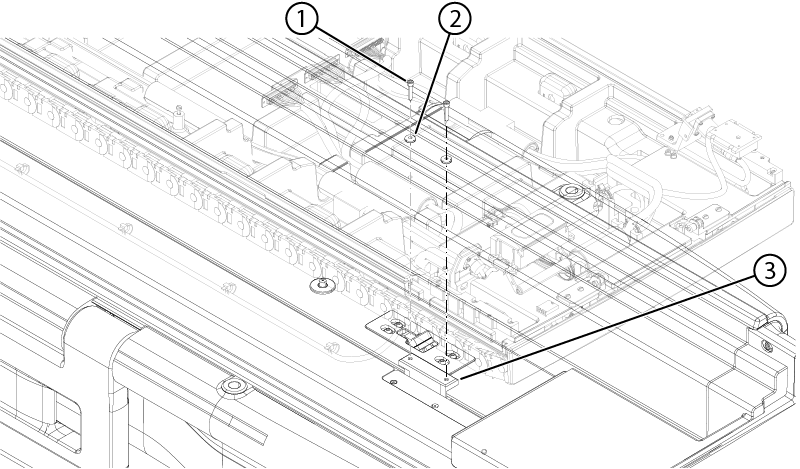
1 Screw 2 Washer 3 Rigibelt mounting block