
- SIGNA™ Hero 3.0T Service Methods
- 5852800-8EN Revision 1.0
- 00000018WIA30A36C40GYZ
- id_20194232.4
- Apr 23, 2020 8:51:55 PM
Installing the dockable table handle
Installs the handle onto the dockable table.
Prerequisites
| Personnel requirements | |||
|---|---|---|---|
| Required persons | Preliminary requirements | Procedure | Finalization |
| 1 | - | 10 minutes | - |
| Tools and test equipment | |||
|---|---|---|---|
| Item | Quantity | Part number | Manufacturer |
| Nonmagnetic Titanium Service Tool Kit, Small Set | 1 | 5113258 | - |
| Consumables | |||
|---|---|---|---|
| Item | Quantity | Part number | Manufacturer |
| Loctite #222 | As needed | 46-170683P1 | - |
| Loctite #243 | As needed | 5415261-3 | - |
| Required conditions |
|---|
| The tabletop rear cover is installed. |
Procedure
- Install the right-hand handle arm onto the table.
Figure 1. Handle right-hand arm 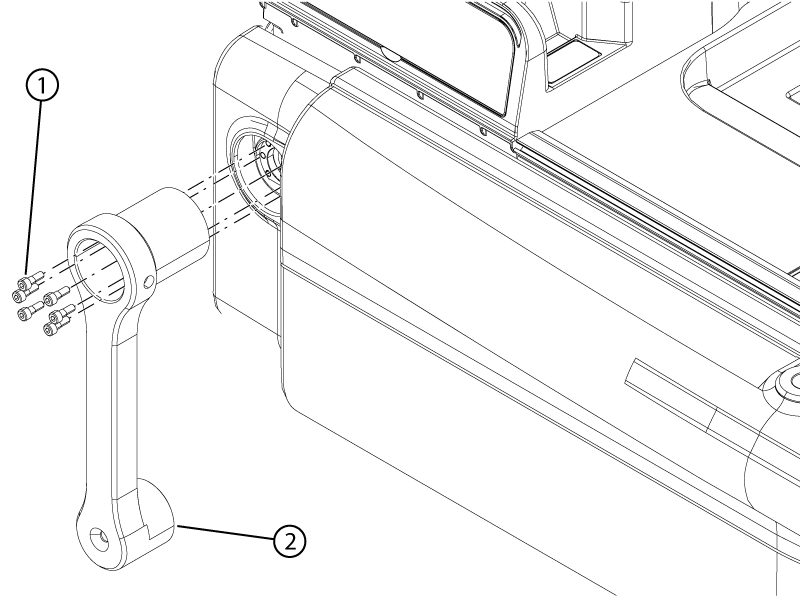
1 Shoulder screw 2 Right-hand handle arm - Install the handle button into the handle arm.
Figure 2. Handle button 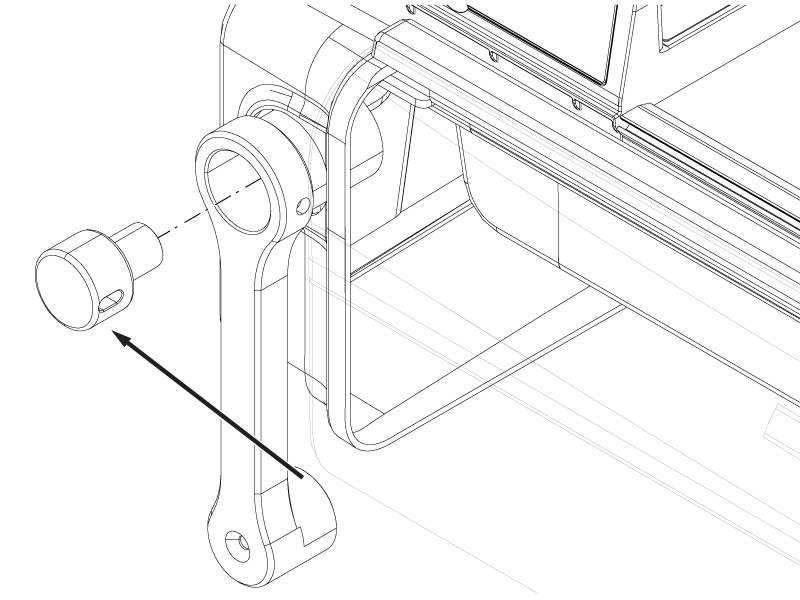
- Install the screw securing the handle button to the handle arm.
Figure 3. Handle button screw 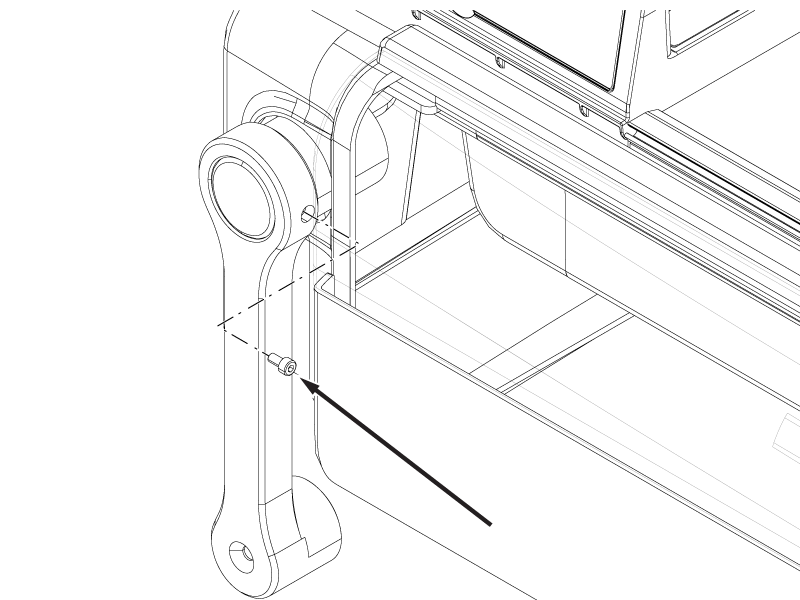
- Install the handle tube onto the right-hand handle arm.
Figure 4. Handle parts - enlarged to show detail 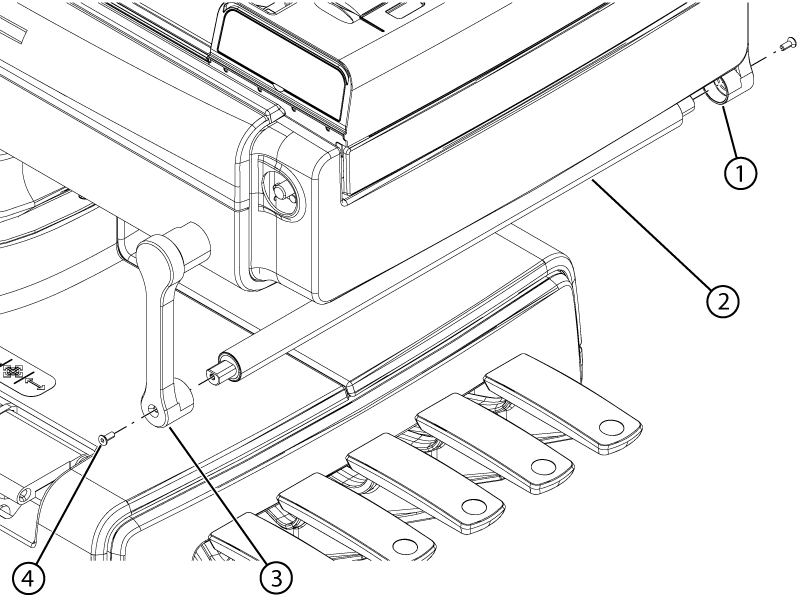
1 Right-hand handle arm 2 Handle tube 3 Left-hand handle arm 4 Handle screw