
- SIGNA MR355 / SIGNA MR360
- Service Manual
- 5856356-3EN Revision 5.0
- Basic Service Documentation. Copyright General Electric Company.
- 00000018WIA30D6D330GYZ
- id_168946031.3
- Jul 5, 2019 4:57:32 PM
LCD Monitor Replace with HP HC240
Prerequisites
| Required persons | Preliminary requirements | Procedure | Finalization |
|---|---|---|---|
| 1 | Not Applicable | 20 Minutes minutes | Not Applicable |
| Item | Quantity | Effectivity | Part number | Manufacturer |
|---|---|---|---|---|
| Brass Master Padlock with Brass Shackle | 2 | - |
46-194427P320 | - |
| Red LOTO personal lock wrap | 1 | - |
2393068 | - |
| Multi-locking device (if multiple service personnel are involved) | 1 | - |
46-194427P313 | - |
| Red Warning LOTO Tag | 1 | - |
46-194427P322 | - |
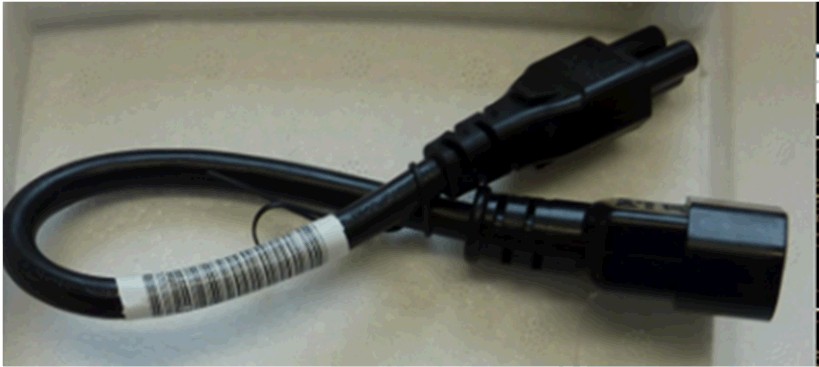
| IEC Power Cord Adapter | 1 | - |
5412946–2 | - |
| Item | Quantity | Effectivity | Part number | Manufacturer |
|---|---|---|---|---|
| NEC LCD Monitor P242W | 1 | - |
5430786-2 | - |
| Wide-Screen 24 Inch Color Monitor LCD 2490WUXI2 - Black | 1 | - |
5343103 | - |
| Wide-Screen 24 Inch Color Monitor LCD | 1 | - |
5245466 | - |
| NEC 24 Inch LCD Monitor P242W - Black | 1 | - |
5505968 | - |
| HP LCD Monitor HC240 | 1 | - |
8771241 | - |
| ||||
| Condition | Reference | Effectivity |
|---|---|---|
|
Powered off the whole system. refer to Lockout / Tagout for System Cabinet PDU Main Breaker | - | - |
Procedure
- Connect the DVI-D and power cables to the LCD monitor.Note:
For DVI cable and Power cable, reuse the one which was originally connected to the previous LCD monitor.
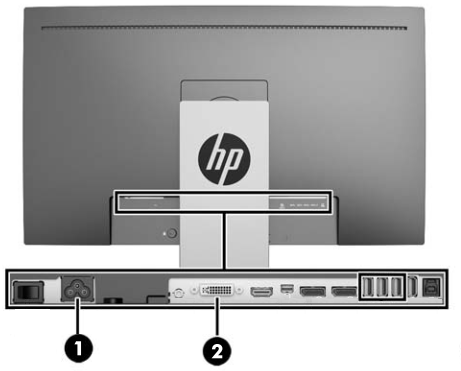
1 Power Connector 2 DVI-D If replace NEC monitor to HP HC240 monitor, will need the supplied adapter to mate the HP monitor to the existing IEC power cord.
- Select LCD Monitor as the display type.
Figure 1. System Configuration Panel — Example 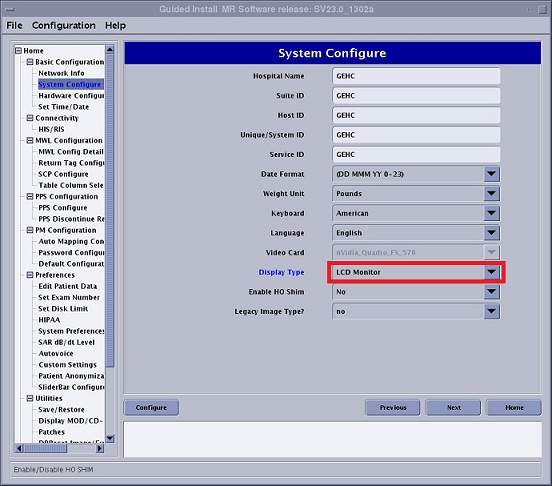
What to do next
Finalization
Monitor Celebrating refer to HP HC240 Monitor Calibration