- SIGNA™ Hero 3.0T Service Methods
- 5852800-8EN Revision 1.0
- 00000018WIA30122E40GYZ
- id_20197421.13
- Apr 23, 2020 8:52:10 PM
Removing the dockable table rigibelt drive (actuator)
Removes the rigibelt drive from the dockable table.
Prerequisites
| Personnel requirements | |||
|---|---|---|---|
| Required persons | Preliminary requirements | Procedure | Finalization |
| 1 | - | 20 minutes | - |
| Tools and test equipment | |||
|---|---|---|---|
| Item | Quantity | Part number | Manufacturer |
| Nonmagnetic Titanium Service Tool Kit, Small Set | 1 | 5113258 | - |
| Pair: Cut-Resistant Gloves | 1 | - | - |
| Required conditions |
|---|
| The tabletop rear cover is removed. |
| The left- and right-hand table side covers are removed. |
About this task
| CAUTION | |
|---|---|
Procedure
- Loosen the two screws securing the rigibelt drive coupler.Note: Push the Dock pedal if required to release and move the cradle to access the screws.
Figure 1. Rigibelt drive coupler screws 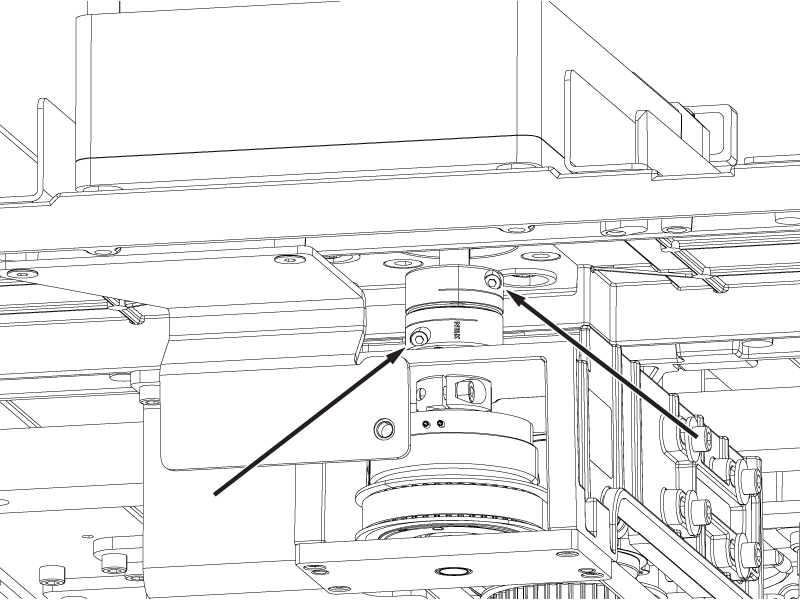
- Push the coupler up off of the electromagnetic clutch shaft.Note: Make sure the clutch shaft key remains installed in the clutch shaft.
Figure 2. Rigibelt drive coupler lift 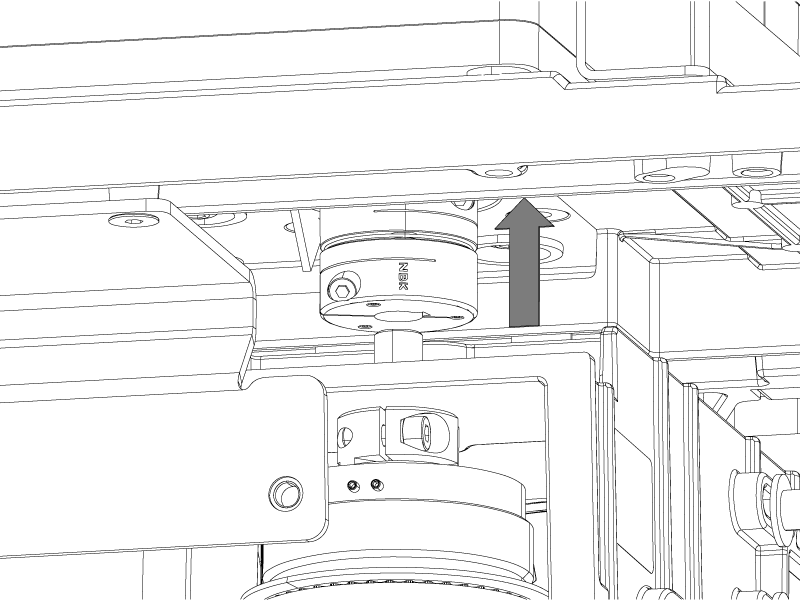
- Move the cradle off the tabletop surface until the two screws securing the rigibelt to the rigibelt mounting block are accessible in the cutout in the bottom of the tabletop.
Figure 3. Rigibelt mounting screws 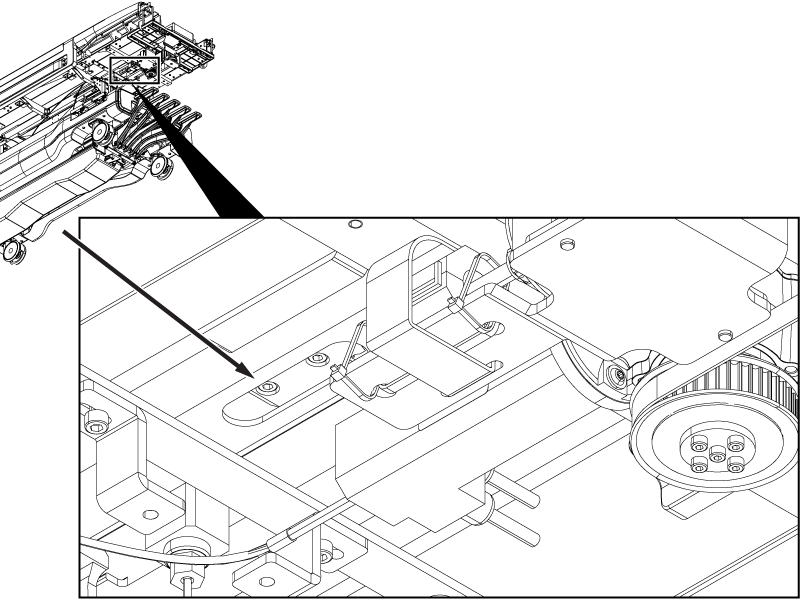
- Remove the two screws securing the rigibelt drive to the tabletop.
Figure 4. Rigibelt drive screws 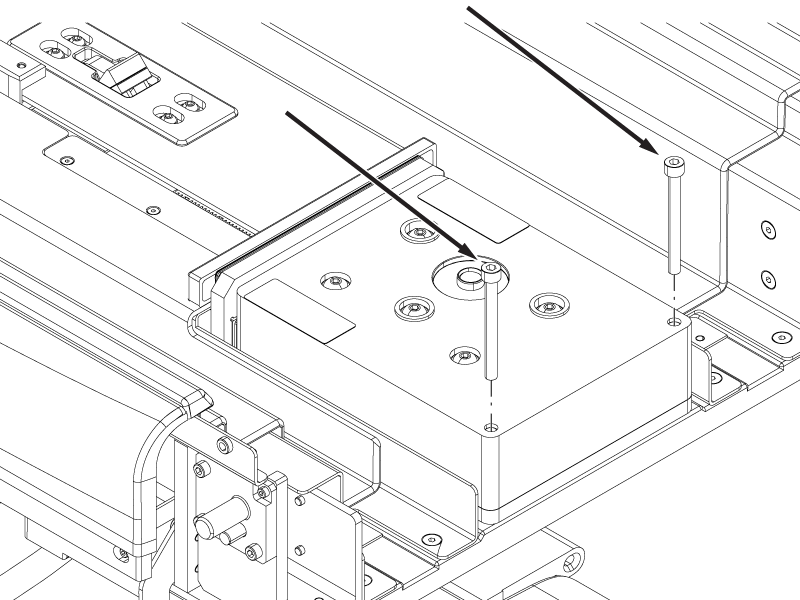
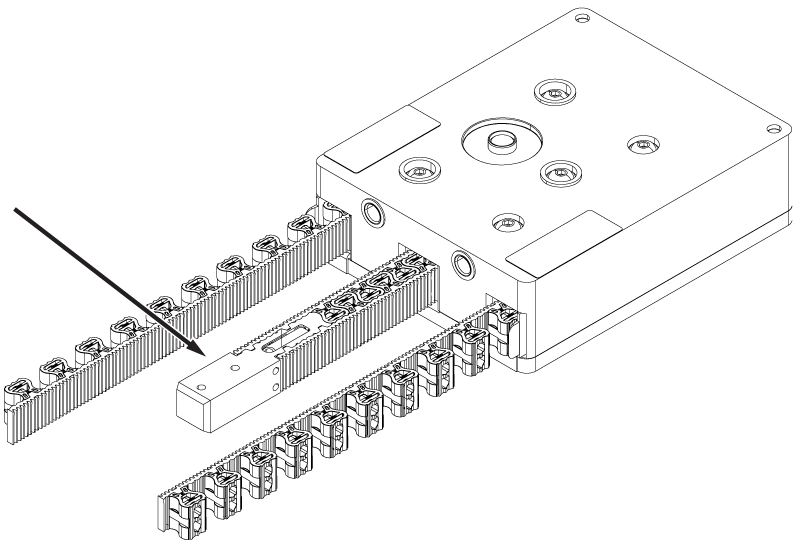
- Tilt the rear end of the rigibelt drive slightly, and move the rigibelt and coupler together towards the handle-end of the table until the coupler is past the motor.
Figure 5. Rigibelt coupler access 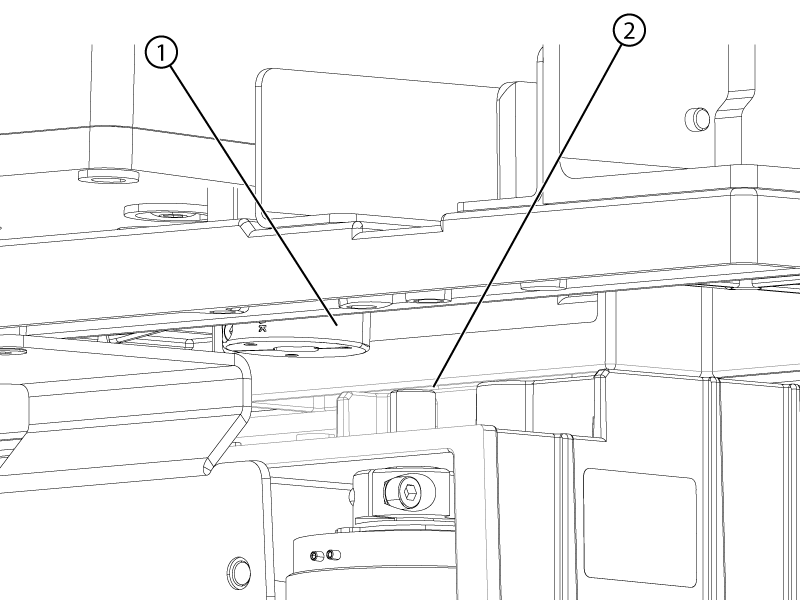
1 Rigibelt coupler 2 Motor shaft - Tilt the rear end of the rigibelt drive until the drive shaft is above the rear bar of the tabletop.
Figure 6. Rigibelt drive shaft 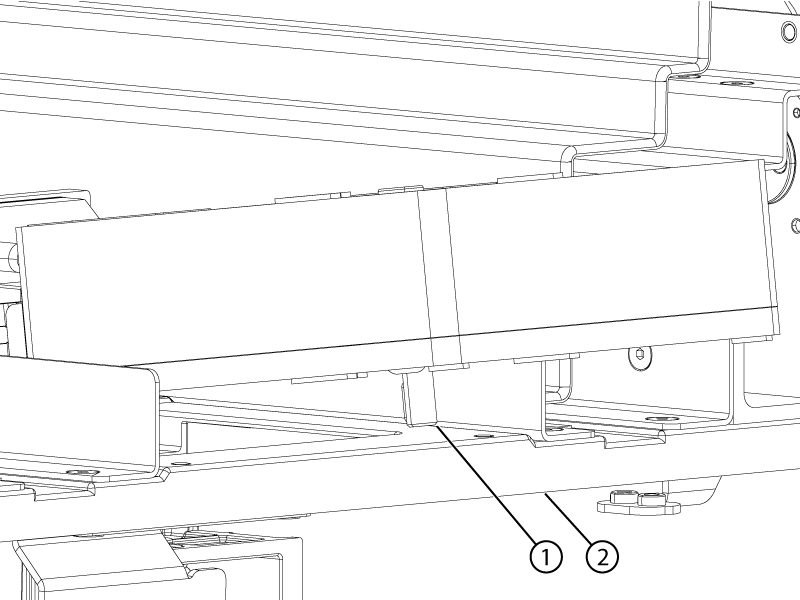
1 Rigibelt drive shaft 2 Table rear bar - Make sure the position of the middle rigibelt is not changed after the rigibelt drive is removed from the table. The new rigibelt drive will be easier to connect to the rigibelt mounting block if the middle belt is not changed.
Figure 7. Middle rigibelt