
- SIGNA™ Hero 3.0T Service Methods
- 5852800-8EN Revision 1.0
- 00000018WIA3016C230GYZ
- id_156669111.10
- Jul 13, 2021 4:27:36 PM
Main Breaker Replacement
Prerequisites
| Required persons | Preliminary requirements | Procedure | Finalization |
|---|---|---|---|
| 1 | Not Applicable | 60 minutes | Not Applicable |
| Item | Quantity | Effectivity | Part number | Manufacturer |
|---|---|---|---|---|
| Standard Tool | 1 | - | - | - |
| Item | Quantity | Effectivity | Part number | Manufacturer |
|---|---|---|---|---|
| Main Breaker | 1 | - |
Refer to FRU Manual | - |
| ||||
| Condition | Reference | Effectivity |
|---|---|---|
|
PDU and Service Disconnect Panel (or Main Disconnect Panel) must be turned OFF. Refer to Lockout / Tagout for MDP(Main Disconnect Panel) or Facility PDU. | - | - |
Procedure
- Remove 6 screws and remove PDU front Panel.
Figure 1. PDU Front Panel 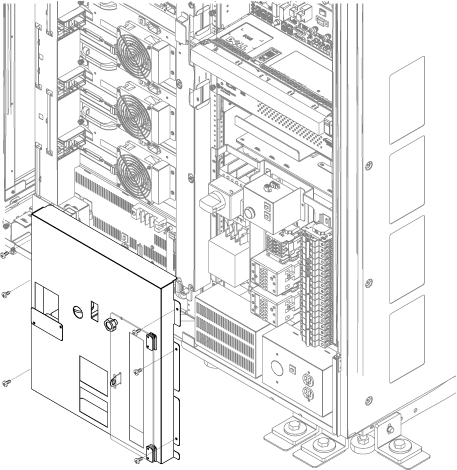
- Disconnect 2-pin connector. 2pin connector is located behind the Main Breaker.
Figure 2. 2-pin connector 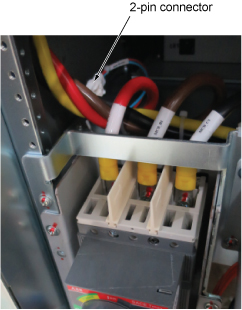
- Perform the following steps.
- Remove three screws from the main Breaker top terminal and remove cables. Use 5mm hex wrench.
- Remove three screws from the top of EMI Filter and remove the bus bar.
Figure 3. Remove screws 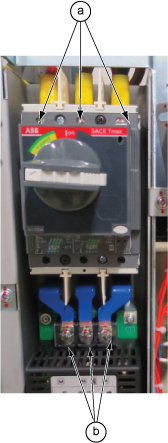
Remove 2 silver screws and remove main breaker.Notice  Note: Do not remove black screws.
Figure 4. Remove main breaker 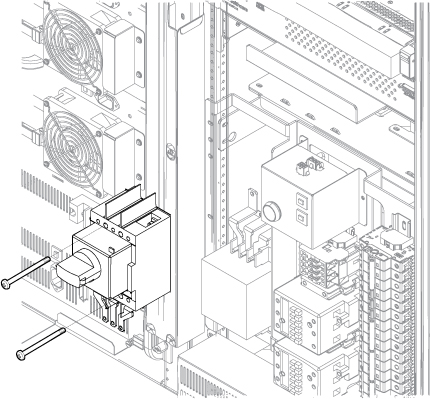
- Replace the busbar and Insulator sheet (Black color). Use 5mm hex wrench for busbar removal.
Figure 5. Busbar and Insulator sheet (Black color) 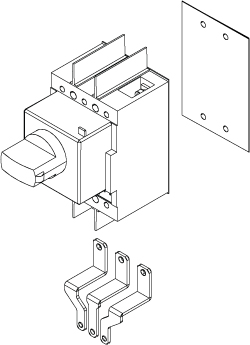
- Compare with the defective Main Breaker and set the overload and short circuit trip dip SW to the correct value corresponding to the input voltage.
Figure 6. DIP SW 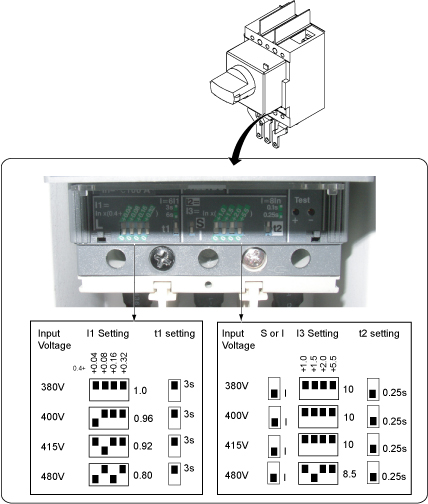
Restore it by the reverse order of the removal.Notice
Finalization
- Restore the Power. Refer to Removing LOTO - MDP.
- Perform check scan.