Move the primary latch assembly into place on the dockable table and connect the adjustment cable.
Prerequisites
| Personnel requirements |
|---|
| Required persons | Preliminary requirements | Procedure | Finalization |
|---|
| 1 | - | 5 minutes | - |
| Tools and test equipment |
|---|
| Item | Quantity | Part number | Manufacturer |
|---|
| Nonmagnetic Titanium Service Tool Kit, Small Set | 1 | 5113258 | - |
| Consumables |
|---|
| Item | Quantity | Part number | Manufacturer |
|---|
| Loctite #243 | As required | 5415261-3 | - |
Procedure
- Thread the adjustment cable through the primary latch opening and position the primary latch housing in the opening.
Figure 1. Primary latch housing
| 1 | Latch pin |
| 2 | Primary latch housing |
- Apply Loctite #243 to the four screws.
- Secure the primary latch housing with four screws on the underside.
- Route the adjustment cable through the center of the frame to the pivot block.
- Thread the adjustment cable through the fine adjustment screw in the pivot block.
Figure 2. Adjustment cable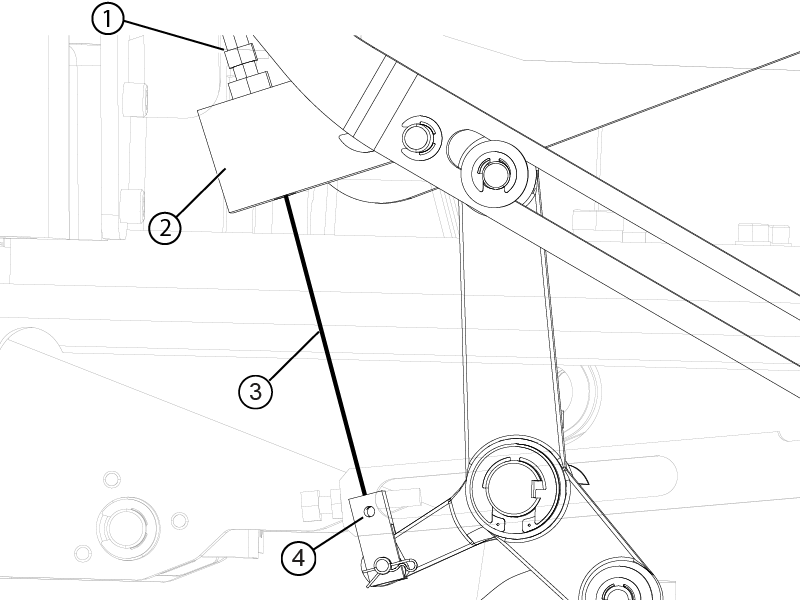
| 1 | Fine adjustment screw |
| 2 | Pivot block |
| 3 | Adjustment cable |
| 4 | Coarse adjustment block setscrew |
- Thread the adjustment cable into the coarse adjustment block.
- Pull the adjustment cable taut and tighten the coarse adjustment setscrew to secure the adjustment cable.
- Wrap any excess cable around the coarse adjustment block.
