
- SIGNA™ Hero 3.0T Service Methods
- 5852800-8EN Revision 1.0
- 00000018WIA30F35E40GYZ
- id_20199522.6
- Apr 23, 2020 8:52:20 PM
Installing the dockable table right-hand bore-end side bumper
Installs the bore-end bumper onto the right-hand side of the dockable table.
Prerequisites
| Personnel requirements | |||
|---|---|---|---|
| Required persons | Preliminary requirements | Procedure | Finalization |
| 1 | - | 15 minutes | - |
| Tools and test equipment | |||
|---|---|---|---|
| Item | Quantity | Part number | Manufacturer |
| Nonmagnetic Titanium Service Tool Kit, Large Set | 1 | 5112581 | - |
Procedure
- Install the five nuts and five washers securing the bumper to the tabletop.
Figure 1. Bumper nuts 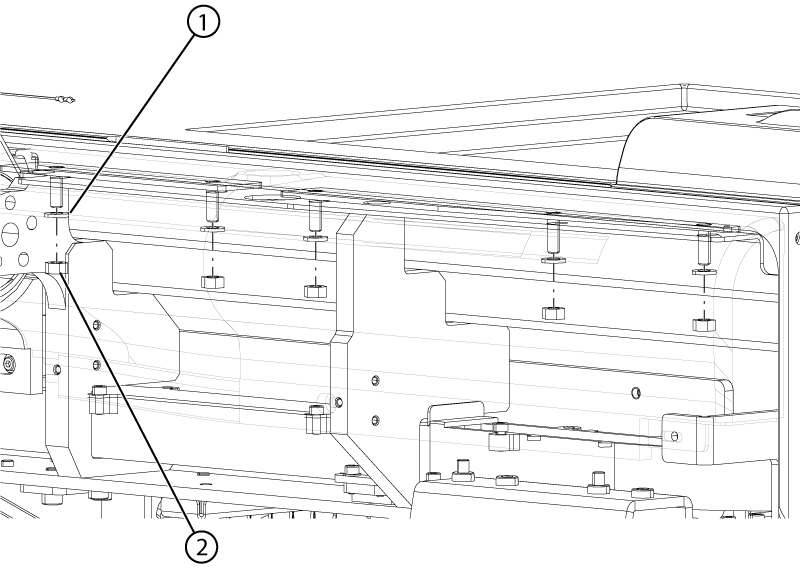
1 Washer 2 Nut - Install the IV bushing into the bumper.
Figure 2. IV bushing 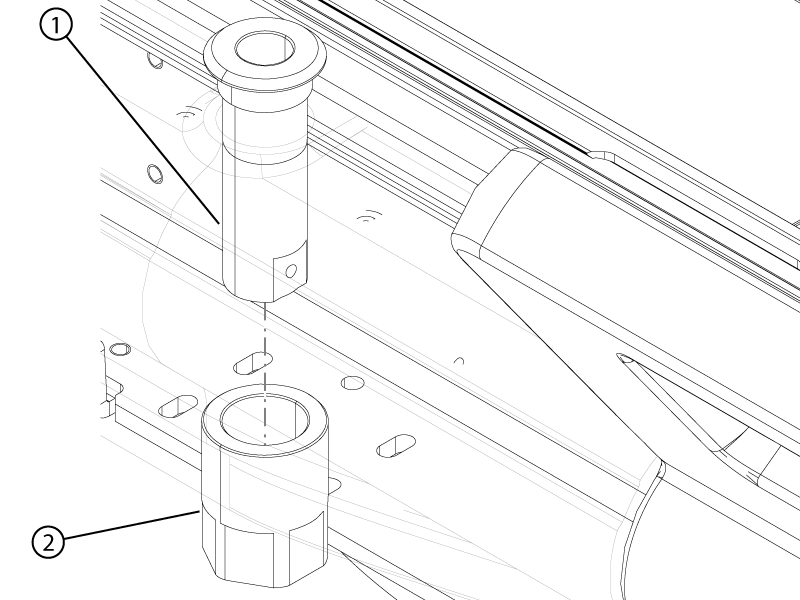
1 Bushing 2 Jam nut - Insert a flat-head screw driver into the slot of the IV bushing and tighten the jam nut.
Figure 3. IV bushing slot 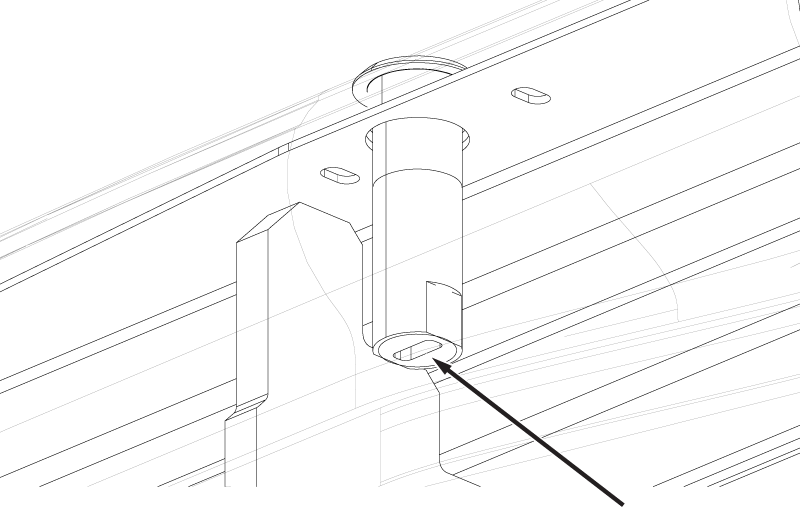
- If the L-bracket was removed, install the L-bracket and the two screws securing the bracket to the tabletop.
Figure 4. Bumper L-bracket 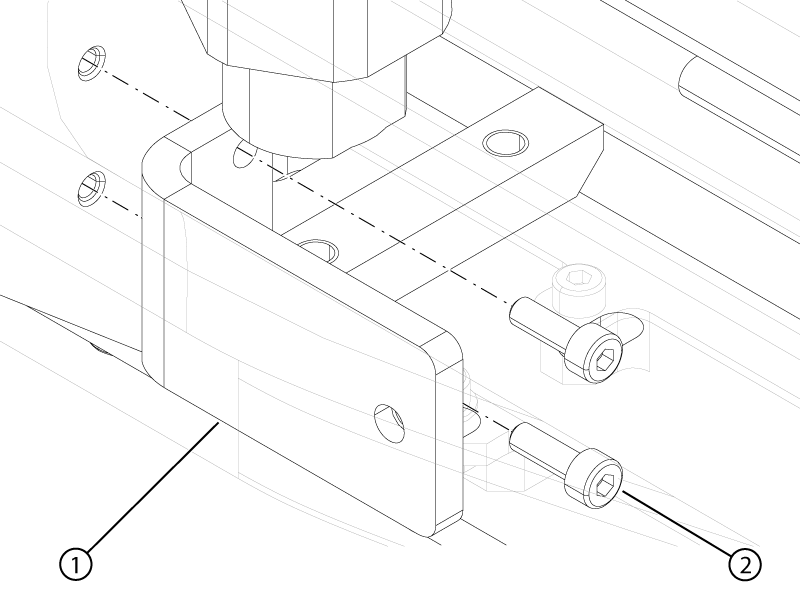
1 L-bracket 2 Screw - Install the two screws securing the side bumper to the table.
Figure 5. Bumper screws 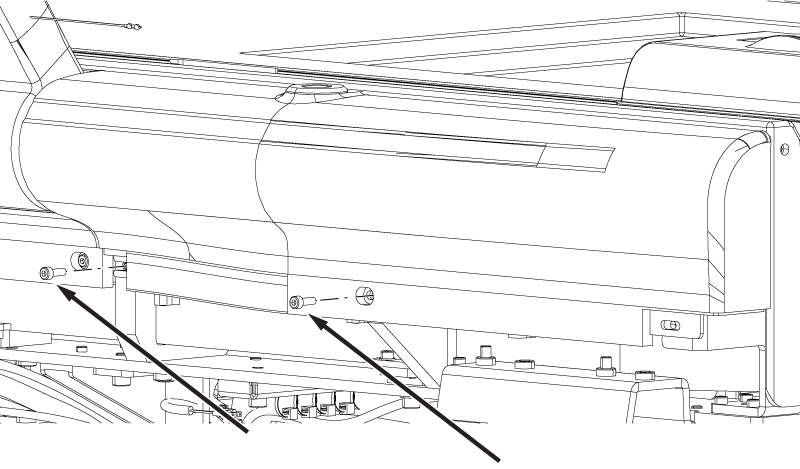
- Install the front lower bumper onto the table.
Figure 6. Front lower bumper screw 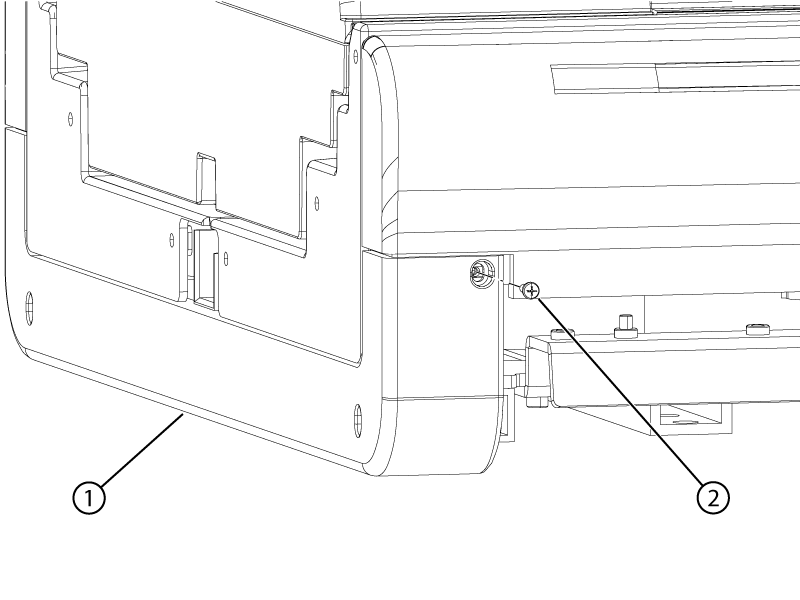
1 Front lower bumper 2 Screw