
- Discovery MR750w and SIGNA™ Architect T 3.0T System Service Methods
- 5690002-2EN Revision 4
- 00000018WIA30DCCE20GYZ
- id_131058682.0
- Feb 22, 2021 1:46:52 AM
3.0T HD 3-Channel Shoulder Coil Setup for MCQA Test
Prerequisites
| Required persons | Preliminary requirements | Procedure | Finalization |
|---|---|---|---|
| 1 | Not Applicable | 15 minutes | Not Applicable |
| Item | Quantity | Effectivity | Part number | Manufacturer |
|---|---|---|---|---|
| Phantom Positioner | 1 | - |
2375136-3 | - |
| 3.0T Head TLT Sphere (pink) | 1 | - |
2359877 | - |
| Curved Adapter Panel for Flat Table (GEM) | 1 | Flat table |
5395828 | - |
| Condition | Reference | Effectivity |
|---|---|---|
|
The coil configuration name HD Shoulder must be installed to run this tool. | - | - |
About this task
Follow this process to prepare for the automated SNR test using the 3.0T HD 3-Channel Shoulder Coil by GE/USAI, catalog M3335LR.
This procedure can be performed using either a flat table or a curved table.
Note:
If installing the coil for the first time on a system, refer to Auto Coil Installation.
Procedure
-
(For flat table) Insert the curved adapter panel
into the magnet end of the table.
Figure 1. Placement of Curved Adapter Panel on Flat Table 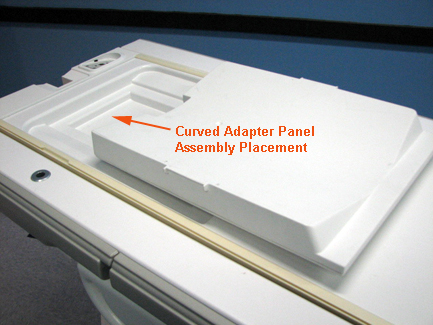
-
(For flat table) Place the phantom positioner
on the table and connect the coil cable.
Figure 2. Phantom Positioner, Coil, and Cable Connection on Flat Table 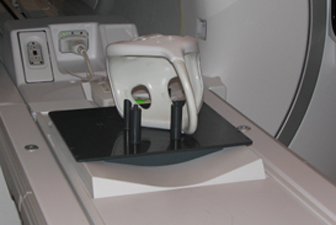
-
(For curved table) Place the phantom positioner
on the table.
Figure 3. Placement of Phantom Positioner on Curved Table 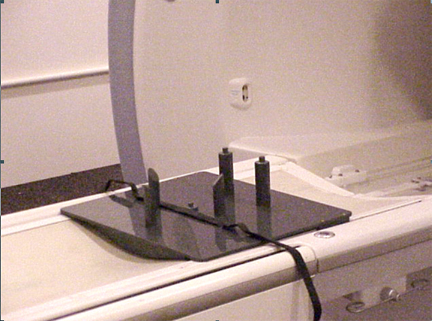
- Insert the phantom into the coil, then guide the coil onto the
phantom positioner pins (the holes in the coil frame will accept the
positioner pins). Confirm the coil cable is connected to the system.
Figure 4. Phantom in Coil on Positioner 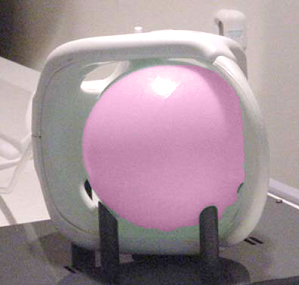
- Landmark on the coil crosshairs.
Figure 5. Landmarking on Coil 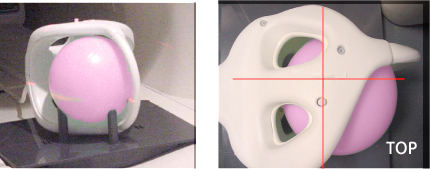
Finalization
No finalization steps.