
- Discovery MR750w and SIGNA™ Architect T 3.0T System Service Methods
- 5690002-2EN Revision 4
- 00000018WIA3037CE20GYZ
- id_131058617.0
- Feb 22, 2021 1:40:21 AM
3.0T 8-channel high res brain array setup for MCQA test
Prerequisites
| Required persons | Preliminary requirements | Procedure | Finalization |
|---|---|---|---|
| 1 | Not Applicable | 15 minutes | Not Applicable |
| Item | Quantity | Effectivity | Part number | Manufacturer |
|---|---|---|---|---|
| 18 cm Spherical TLT Phantom with Silicon Oil | 1 | - |
2359877 |
GE |
| Phantom Positioner | 1 | - |
2317112-3 |
Invivo |
| Curved Adapter Panel for Flat Table (GEM) | 1 | Flat table |
5395828 |
Sumi Motherson |
| Condition | Reference | Effectivity |
|---|---|---|
|
No required conditions for this procedure. | - | - |
Note:
If installing the coil for the first time on a system, see Auto Coil Installation.
Procedure
-
(For flat table) Insert the curved adapter panel in the magnet end of the table.
Figure 1. Placement of Curved Adapter Panel Assembly on Flat Table 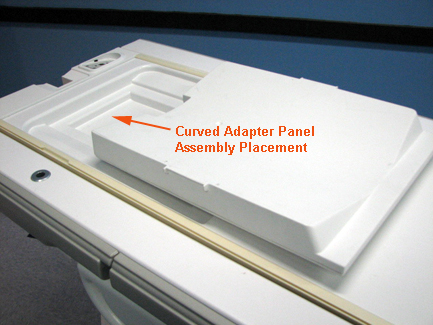
- Slide the coil back to allow access to the head holder.
Figure 2. Coil Slid Back to Access Head Holder on Flat Table 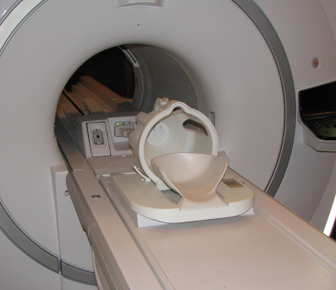
Figure 3. Coil Slid Back to Access Head Holder on Curved Table 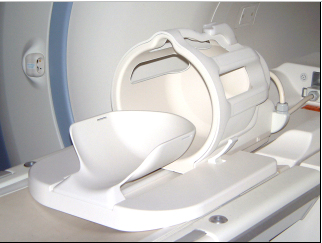
- Place the phantom ring on the head holder. (The edge of the
ring that goes toward the magnet has edges that overhang the head
holder to secure the ring in position.)
Figure 4. Phantom Ring Placed on Head Holder 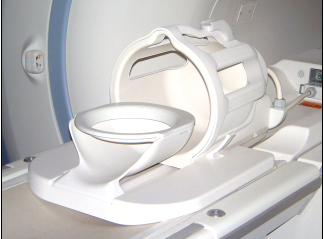
- Place the head TLT sphere on the phantom ring.
Figure 5. Head TLT Sphere Placed on Phantom Ring on Flat Table 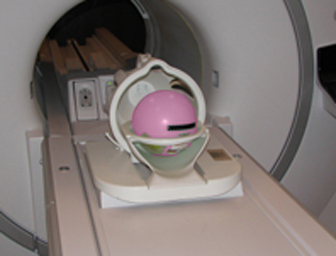
Figure 6. Head TLT Sphere Placed on Phantom Ring on Curved Table 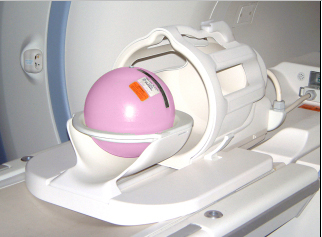
- Slide the coil all the way forward (away from the magnet) on
the baseplate, and set the locks.
Figure 7. Sphere Aligned with Coil on Flat Table 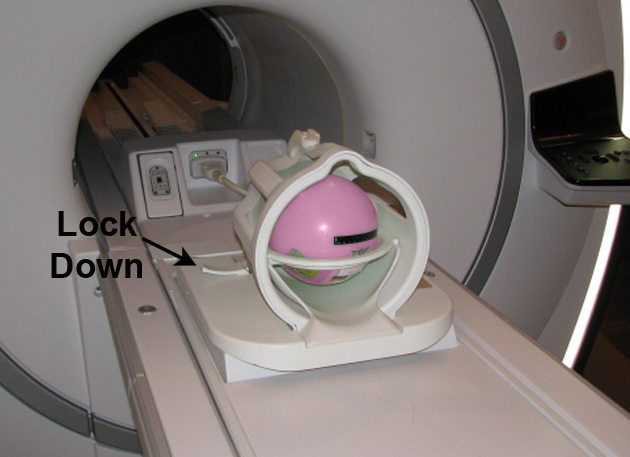
Figure 8. Sphere Aligned with Coil on Curved Table 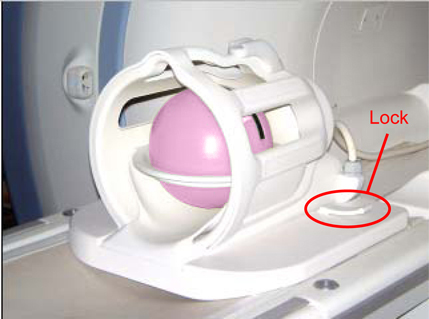
Finalization
No finalization steps.