
- Discovery MR750w and SIGNA™ Architect T 3.0T System Service Methods
- 5690002-2EN Revision 4
- 00000018WIA3018DE20GYZ
- id_131058652.0
- Feb 22, 2021 1:47:31 AM
3.0T 8-Channel Foot/Ankle Coil Setup for MCQA Test
Prerequisites
| Required persons | Preliminary requirements | Procedure | Finalization |
|---|---|---|---|
| 1 | Not Applicable | 15 minutes | Not Applicable |
| Item | Quantity | Effectivity | Part number | Manufacturer |
|---|---|---|---|---|
| Small, Cylindrical Unified Phantom | 1 | Unified phantom set |
5342680 | - |
| Cubical Unified Phantom | 1 | Unified phantom set |
5342681 | - |
| Curved Adapter Panel for Flat Table (GEM) | 1 | Flat table |
5395828 |
Sumi Motherson |
| Item | Quantity | Effectivity | Part number | Manufacturer |
|---|---|---|---|---|
| See 3.0T HD 8-Channel Foot/Ankle Coil FRUs | - | - | - | - |
| ||||
| Condition | Reference | Effectivity |
|---|---|---|
|
This coil configuration name must be installed to run the SNR test tool: HD Foot Ankle. Install this coil configuration with Config File Manager. | - | - |
About this task
This procedure can be performed using either a flat table or a curved table.
Note:
Coils do not ship with phantoms. Phantoms come in a unified phantom set with the MR system.
Unified Phantom Setup
About this task
Follow this process to prepare for the automated SNR test using the 3.0T HD 8-channel foot/ankle coil by Invivo (M3340CB).
Procedure
-
(For flat table) Insert the curved adapter panel
into the magnet end of the table.
Figure 1. Curved Adapter Panel Assembly on Flat Table 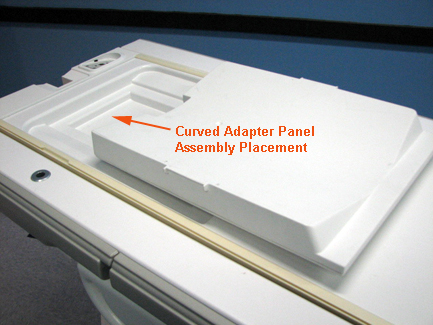
- Place the foot/ankle coil baseplate on the table.
Figure 2. Foot/Ankle Coil Baseplate on Curved Table 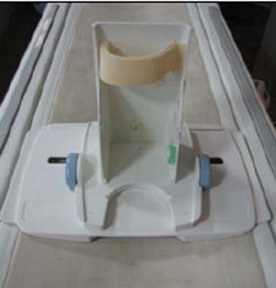
Figure 3. Foot/Ankle Coil Baseplate on Flat Table 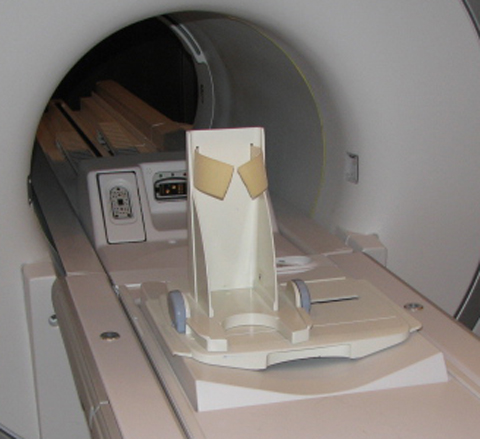
-
(For curved table) Place the small cylindrical
unified phantom horizontally on the baseplate.
Figure 4. Cylindrical Unified Phantom on Baseplate on Curved Table 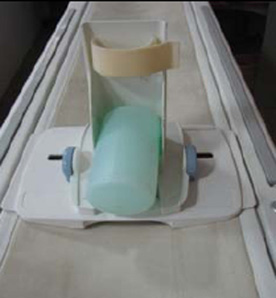
- Place the cubical unified phantom vertically. Secure the phantom
to the baseplate using the Velcro strap.
Figure 5. Cubical Unified Phantom on Baseplate 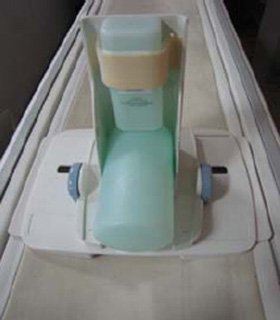
- Cover the baseplate with the coil.
Figure 6. Coil over Baseplate 
- Connect the foot/ankle coil to port A on the LPCA. Landmark
the coil at the crossmark on the coil handle.
Figure 7. Crossmark on Coil Handle 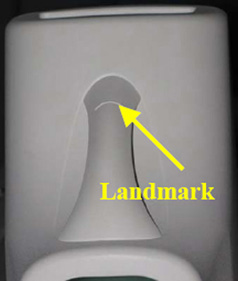
Finalization
Finalization
No finalization steps.