
- Discovery MR750w and SIGNA™ Architect T 3.0T System Service Methods
- 5690002-2EN Revision 4
- 00000018WIA309FCE20GYZ
- id_131074542.0
- Feb 22, 2021 1:47:19 AM
3.0T 8-Channel Wrist Coil Setup for MCQA Test
Prerequisites
| Required persons | Preliminary requirements | Procedure | Finalization |
|---|---|---|---|
| 1 | Not Applicable | 15 minutes | Not Applicable |
| Item | Quantity | Effectivity | Part number | Manufacturer |
|---|---|---|---|---|
| Cubical Unified Phantom | 1 | Unified phantom set |
5342681 | - |
| Wrist Array Baseplate with Baseplate Riser | 1 | Curved table |
5160986-12 | - |
| 3.0T 8-Channel Wrist Coil Baseplate with Baseplate Riser | 1 | Flat table |
5406395–12 | - |
| Condition | Reference | Effectivity |
|---|---|---|
|
For Discovery MR750w, the following coil configuration names must be installed to run this tool: GE_HD Wrist Array. | - | - |
About this task
Follow this process to prepare for the MCQA test. This procedure can be performed using either a flat table or a curved table. Each table has its own coil. Use the correct coil for the table you are using.
-
(For curved table) 3.0T HD 8-Channel Wrist Array by Invivo, catalog number M3340CA
-
(For flat table) 3.0T HD 8-Channel Wrist Array by Invivo, catalog number M7000GW
Coils do not ship with phantoms. Phantoms come in a unified phantom set with the MR system.
Unified Phantom Procedure
Procedure
- Place the baseplate of the wrist coil on the patient table.
Figure 1. Baseplate of Wrist Coil on Curved Table 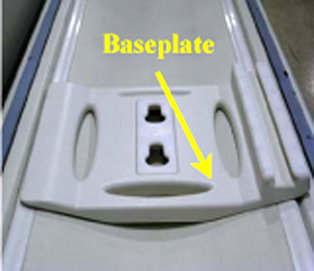
Figure 2. Baseplate of Wrist Coil on Flat Table 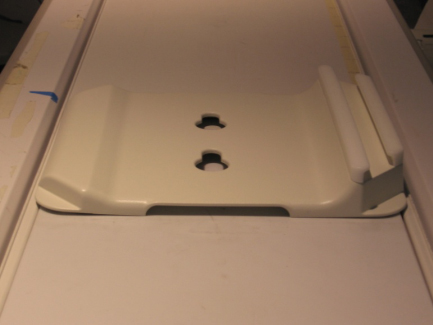
- Attach the baseplate
riser to the baseplate and then securely lock the baseplate riser
into the baseplate.
(For curved table)
Figure 3. Baseplate Riser Placed on Baseplate on Curved Table 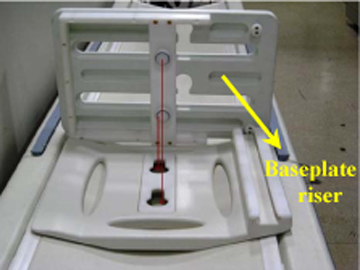
Figure 4. Baseplate and Riser in Locked Position on Curved Table 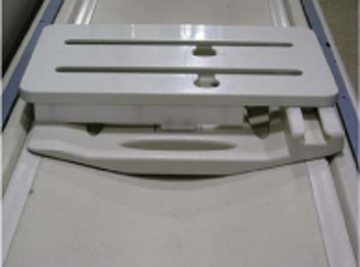
(For flat table)
Figure 5. Baseplate Riser Placed on Baseplate on Flat Table 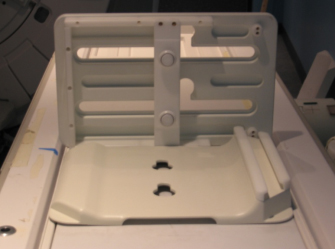
Figure 6. Baseplate and Riser in Locked Position on Flat Table 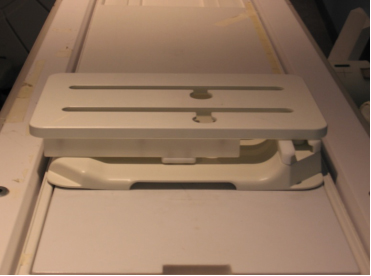
- Attach the 3.0T HD 8-channel wrist array to the baseplate assembly
using the knobs. Slide the locked coil to the center of the baseplate
assembly and align properly.
Figure 7. Wrist Array Attached to Baseplate Assembly on Curved Table 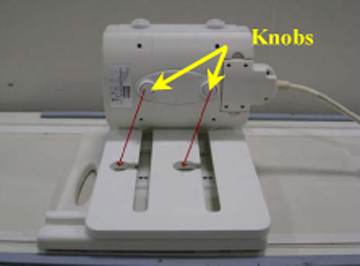
Figure 8. Wrist Array Attached to Baseplate Assembly on Flat Table 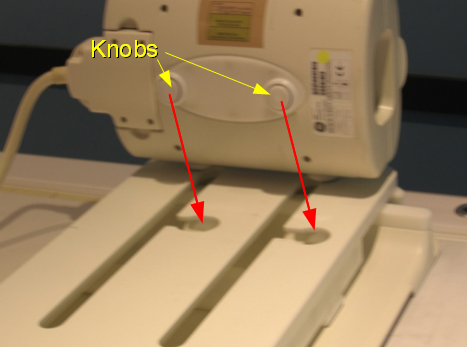
- Place the cubical unified phantom in the coil by lifting the
upper portion of the coil. Close the coil and lock it.
(For curved table)
Figure 9. Cubical Unified Phantom Positioned in Coil on Curved Table 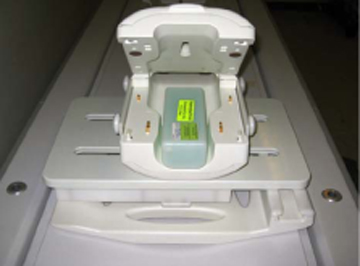
Figure 10. Coil Closed and Locked on Curved Table 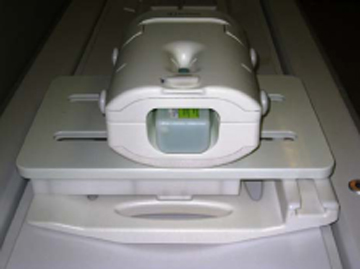
(For flat table)
Figure 11. Cubical Unified Phantom Positioned in Coil on Flat Table 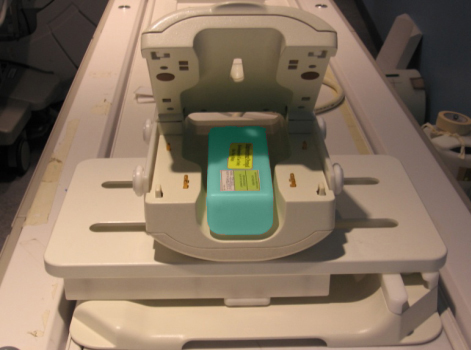
Figure 12. Coil Closed and Locked on Flat Table 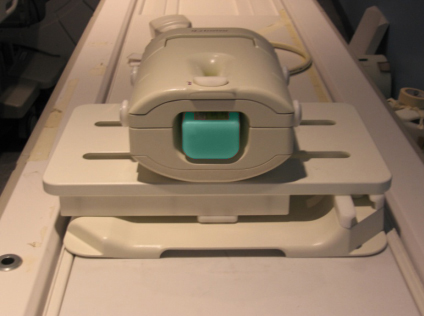
- Connect the coil to port A on the LPCA. Landmark at the marks
on the coil, and advance to scan.
Figure 13. Lock and Marks on Coil 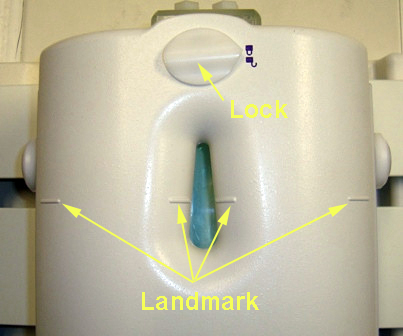
Finalization
Finalization
No finalization steps.