- SIGNA MR355 / SIGNA MR360
- Service Manual
- 5856356-3EN Revision 5.0
- Basic Service Documentation. Copyright General Electric Company.
- 00000018WIA30892B10GYZ
- id_20068782.11
- Jun 21, 2021 10:56:23 AM
Connecting to Imaging Protocol Manager (IPM)
Connect the scanner to Imaging Protocol Manager (IPM) on the cloud.
Prerequisites
You perform this process in tandem with the IPM Device Registration User, who will complete the necessary steps in the IPM application while you perform these steps in the imaging device. The During Early Readiness Training (ERT), the IPM Lead Service Integrator (LSI) will provide you with information you need to complete this procedure. For details, see section Assemble prerequisites in the IPM Service Manual (DOC2432496 for IDAM deployments) or Onboarding preparation in the IPM Service Manual (DOC2090972 for UOM deployments).
- (For cloud) Add the scanner's device system ID to IPM and generate a globally unique IPM device ID that identifies it in the pool of imaging devices available in the GE Health Cloud. Let the service team member configuring the device know when the device state in IPM is Ready . For details, see section Connect imaging devices in the IPM Service Manual .
- (For cloud) If the IPM implementation is in the China region, also will send the enrollment code needed to register IPM on the scanner.
-
(For scanner) Confirm the specifications for this device provided by the GEHC IPM implementation project manager:
- Model name
- Software version
- System ID
- (For scanner) Configure the scanner to work with the network over which it will communicate with IPM. For details, see Configure a DNS server or Configure a Proxy server , and Install an SSL certificate (for Proxy servers requiring SSL authentication) .
About this task
You use the Service Desktop Manager on the scanner to register IPM.
Procedure
-
On the
Service Desktop Manager
, navigate to
.
Result
The Get connected IPM Registration page appears.Figure 1. Configuration tab 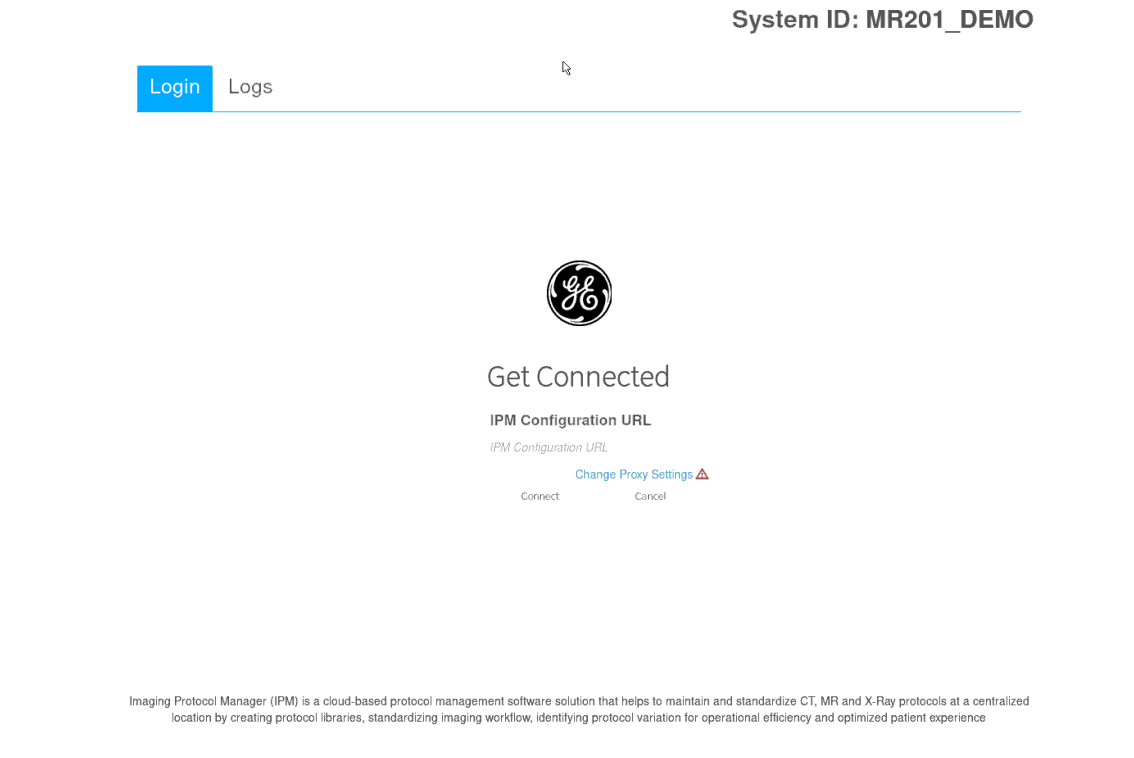
- Enter the IPM Configuration URL. For instructions to Change Proxy Settings, see Configure a Proxy server.
Figure 2. Configuration Tab 2 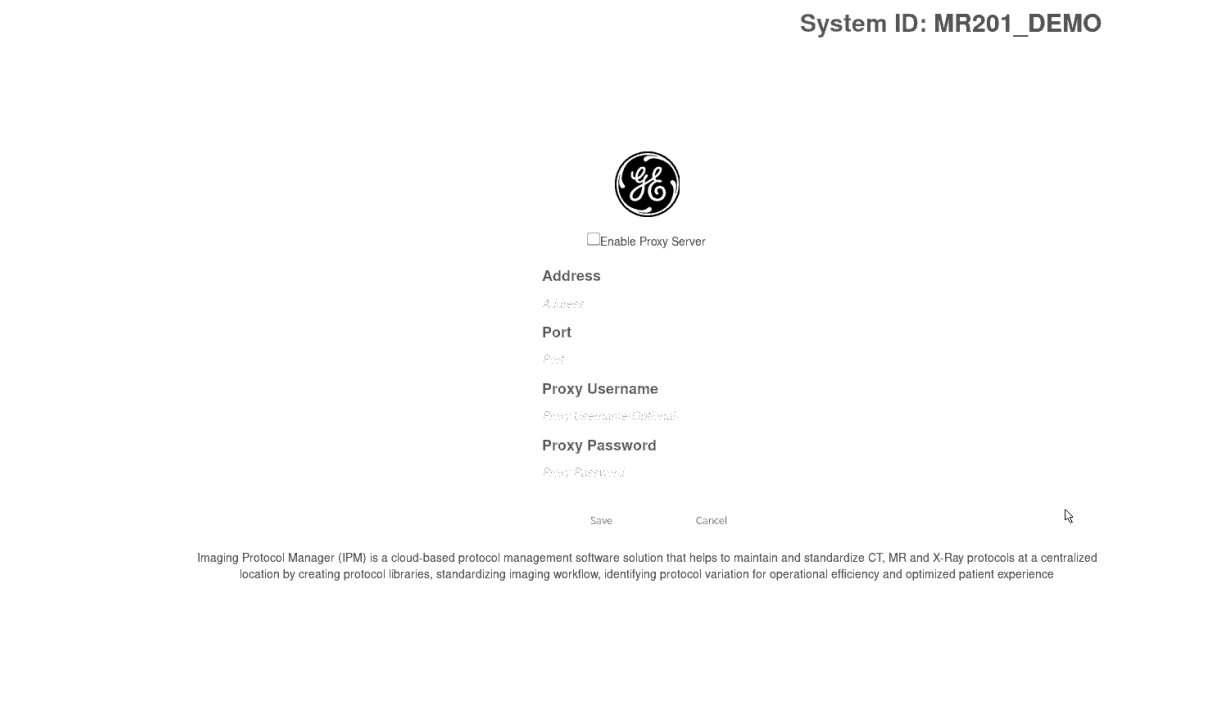
-
If the
IPM Configuration URL
is for the China region (IDAM deployment), enter the
Enrollment code
previously generated in the IPM application.
Figure 3. Enrollment Code 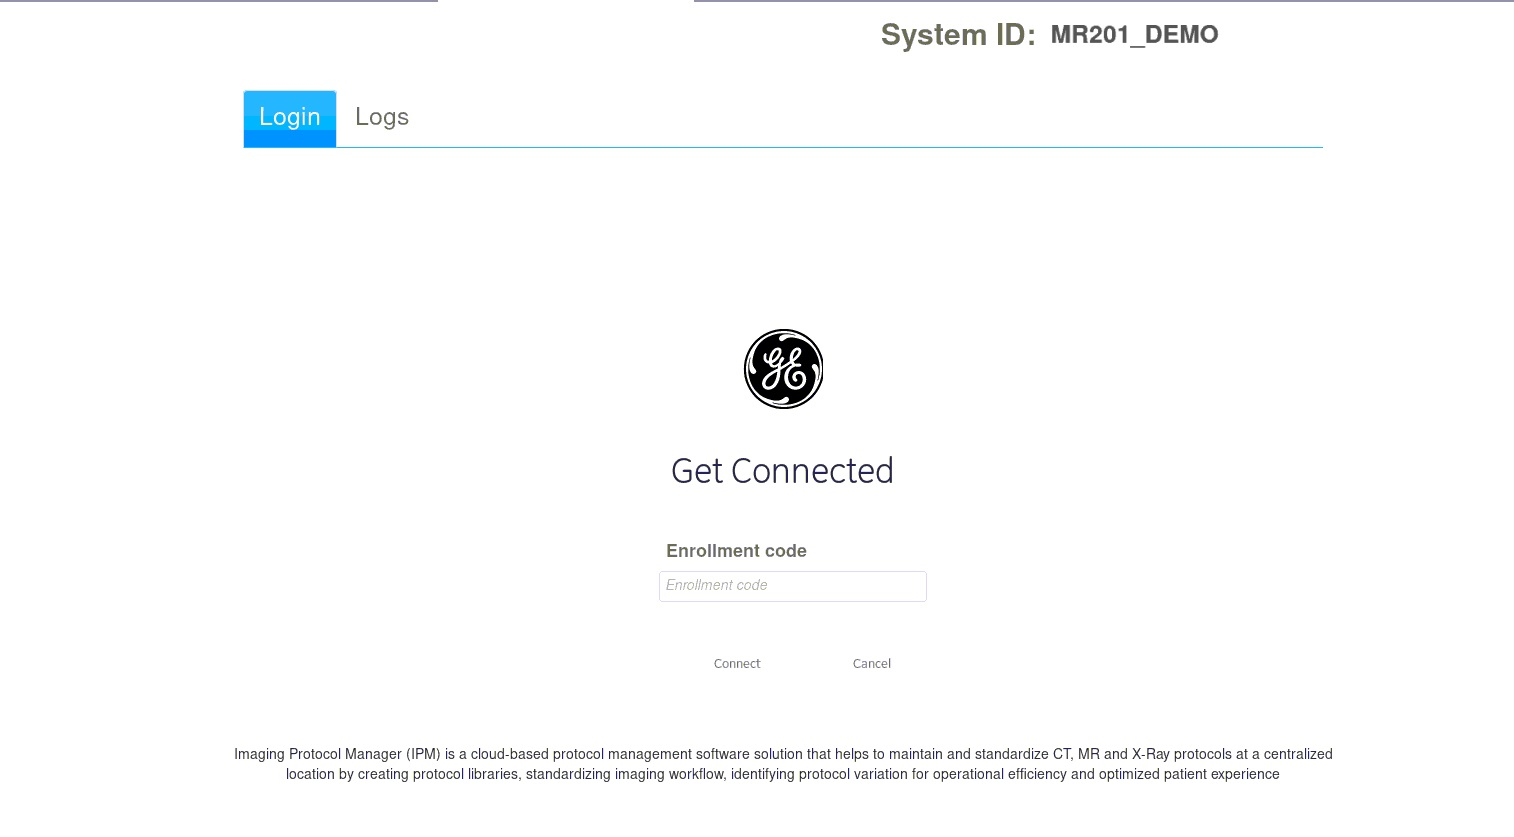
- If the IPM Configuration URL is for another rest of the world region (UOM deployment), enter the User name and Password.
Figure 4. Fill the User Name and Password 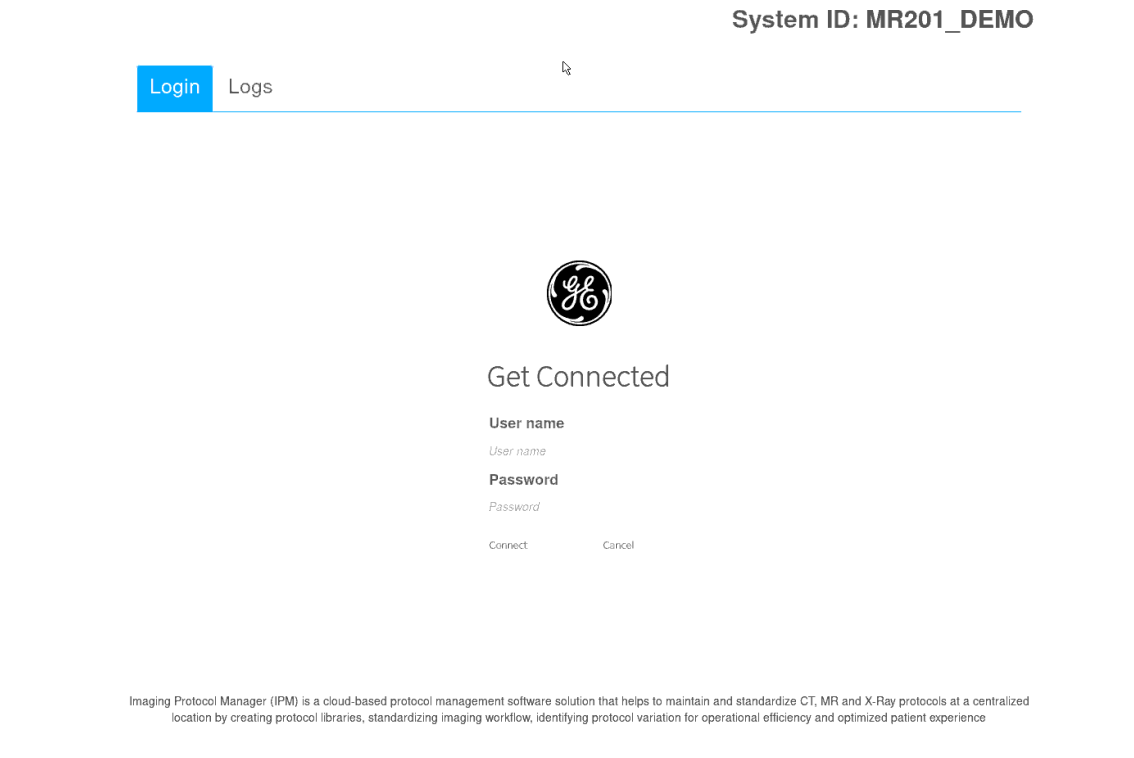
- Click Connect to start the device authorization process.
Figure 5. Device authorization 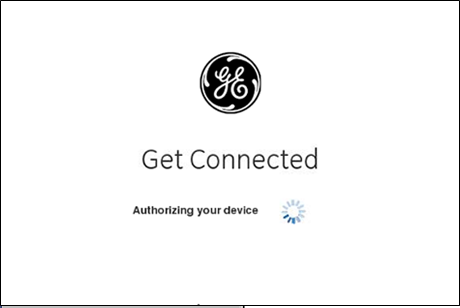
Result
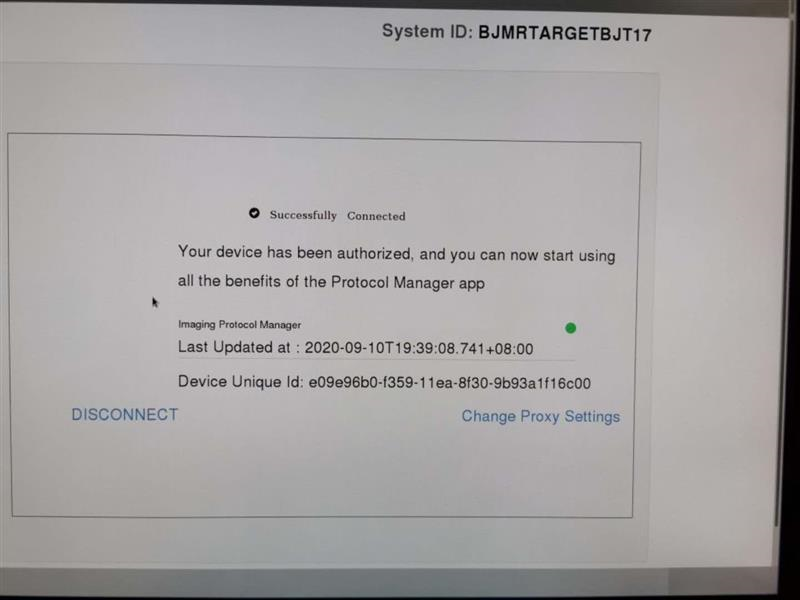
If all of the credentials are correct, the device is authorized and enrolled. Device credentials/security keys are generated and stored on the MR system. MR system configuration data is then uploaded to the cloud. - After the following message confirms the connection status is activated, advise the IPM Device Registration User performing the connection procedure on IPM. They should check and confirm that this scanner state shows Activated and the Status field contains a green check mark.
Figure 6. Device activated