
- SIGNA™ Hero 3.0T Service Methods
- 5852800-8EN Revision 1.0
- 00000018WIA306AA230GYZ
- id_156670461.8
- Jul 13, 2021 4:27:36 PM
Body Coil Blower Cleaning and Replacement
Prerequisites
| Required persons | Preliminary requirements | Procedure | Finalization |
|---|---|---|---|
| 1 | Not Applicable | 90 minutes | 15 minutes |
| Item | Quantity | Effectivity | Part number | Manufacturer |
|---|---|---|---|---|
| Standard Tool | 1 | - | - | - |
| Hoist Service Kit | - | - |
5196226 | - |
| Item | Quantity | Effectivity | Part number | Manufacturer |
|---|---|---|---|---|
| Body Coil Blower | 1 | - |
Refer to FRU Manual | - |
| ||||
| Condition | Reference | Effectivity |
|---|---|---|
|
ISC Power must be turned OFF. Refer to Lockout / Tagout for ISC. | - | - |
Procedure
- Setup Hoist. Refer to Hoist Setup.
Figure 1. Hoist Setup 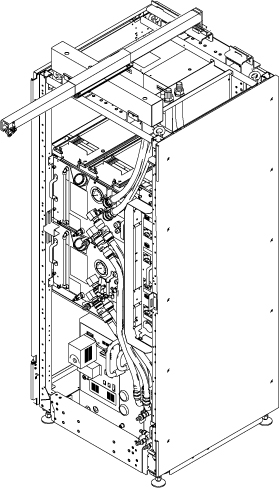
- Go to Scan Room and disconnect air hose from Body Coil Blower.
Figure 2. Body Coil Blower Hose 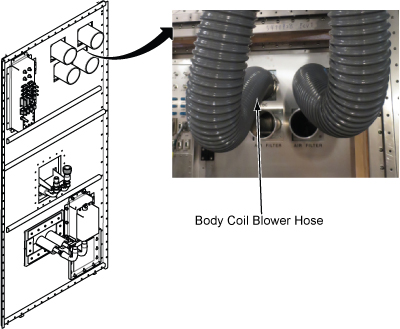
- Remove four screws fixing Body Coil Blower at rear panel.
Figure 3. four screws 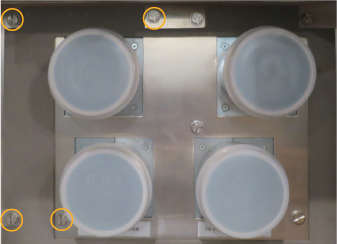
- Go to Machine Room and disconnect 4X1 cable from Control Unit.
Figure 4. Cables 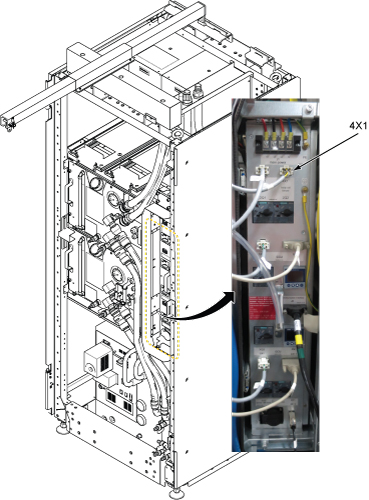
- Loosen two screws and carefully withdraw Body Coil Blower from the chassis.
Figure 5. Withdraw Blower 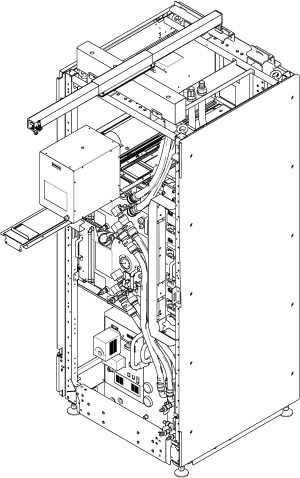
- Attach the lifting eye bolt on the top of Body Coil Blower.
Figure 6. Eyebolt 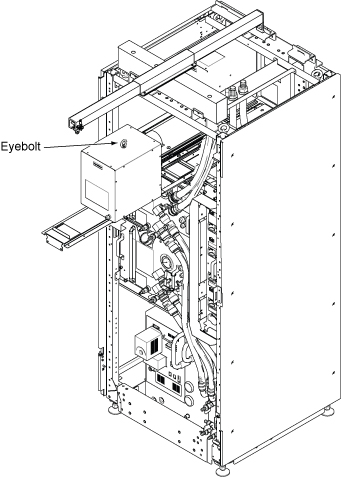
- Note:Loosen four screws connecting Body Coil Blower and slide the tray front a little to release the screw.
Make sure the hook is seated in the lifting eye bolt. If not, the weight can shift causing harm to the equipment or engineer.
Figure 7. Hook 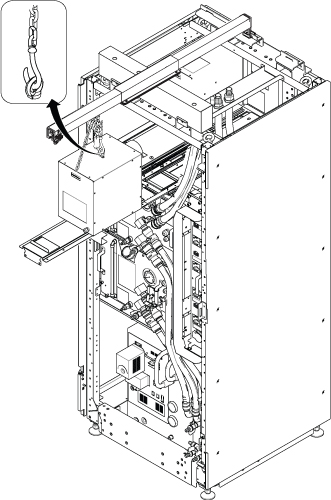 Note:
Note:Screw hole of tray is keyhole type. No need to remove the four screws.
Figure 8. Remove screws 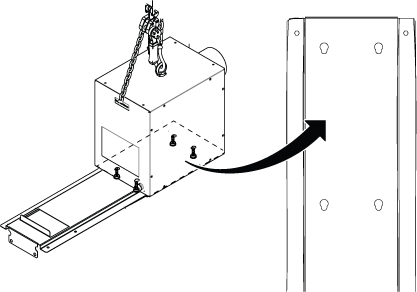
- Ratchet the winch to tighten the chain.
Figure 9. Ratchet 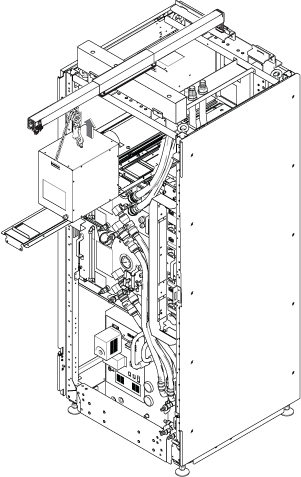
- Push the slide tray into the cabinet before lowering Body Coil Blower.
Figure 10. Push slide tray 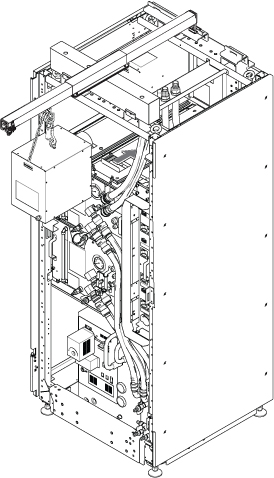
- Use the hoist and slowly lower the Body Coil Blower to the floor.
Figure 11. Lower Blower 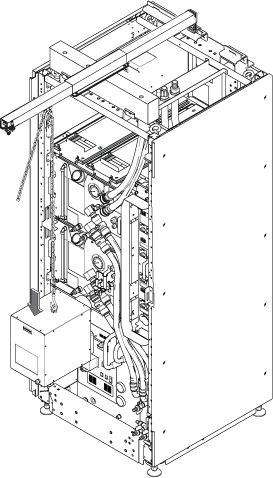
Finalization
- Restore the power. Refer to Removing LOTO - ISC.
- Check that Body Coil Blower is correctly running.
- Perform check scan.