- id_15271090
- Version: 3.3
- Date: Feb 19, 2020 4:47:24 PM
Cradle/table release block adjustment/cradle egress functionality
Prerequisites
| Personnel requirements | |||
|---|---|---|---|
| Required persons | Preliminary requirements | Procedure | Finalization |
| 1 | - | 35 minutes | 5 minutes |
| Tools and test equipment | |||
|---|---|---|---|
| Item | Quantity | Part number | Manufacturer |
| Straight Edge (For Example: Non-Ferrous Level) | 1 | - | - |
| Non-Ferrous Measuring Device (For Example: Bridge Height Gauge) | - | - | - |
| Nonmagnetic Titanium Service Tool Kit, Large Set | 1 | 5112581 | - |
This procedure explains how to adjust the cradle release block position and how to adjust the cradle release block retraction. The cradle release block retraction procedure shows how to adjust the cable to meet the system specification.
Cradle release block position adjustment
Procedure
- Undock the patient table and remove it from the magnet room.
- Raise the table to its maximum height.
 warning
- Lower the table lock safety bar.
Figure 1. Table Lock Safety Bar
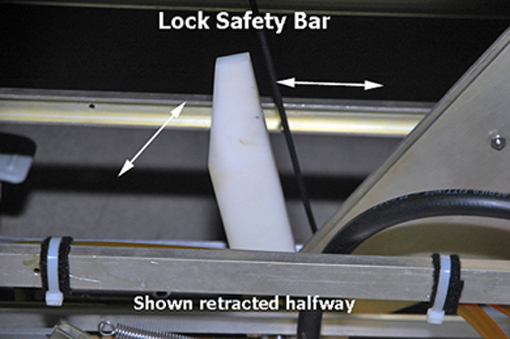
- Lower the table and verify that all of the table top's weight is resting on the safety bar.
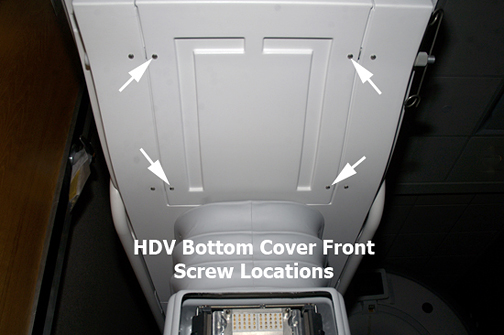
- Remove the patient table bottom front cover.
Figure 2. Bottom front cover
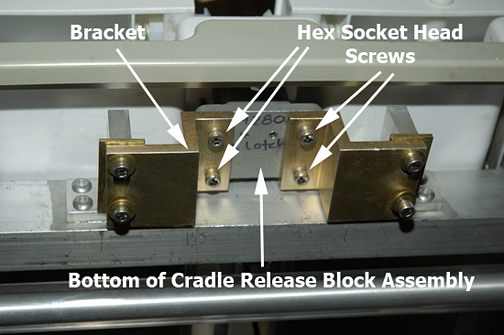
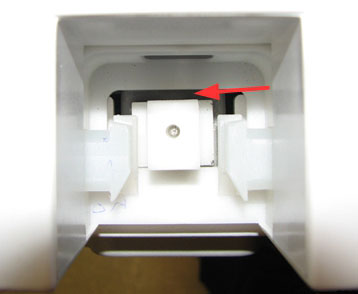
- Loosen the 4 hex socket head screws securing the release block assembly.
Figure 3. Bottom view of cradle release block assembly
- Adjust the housing's position to minimize the distance between the latch and the latch housing. Cycle (press) the latch several times, to make sure the latch never sticks in the down position.
Figure 4. Cradle release latch - correct position
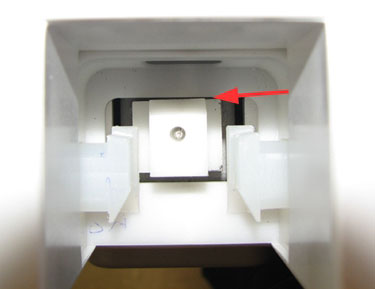
Figure 5. Cradle release latch - wrong position
Cradle release block retraction adjustment
Procedure
- Dock the patient table.
- Release the cradle from the carriage and drive the LPCA into the bore.
Figure 6. Cradle released from LPCA
Figure 7. View of cradle release block with table docked
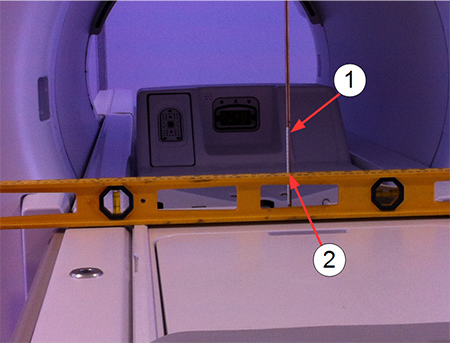
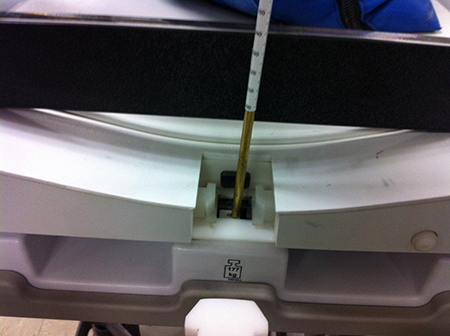
- Place a straight edge (for example, a level) across the front edge of the patient table.
Figure 8. Measuring the height of the cradle release block (not pressed)
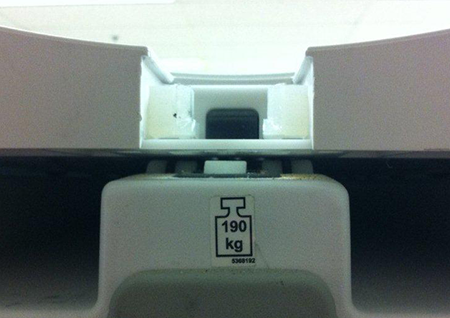
1 Bridge height gauge 2 Measurement point for cradle release block - Place a measuring device (for example, the bridge height gauge) onto the cradle release latch so that the current height can be measured.
Figure 9. Measure current height
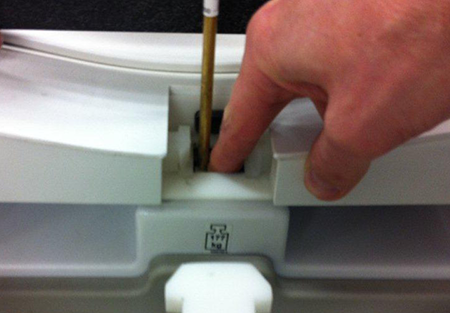
Press the cradle release block. Measure the change in height. The maximum height change is 1.0 mm.
Figure 10. Press the cradle release block
If the height change is ≤ 1 mm, proceed to Finalization.
If the height change is ≥ 1 mm, do the cradle release block adjustment.
- Remove the upper and lower base covers. See Patient Table Upper and Lower Base Cover Removal.
- Loosen the lock nut, then tighten or loosen the cable adjustment screw in the pivot block so that the cradle release block is flush or just below the level of the table top.
Figure 11. Cradle release block retraction adjustment
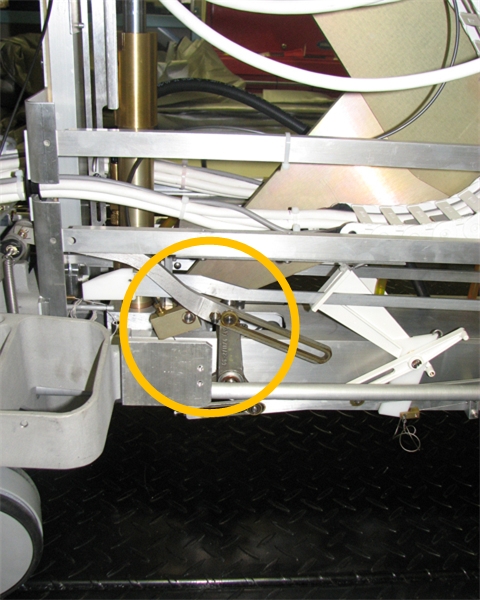
Figure 12. Fine adjustment and course adjustment locations

1 Fine adjustment 2 Coarse adjustment Figure 13. Fine adjustment screw and lock nut

1 Fine adjustment screw 2 Lock nut note: If the adjustment screw does not provide enough range for adjustment, loosen the coarse adjustment set screw to change the cable length. Fine adjustment is required after performing a coarse adjustment. - Re-tighten the lock nut.
- Recheck the height change. Repeat the adjustment until height change is ≤ 1.0 mm.
- Raise the table lock safety bar.
- Replace the upper and lower base covers as well as the patient table bottom front cover.
Finalization
Finalization
- Dock the table to the magnet and ensure that the table/cradle functions correctly.
- Ensure that the table undocks, and that the LPCA is released when the undock pedal is depressed.