- id_13106535
- Version: 3.2
- Date: Feb 19, 2020 4:50:01 PM
Cradle Release Pin Height Adjustment
Prerequisites
| Required persons | Preliminary requirements | Procedure | Finalization |
|---|---|---|---|
| 1 | N/A minutes | 25 minutes minutes | 5 minutes |
| Item | Quantity | Effectivity | Part number | Manufacturer |
|---|---|---|---|---|
| Non-ferrous medium slotted screwdriver | 1 | - | - | - |
note:
It is recommended that when conducting any service tasks to the table that the table is removed from the magnet room. |

This procedure provides instructions on how to adjust the cradle release pin to the correct height.
Procedure
- Undock patient table and remove from magnet room.
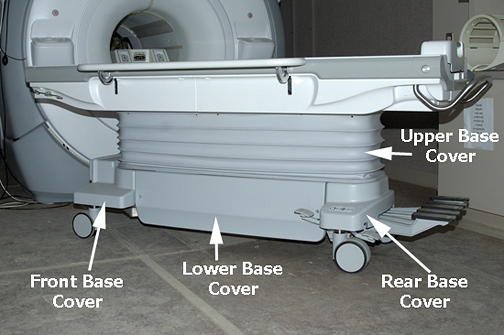
- Remove upper and lower base covers from table. See Patient Table Upper Bellows and Lower Base Side Cover Removal.
Figure 1. Table Base Covers
- Raise the table to its maximum height.
 warning
- Lower the table lock safety bar.
Figure 2. Table Lock Safety Bar
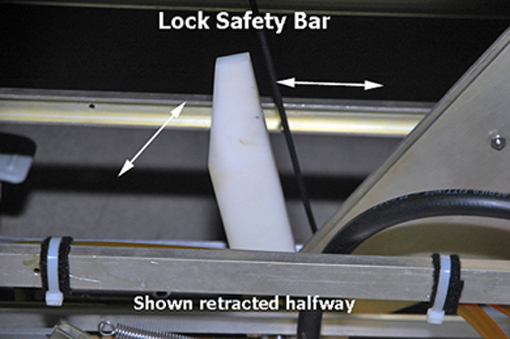
- Lower the table and verify that all of the table top's weight is resting on the safety bar.
- Remove front base cover.
- Undock the patient table.
- At the same time, press the cradle latch block and push in the cradle release button at the front of the cradle.
Figure 3. Cradle Removal
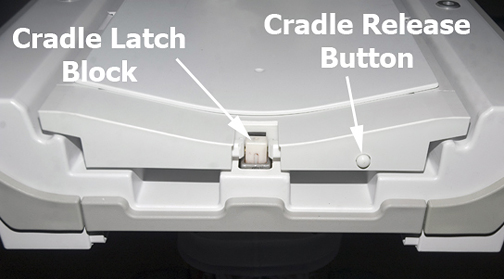
- While holding down the latch block and pressing the cradle release button, slide the cradle forward enough so that the cradle covers the top area of the cradle latch block. Release the latch block and cradle release button.
- caution
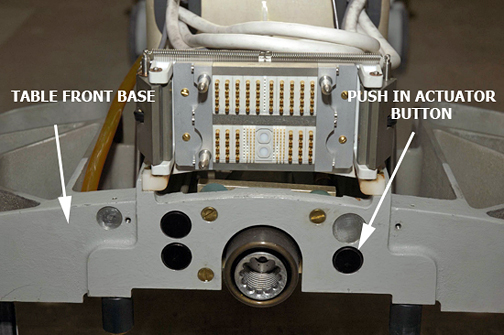
- Push in the right actuator on the table front base.
Figure 4. Table Front Base
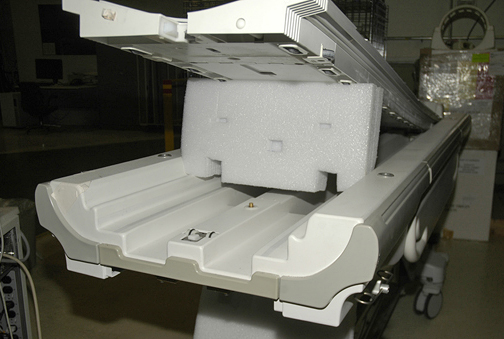
- note:Prop up the cradle or remove the cradle from the patient table to perform desired maintenance.
Pressing the actuator button engages the secondary cradle latch cable and causes the pin stop to move down flush with the table top surface, allowing the cradle to slide forward.
Figure 5. Prop Up Cradle
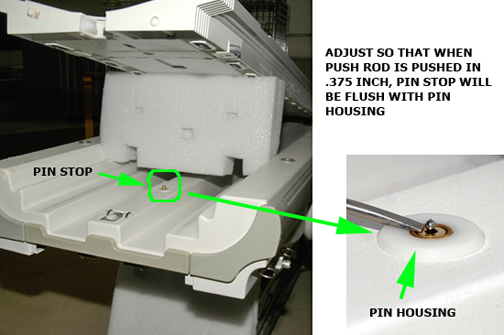
- Adjust cable so that when push rod button is pushed in 0.375”
(9.6 mm), pin stop is flush with pin housing. Use threaded cable adjuster
for fine adjustment. Tighten lock nut after adjustment is complete,
then cut off excess length of cable.
Figure 6. Push Rod Button
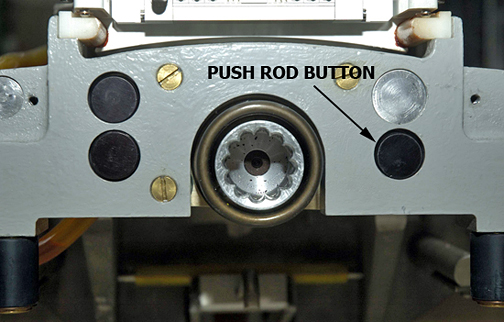
Figure 7. Push Rod
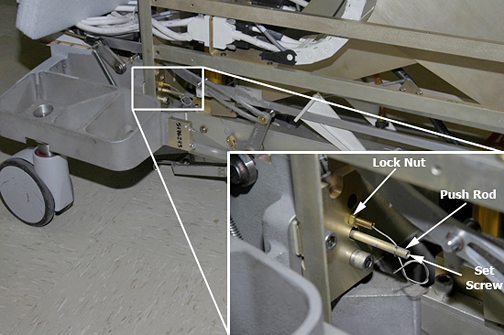
Figure 8. Pin Housing
- Raise the table lock safety bar.
- Replace the cradle, front base cover, upper and lower base covers.
- Return the table to the magnet room and dock the table.
- Drive the cradle into the magnet to expose the cradle release
pin. Verify that release pin is flush to 1/16 inch (2 mm) below flush
when the table is docked.
Finalization
- Dock the table.
- Confirm that the cradle release functions properly.
- Confirm that the LPCA connects to the cradle and that the cradle can move into the bore.