Installing the DS Digitized Per Pin Remote Receiver (DPP RRx)
Install a DS Digitized Per Pin Remote Receiver (DPP RRx) in the magnet outer electronics.
Prerequisites
Personnel requirements
Required persons
Preliminary requirements
Procedure
Finalization
1
-
15 minutes
-
Tools and test equipment
Item
Quantity
Part number
Manufacturer
Nonmagnetic Titanium Service Tool Kit, Small Set
1 Kit
5113258
-
Nonmagnetic Titanium Service Tool Kit, Large Set
5112581
-
Replacement parts
Item
Quantity
Part number
Manufacturer
Gen2 Direct Sampled (DS) Remote Receiver (RRx) P-port 3T High Level Assembly (HLA)
Note: DS DPP requires PX28 Software.
1
5789759
-
Safety
CAUTION
Strong magnetic field
The DS Digitized Per Pin Remote Receiver (DPP RRx) has no ferrous material and will not be attracted to the magnet, but the eddy currents can cause resistance when you pull the DS DPP RRx away from the magnet.
When removing and replacing the DS DPP RRx, keep the receiver as far away from the magnet as possible while moving it.
Procedure
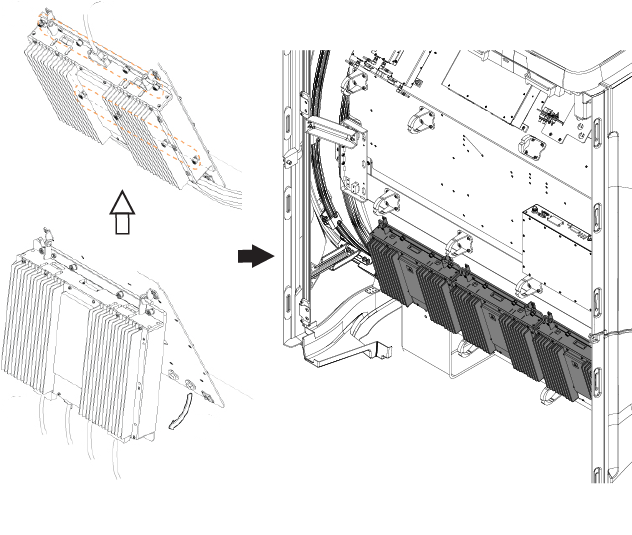
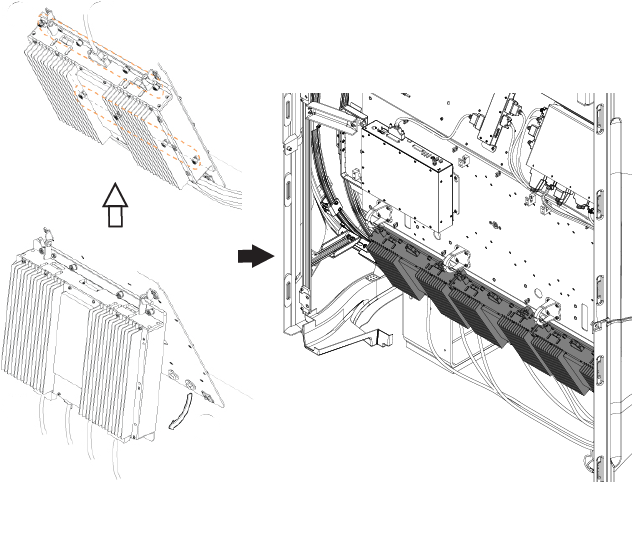
Position the two hanger studs on the DPP module in the hanger blocks on the side electronics plate.
Figure 1. (For AR magnets) Positioning the DS DPP RRxFigure 2. (For UA magnets) Positioning the DS DPP RRx
Make sure the DS DPP RRx is flat against the mounting surface.
Tighten the eight captive screws to secure the DPP RRx to the side electronics plate.
Note: Apply antiseize to mounting screw threads before installation.
Notice
Component damage risk
Applying too much force when pins are not properly aligned to the corresponding socket will bend the pins and can break the connector or cable.
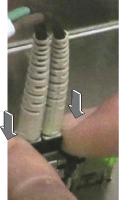
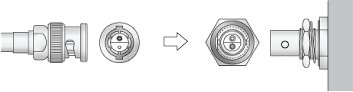
J10 of each DPP is a Twin BNC plug for a local oscillator cable. Align pins and keys properly before connecting them.
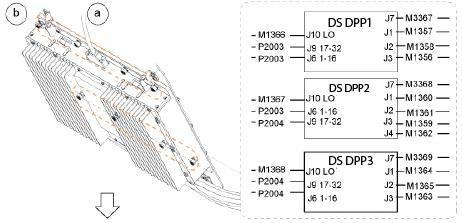
Connect all cables that you previously removed to the DS DPP RRx.
Figure 3. (For AR and UA magnets) DS DPP Rx cable connections
Note: M1368, M1367, M1366 are not available for DS DPP.
Note: J6 and J9 are connectors for the SFP Transceiver. To insert the SFP cable connector, push the latch block from both sides until it clicks into place.


 Note: M1368, M1367, M1366 are not available for DS DPP.Note: J6 and J9 are connectors for the SFP Transceiver. To insert the SFP cable connector, push the latch block from both sides until it clicks into place.