
- SIGNA MR355 / SIGNA MR360
- Service Manual
- 5856356-3EN Revision 5.0
- Basic Service Documentation. Copyright General Electric Company.
- 00000018WIA30DB0030GYZ
- id_131063261.3
- Mar 19, 2020 6:17:59 AM
ICE IP change procedure
Prerequisites
| Required persons | Preliminary requirements | Procedure | Finalization |
|---|---|---|---|
| 1 | Not Applicable | 60 minutes | Not Applicable |
About this task
This procedure shows how to change the TPS/MGD Subnet (ICE IP) when the host IP on site is conflict with the system IP address or the host IP will change and the new one is conflict with the system IP. In our system there are only two IP address available, which are 10.0.1; 192.168.*.*.
Procedure
- Turn the VRE power OFF from Common Service Desktop. (Utility/VRE/Power
Control). See Figure 1
Figure 1. VRE Power OFF 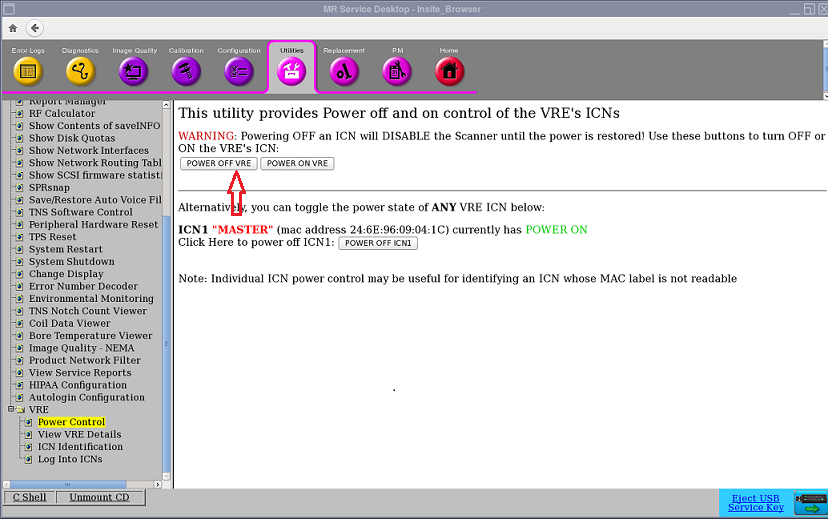
- From the Common Service Desktop select [Configuration] . Under
Guided Install, select [FE mode] . The window called Install Tool
opens. In the window called “Install Tool”, type 'operator
<Enter>' at the password prompt. The Install menu will then open.
Go to the [Network Info] tab. And then change the TPS/MGD Subnet to
10.217.*; or 10.121.*; or 10.47.*; or 10.0.* according to actual host
IP address. See Figure 2 . The Host IP Address and TPS/MGD Subnet can
NOT be same, otherwise one error message will pop up. See Figure 3
Figure 2. Network Info 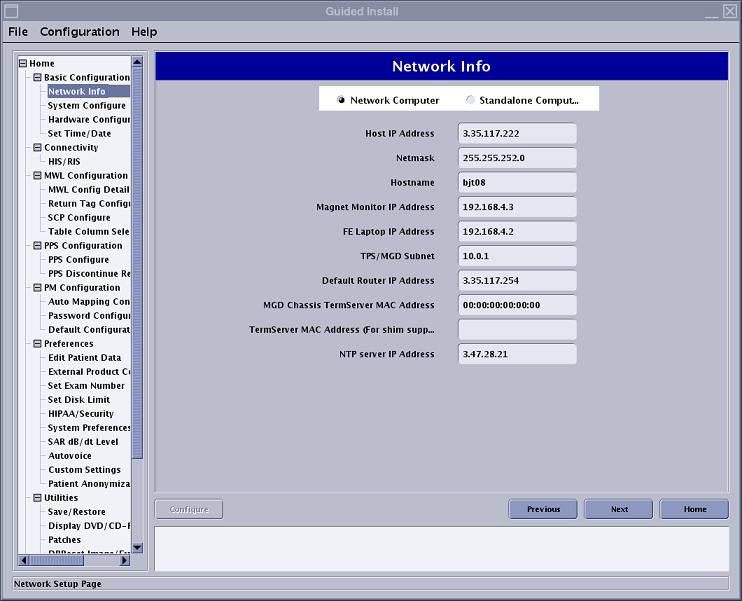
Figure 3. Error Message 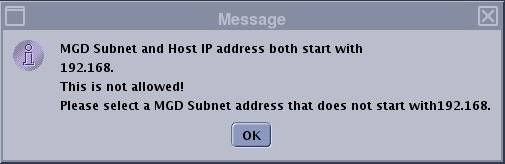
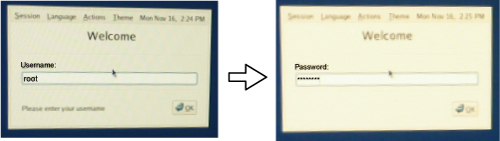
- Login as SDC user, right click desktop
and select Restart the Host computer again and login as ROOT user.Note:
To log in to the system as root, enter 'root' for user name and enter 'operator' for password.
- Click [Yes] for the following screen to invoke Guided Install.
Figure 4. Invoke Guided install 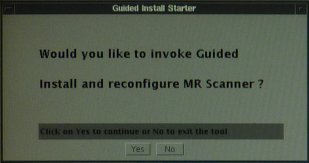
- Select VRE Configuration TAB and Click on [Configure VRE Blades].Note:
This procedure will take between 15-20 minutes.
Figure 5. VRE Configuration Screen 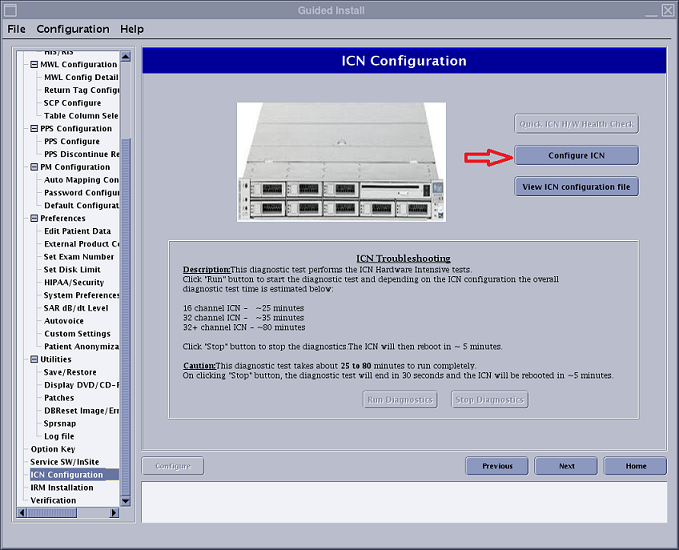
- Once VRE config succeeds, right mouse click on desktop and selecting
'System Restart'. And login as sdc user.
Figure 6. System Restart from root 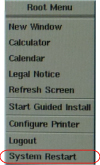
Finalization
- Perform one test phantom scan and confirm that it operates normally.
- To check the IP address assigned by the system, open c-shell
and enter the following command
cd /etcEnter
more hostsEnter
You can check the IP address assigned by the system.