
- SIGNA™ Hero 3.0T Service Methods
- 5852800-8EN Revision 1.0
- 00000018WIA30B24840GYZ
- id_20148814.10
- Oct 11, 2021 6:34:12 PM
Removing the host computer - Dell T5820
Remove the host computer.
Prerequisites
| Personnel requirements | |||
|---|---|---|---|
| Required persons | Preliminary requirements | Procedure | Finalization |
| 1 | - | 30 minutes | - |
| Tools and test equipment | |||
|---|---|---|---|
| Item | Quantity | Part number | Manufacturer |
| Screwdriver | 1 | - | - |
| Disk Management Tool | 1 | - | - |
| ESD Strap | 1 | - | - |
Procedure
- Remove the two screws that secure the left side panel of the GOC.
Figure 1. GOC left side panel 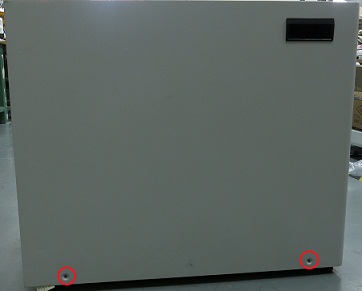 Note: The side panel has a short ground lead connecting it to the main chassis. When removing the side panel, do not strain this ground lead.
 - Disconnect the short ground lead that connects the side panel to the GOC main chassis at the center of the lead.
Figure 2. Left side panel ground lead 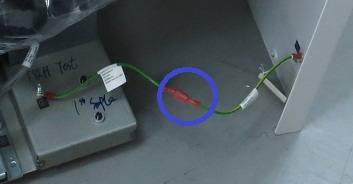
- Make sure all the cables are properly labeled. If not, note their locations for reattachment.
Figure 3. Dell T5820 cable configuration 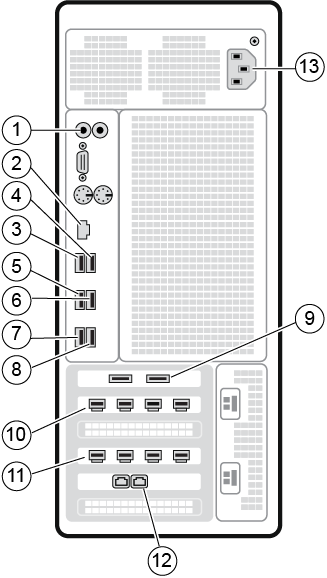
Table 1. Dell T5820 cable configuration Item Run # Description 1 NA Line In/Out cable to GOCAA J12/14 2 NA Site network Ethernet cable (see note below) 3 NA Mouse USB cable 4 E3048 Keyboard USB extender cable to keyboard USB cable 5 E3037 ICE USB extender cable to ISC top I/O USB ICE cable 6 NA USB-RS422 Converter USB cable to USB-RS422 Converter 7 P5006 (P2027) USB cable to IRD-R 8 P5006 (P2029) USB cable to IRD-L 9 E3049 USB cable to PDU J2 and Cabinet Monitor 10 P5006 (P2026 & P2028) Mini DP to DP Dongle for port 1 to IRD DP AOC cables P2026 and
Mini DP to DP Dongle for port 2 to IRD DP AOC cables P202811 E3046 Mini DP cable to Host LCD Monitor 12 E3011 ETH1 (right port) cable to ISC top I/O panel 13 NA Power cable