- id_12374597
- Version: 1.3
- Date: Jul 5, 2019 10:03:33 PM
High Order (HO) Shim Supply Replacement
Prerequisites
| Required persons | Preliminary requirements | Procedure | Finalization |
|---|---|---|---|
| 1 | Not Applicable | 30 minutes | 20 minutes |
| Item | Quantity | Effectivity | Part number | Manufacturer |
|---|---|---|---|---|
| Screwdriver | 1 | - | - | - |
| Non-Ferrous Tool Kit | 2 | - | - | - |
|

High Order Shim Supply Power Down and Lockout/Tagout Procedure
Procedure
- Prepare for the shutdown of equipment. Notify affected personnel working in the area that LOTO is being performed.
- To turn power off, press the power switch at the back of the HO Shim Supply
- Remove the power cord from the plug it is plugged into
- Using DMM, measure voltage at plug to ensure no power present
- Lock out the power plug.
HO Shim Supply Replacement
Procedure
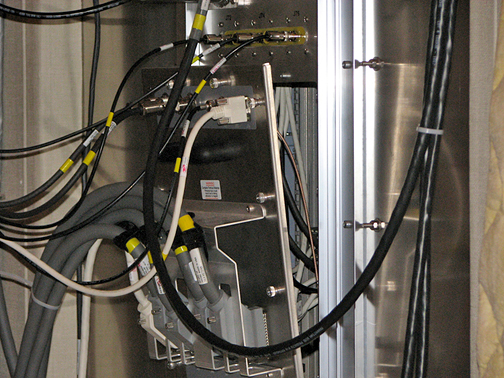
- note:Loosen the 16 thumbs screws securing the penetration panel to the magnet room wall Figure 1. This will allow access to the rear of the Shim Supply.
The HO Shim Supply (NAV version) is light enough to replace without the use of the Hoist Kit Figure 2.
Figure 1. Removing the Penetration Panel
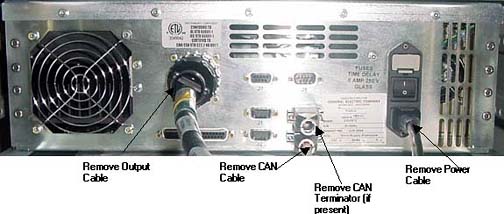
- Remove all cables that attach to the back
of the supply Figure 2.
Figure 2. HO Shim Supply Replacement (Front View)
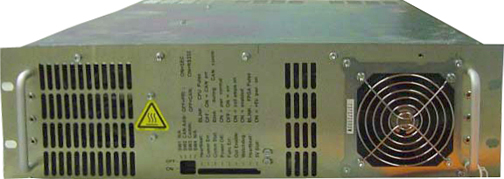
Figure 3. HO Shim Supply Replacement (Rear View)
- Remove 4 screws that attach the shim supply to the cabinet
- Carefully slide out and remove the shim supply.note:
Fiber Optic cables are present in front of Shim Supply. You can remove Shim Supply without removing cables, but should be careful about not breaking the Fiber Optic cables.
- Install the new supply and secure with 4 screws
- Attach all cables/connectors removed in Step 2.
- Attach Pen Panel removed in Step 1
- Proceed to Step 1.
Finalization
Procedure
- Remove LOTO from power cable to shim supply.
- Plug in shim supply power cable and turn on power switch at back of supply
- Reset TPS
- If NAV supply is used, proceed to HO Shim Supply Functional Checks and run shim coil continuity check.
- Run Goodbye Scan to make sure system is ok. Check this document for details.