
- SIGNA™ Hero 3.0T Service Methods
- 5852800-8EN Revision 1.0
- 00000018WIA302BA230GYZ
- id_156672791.10
- Oct 8, 2021 2:04:56 PM
Body Coil Gap Foam Replacement
Prerequisites
| Personnel requirements | |||
|---|---|---|---|
| Required persons | Preliminary requirements | Procedure | Finalization |
| 1 | - | 60 minutes | 10 minutes |
| Tools and test equipment | |||
|---|---|---|---|
| Item | Quantity | Part number | Manufacturer |
| Nonmagnetic Titanium Service Tool Kit, Large Set | 1 | 5112581 | - |
| Consumables | |||
|---|---|---|---|
| Item | Quantity | Part number | Manufacturer |
| Alcohol wipes | As needed | - | - |
| Replacement parts | |||
|---|---|---|---|
| Item | Quantity | Part number | Manufacturer |
| Body coil gap foam with adhesive | 1 |
5482545 | - |
| ||||
Procedure
- Peel off the damaged gap foam.
Figure 1. Peel off 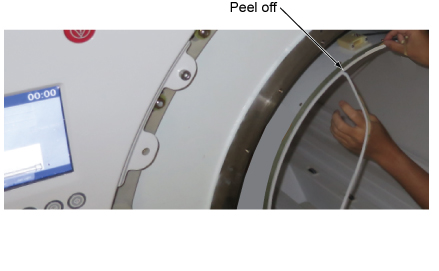
- Note: When attaching the gap foam, align the gap foam to the outer side of the body coil.Neatly attach the gap foam along the outer side of body coil per following steps.
Figure 2. Alignment note 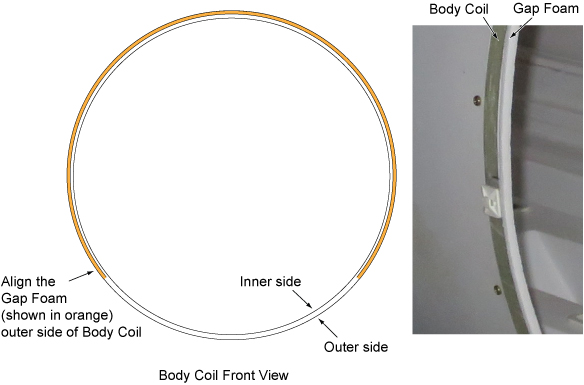
- Peel off the backing of adhesive little by little and start to attach the gap foam under the bridge.
- Attach the gap foam along the outer side of body coil.
- When it reaches to the other side under the bridge, cut the gap foam.
Figure 3. Gap foam attachment 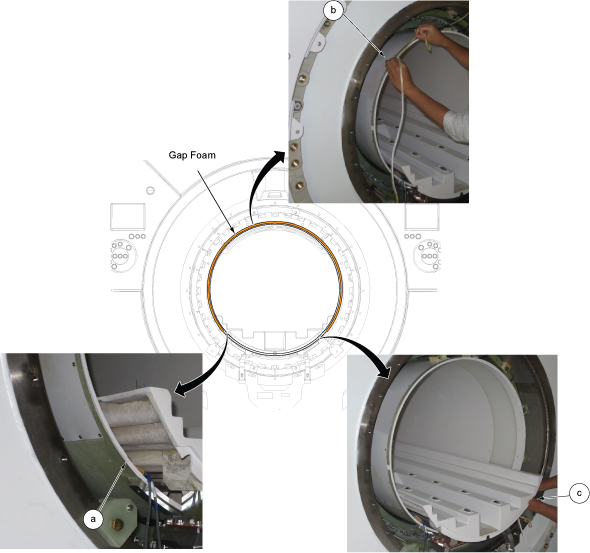
Finalization
Perform Check Scan.