- 00000018WIA3083EE20GYZ
- id_131058903.4
- Apr 23, 2020 7:31:49 PM
GEM MCQA Setup - Posterior Array (PA) upper
Prerequisites
| Required persons | Preliminary requirements | Procedure | Finalization |
|---|---|---|---|
| 1 | - | 30 minutes | - |
The 1.5T GEM Coil MCQA will use the 1.5T phantoms, which are green in color.
Note:
Coils do not ship with phantoms. Phantoms come in a Unified Phantom set with the MR System.
| Item | Quantity | Effectivity | Part number | Manufacturer |
|---|---|---|---|---|
| TL Unified Phantom (for 1.5T) | 2 | - |
5343347 | - |
| PA Phantom Positioner (for both 1.5T and 3.0T) | 1 | - |
5405748 | - |
Procedure
- Place the flat filler panel on the GEM table in the recess closest to the magnet bore.
Figure 1. Flat filler panel 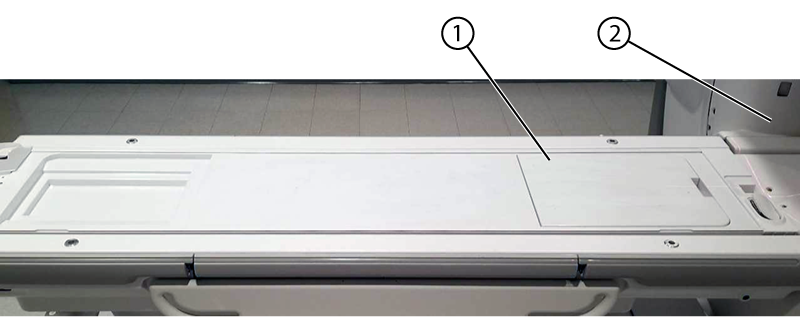
1 Flat filler panel 2 Bore - Landmark at the straight edge of the flat filler panel.
Figure 2. Landmark location 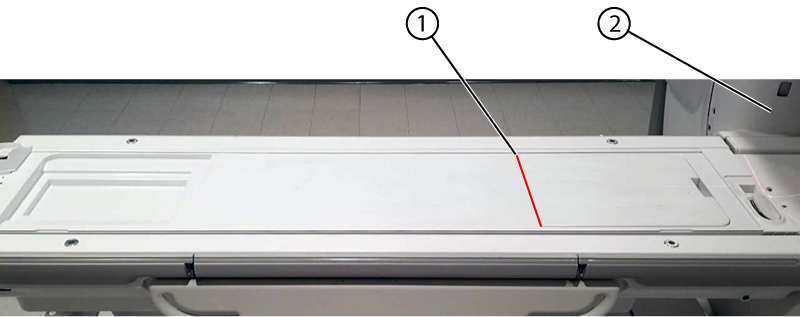
1 Landmark/bottom edge of the flat filler panel 2 Bore - From Landmark 0 mm (at the bottom edge of the flat filler panel), move the table from bore until the system LCD displays s 50 mm.
Figure 3. Phantom position 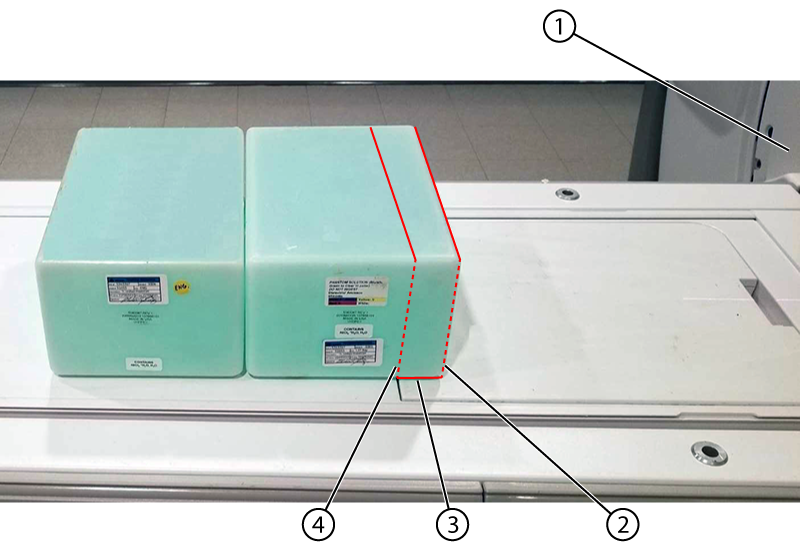
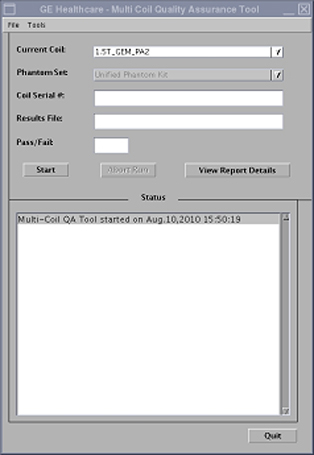
1 Bore 2 s 50 mm 3 50mm overlap 4 Landmark 0 mm - Run the MCQA Tool. Make sure that the correct coil is selected in the Current Coil field:
- For the original PA coil: 1.5T_GEM_PA1
- For the latest PA coil: 1.5T_GEM_PA_1 (note the extra underscore between "PA" and the number)
Figure 4. MCQA Tool Menu