
- 00000018WIA303ACE20GYZ
- id_131066261.6
- Jul 16, 2020 10:26:40 AM
48CH Head Coil non-MEMS Setup for MCQA Test
Prerequisites
| Required persons | Preliminary requirements | Procedure | Finalization |
|---|---|---|---|
| 1 | Not Applicable | 30 minutes | Not Applicable |
The 3.0T GEM Coil MCQA will use the 3.0T phantoms, which are pink in color.
Note:
Coils do not ship with phantoms. Phantoms come in a Unified Phantom set with the MR System.
| Item | Quantity | Effectivity | Part number | Manufacturer |
|---|---|---|---|---|
| Large Cylindrical Unified Phantom (For 3.0T) | 1 | - |
5342679-2 | - |
| TL Unified Phantom (For 3.0T) | 1 | - |
5343347-2 | - |
| Condition | Reference | Effectivity |
|---|---|---|
|
The coil configuration name HD Shoulder must be installed to run this tool. | - | - |
Procedure
- Note:Remove the Flat Filler Panel from the Table if present.The table adapter will need to be installed prior to completing the SNR Procedure. Place table adapter on coil and secure with five screws as indicated.
Figure 1. Table Adapter 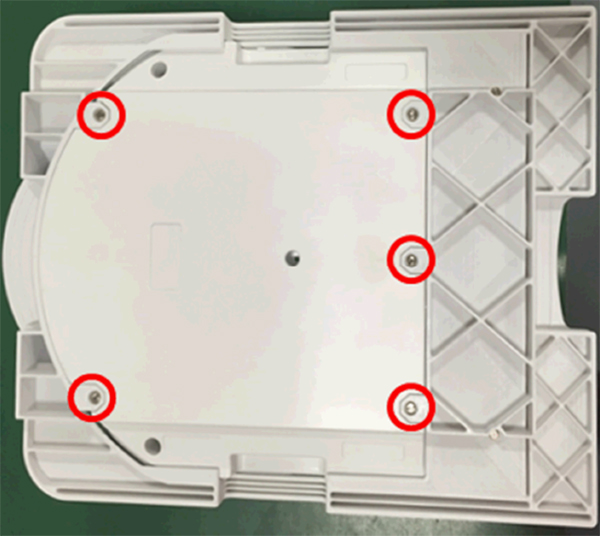
- Place the 48CH Head Coil posterior unit on the Table as shown.
Connect the coil to the P2 Port on the table.
Figure 2. Placement of 48CH Head Coil Posterior Unit 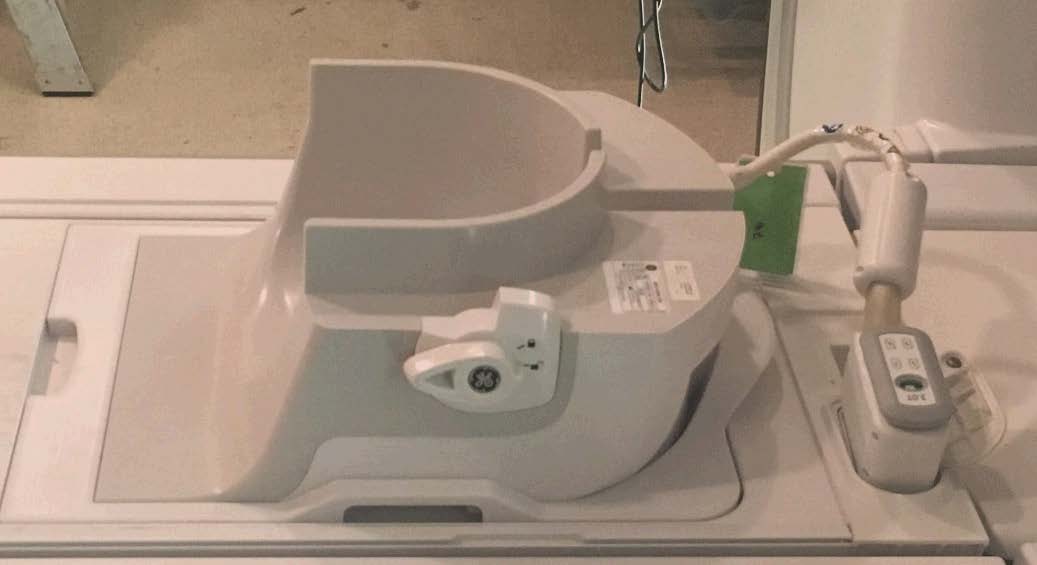
- Place the 48CH Head Coil Phantom Positioner (5756144) into the
48CH Head Coil posterior unit, then place the Large Cylindrical Unified
Phantom and TL Unified Phantom into the 48CH Head Coil Phantom Positioner.
Figure 3. Placement of Large Cylindrical and TL Unified Phantoms 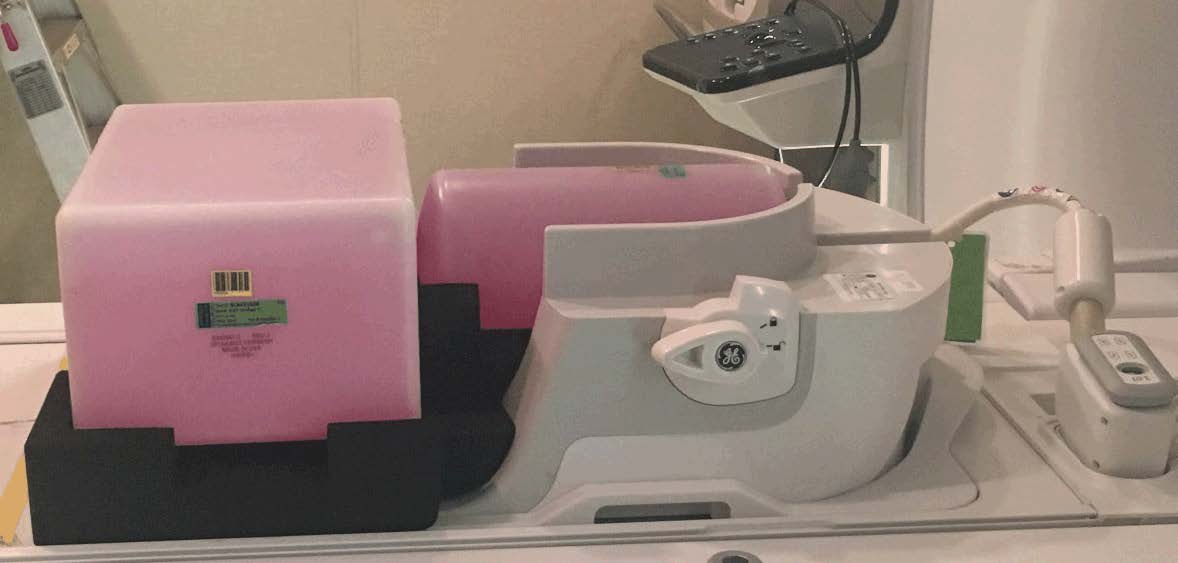 Note:
Note:Use the correct Phantom Positioner (5756144). Do not use the Phantom Positioner for the DV system and SIGNA Pioneer. Otherwise, it will affect the SNR result.
Figure 4. Phantom Positioner 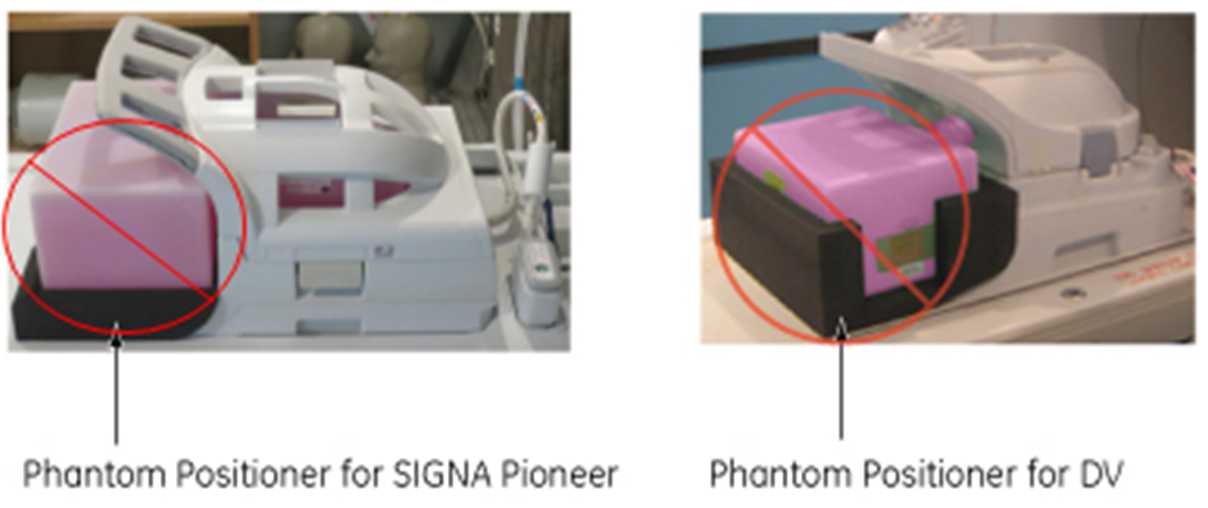
- Place the anterior of the coil on top of the posterior half
of the coil. Lock the anterior portion to the posterior portion by
rotating the lock handle counterclockwise so that it points to the
lock symbol.
Figure 5. 48CH Head Coil Anterior and Posterior Units Locks 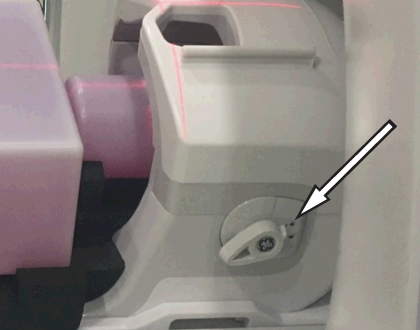
- Connect the anterior coil to the P1 Port on the table. Do not
allow cable to loop on itself or contact any other cables.
Figure 6. Connection of 48CH Head Coil Anterior and Posterior Units 
- Landmark the coil at the crosshair mark (indicated below), and
press Advance to Scan.
Figure 7. Landmarking Coil (Head LM) 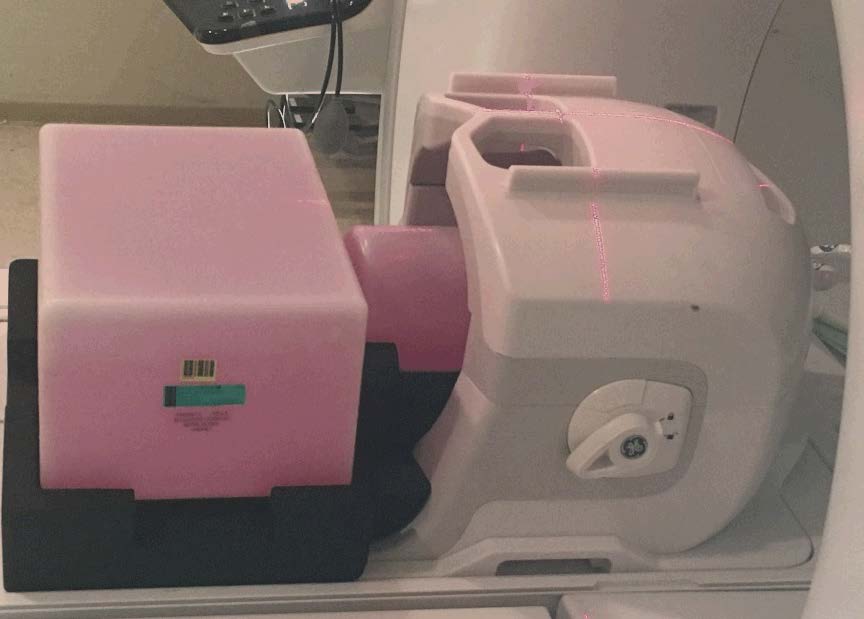
Finalization
No finalization steps.