- 00000018WIA303ABE20GYZ
- id_131058913.5
- Apr 23, 2020 7:30:32 PM
GEM MCQA Setup - Posterior Array (PA) lower
Prerequisites
| Required persons | Preliminary requirements | Procedure | Finalization |
|---|---|---|---|
| 1 | - | 30 minutes | - |
The 1.5T GEM Coil MCQA will use the 1.5T phantoms, which are green in color.
Note:
Coils do not ship with phantoms. Phantoms come in a Unified Phantom set with the MR System.
| Item | Quantity | Effectivity | Part number | Manufacturer |
|---|---|---|---|---|
| TL Unified Phantom (For 1.5T) | 2 | - |
5343347 | - |
Procedure
- Place the flat filler panel on the GEM table in the recess closest to the magnet bore.
Figure 1. Flat filler panel 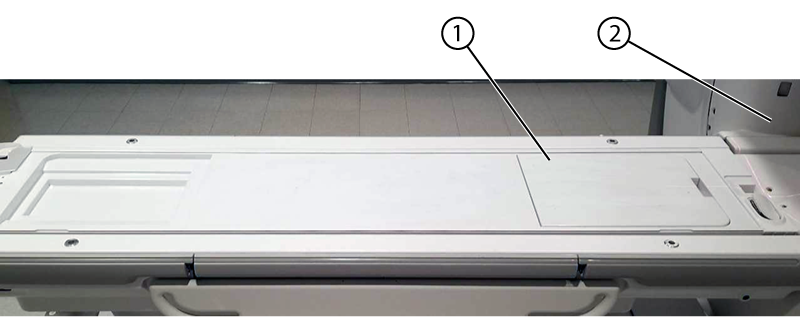
1 Flat filler panel 2 Bore - Place the two TL Unified Phantoms on the GEM table centered in the right to left direction with the bottom edge of the second phantom (farthest from bore) aligned with the bottom edge of the PA Coil.Important: A slight misalignment of the phantoms and landmark may cause a false negative result from MCQA.
Figure 2. Phantom position 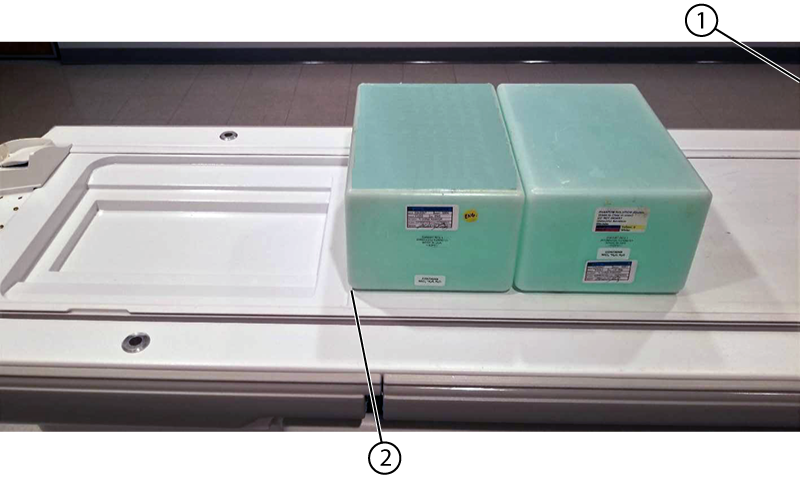
1 Bore 2 Bottom edge of the second phantom/bottom edge of the PA coil - Landmark at the bottom edge of the flat filler panel closest to the bore.
Figure 3. Landmark location 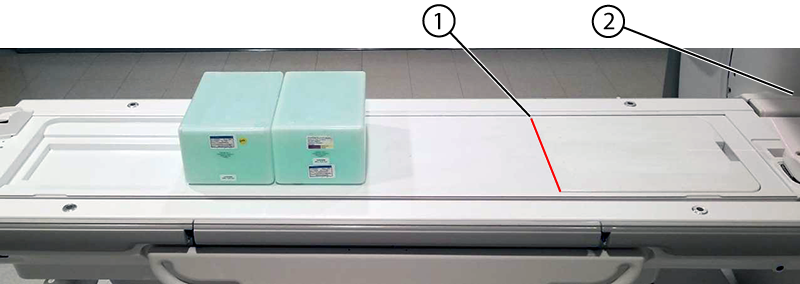
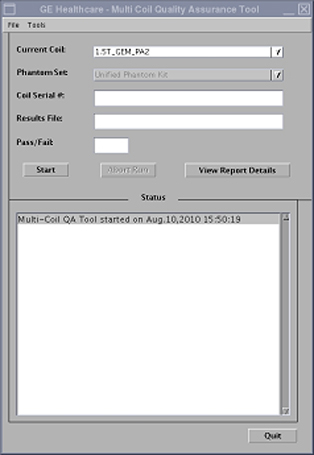
1 Bottom edge of the flat filler panel/landmark location 2 Bore - Run the Multi-Coil Quality Assurance Tool. Make sure that the correct coil is selected in the Current Coil field:
- For the original PA coil: 1.5T_GEM_PA2
- For the latest PA coil: 1.5T_GEM_PA_23.0T_GEM_PA_2 (note the extra underscore between "PA" and the number)
Figure 4. MCQA Tool Menu