• SIGNA™ Hero 3.0T Service Methods
  • 5852800-8EN Revision 1.0
  • Object ID: 00000018WIA30CA6410GYZ
  • Topic ID: id_2004432 Version: 4.3
  • Date: Sep 15, 2021 3:54:48 PM

Testing MRU cable at magnet

Prerequisites

Personnel requirements
Required personsPreliminary requirementsProcedureFinalization
110 minutes 20 minutes5 minutes
Tools and test equipment
ItemQuantityPart numberManufacturer
MRU Tester15730424 -
Digital Voltmeter (DVM)146-194427P284-
Safety

Before working in any GE Healthcare MR suite or performing any GE Healthcare service procedure, you must:

  • Have read and understood all hazard conditions and safety requirements in the latest revision of the GE Healthcare MR Service Safety Manual (5452735).
  • Have successfully completed all relevant GE Healthcare Environmental Health and Safety (EHS) courses (or for non-GE employees, equivalent workplace training courses).
  • Comply with all site-specific training and workplace safety requirements.

If you have any safety concerns at any time, do not begin work or immediately stop work and move to a safe location. Immediately contact your supervisor or site safety officer for instructions on how to proceed.

Important:

Observe the following:

  • The MRU tester is slightly magnetic, it should not be located near the magnet bore. It can be taken to the side of the magnet to test the continuity of the MRU cable that runs between the MRU and the magnet without issue.
  • The MRU tester must be used as documented. Failure to comply with the procedure can result in a magnet quench.
  • The MRU tester should not be removed from the MRU with the LEDs on as this could result in a magnet quench.
  • Failure to properly use the MRU tester can result in magnet quench. If not sure how to properly use the MRU tester contact your MAC team leader.

Procedure

  1. Note: This process is only needed for troubleshooting, it is not needed for PM.
    Disconnect the 5-pin Switchcraft connector P3 cable going into magnet.
  2. Connect this cable to J3 of the MRU tester.
    Figure 1. MRU tester connected at magnet
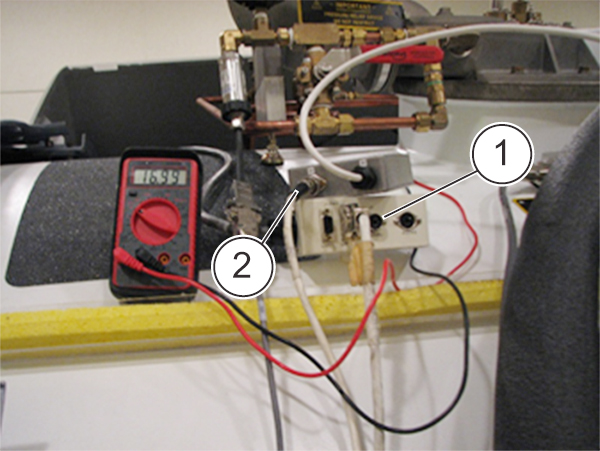
    1Remove cable from J3
    2Install cable into J3 of tester
  3. Plug DVM onto jacks of MRU tester to check for proper voltage.
  4. Important: Failure to properly configure the MRU tester could result in a magnet quench.
    With cable to magnet disconnected and MRU tester plugged into MRU, press the red Quench button. Record output voltage for both A and B circuits.
  5. Both LEDs on the MRU tester should light, which indicates:
    • Proper operation of the MRU
    • Proper operation of the cable between magnet and the MRU
    Note: There should be a 2.4 volt drop when measuring voltage at the magnet compared to measuring voltage at the MRU.
  6. When complete, press Reset on the MRU. See applicable vendor manual for specific MRU to locate the Reset button.
  7. Important: Do not connect cable P3 into the magnet if the LEDs on the MRU tester are illuminated, this will cause a magnet quench.
    Reconnect cable at magnet.
  8. Proceed to Finalization.