
- SIGNA MR355 / SIGNA MR360
- Service Manual
- 5856356-3EN Revision 5.0
- Basic Service Documentation. Copyright General Electric Company.
- 00000018WIA309FAF20GYZ
- id_131073891.2
- Jul 5, 2019 11:49:11 PM
CRADLE SLIDE LOCK ADJUSTMENT
Prerequisites
| Required persons | Preliminary requirements | Procedure | Finalization |
|---|---|---|---|
| 1 | 0 minutes | 90 minutes | 0 minutes |
| Item | Quantity | Effectivity | Part number | Manufacturer |
|---|---|---|---|---|
| Spanners (1/2,3/4,3/8,7/16,5/16,32) | One for each size | - | - | - |
| Circlip inserter (A-150,A170) | One for each size | - | - | - |
| Hex. Socket (9/16,3/4,3/8) | One for each size | - | - | - |
| Scale (15cms & 30 cms) | One for each size | - | - | - |
| Ball driver (5/32,5/64,3/32,1/8,7/64,9/16) | One for each size | - | - | - |
| Allen key (5/32,5/64,3/32,1/8,7/64,9/16) | One for each size | - | - | - |
| Flat nose plier | - | - | - | - |
| Cutter | - | - | - | - |
| Copper hammer | - | - | - | - |
| Screw driver (8mm, 4mm) | One for each size | - | - | - |
| Knife | - | - | - | - |
| Soft mallet | - | - | - | - |
| Torque wrench (40-120 kg-cm,10 –50 lb-ft) | - | - | - | - |
| Item | Quantity | Effectivity | Part number | Manufacturer |
|---|---|---|---|---|
| Locktite / Primer (242, 569, 680, 415, 770) | One for each size | - | - | - |
| IPA | - | - | - | - |
| White Marker | - | - | - | - |
| Grease Mobil HSC 32 | - | - | - | - |
| Cotton waste White (High grade) | - | - | - | - |
 | ||||||||
Procedure
- Loosen the Delrin screw.
Figure 2. Loosen the Delrin screw 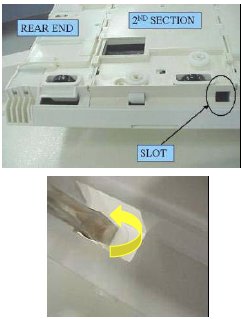
- Remove the wheel housing nearest to the Delrin lock.
Figure 3. Remove the wheel housing 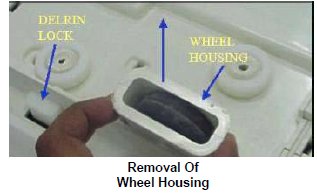
- Insert Finger to reach the Push rod and rotate the push rod
using finger, so that the Delrin lock length increases to 10mm.
Figure 4. rotate the push rod using finger 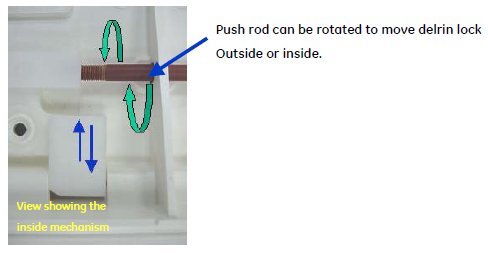
Figure 5. Delrin lock length 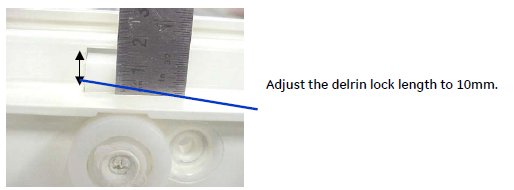
- Push the Delrin screw block to tension the tygon tube inside
and under tension lock the Delrin screw.
Figure 6. Delrin screw block to tension 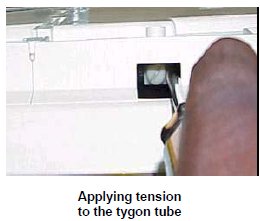
Figure 7. Removal of Wheel Housing 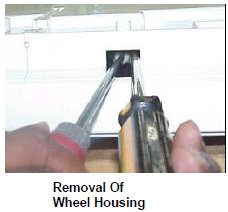
- Check if it is locking, by depressing the Push rod at front
of cradle by 4 mm and slide cradle out and check if lock is releasing
smoothly.
Figure 8. Push rod 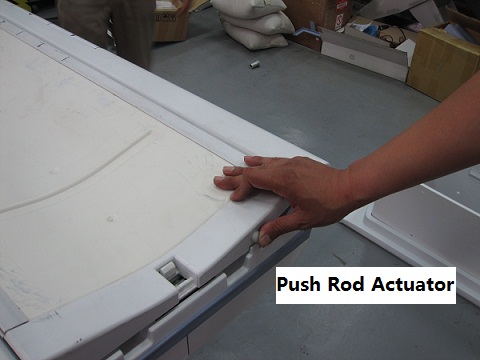
Finalization
No finalization steps.