• SIGNA™ Hero 3.0T Service Methods
  • 5852800-8EN Revision 1.0
  • Object ID: 00000018WHA3014C6GYZ
  • Topic ID: id_2001854 Version: 6.60
  • Date: Nov 3, 2021 6:28:32 PM

Configuring for LVShim

About this task

The configuring process is different depending on the type of software you are using. Please select the appropriate procedure for configuring for LVShim.
Topic ID: task_rx2_vrh_ykb

Configuring for LVShim for systems running PX29.1 or later

About this task

This procedure is for systems running PX29.1 or later

Procedure

  1. Set the universal phantom pad on the table and align the crosshairs at 1080 mm away from home.
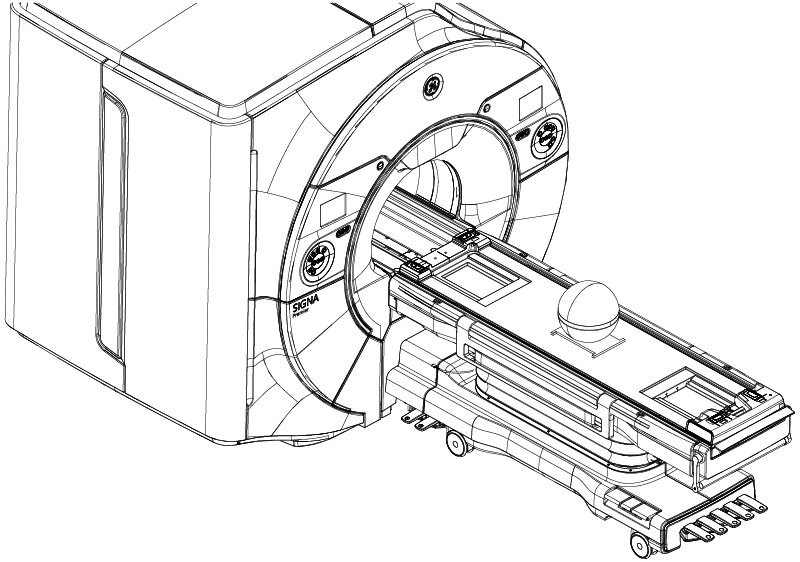
  2. Put the sphere on the pad with the strap (in the groove) in the orientation shown below, making sure the laser lights are cross-centered on the sphere and phantom pad.
    Figure 1. Sphere phantom position
    Note: This image is a representative example. Actual systems may vary.
  3. Set up and align the LVShim phantom. Align the phantom so that:
    1. The strap on the phantom is aligned parallel to the table surface.
    2. The phantom is centered left to right with respect to the cradle top.
  4. Landmark on the universal phantom pad crosshairs.
    Note: The landmarking tolerances of the LVShim tool are: I/S: ± 3 mm, A/P: ± 30 mm, R/L: ± 5 mm. Ensure accuracy of the placement for landmarking.
    Note: Due to the tight landmarking tolerance, it is important to align the lasers on the cross lines of the universal positioner before setting the sphere.
  5. Press Advance to Scan.
    Note: The tool checks phantom positioning and will fail if the above landmarking specs are out of tolerance.