
- SIGNA™ Hero 3.0T Service Methods
- 5852800-8EN Revision 1.0
- 00000018WHA307B62GYZ
- id_200142910.5
- Jul 13, 2021 4:10:15 PM
Checking the laser light
Adjust the cradle position and check the alignment of the laser light.
About this task
Procedure
- Adjust the cradle position to examine the laser light alignment.
Figure 1. Cradle positioning for laser alignment check 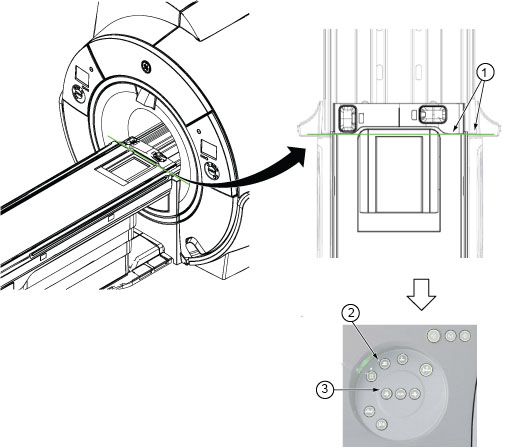
1 Align bridge edge with the cradle joint end cover 2 Landmark button 3 Move the cradle out 8 mm - Examine the laser line for correct alignment.
Figure 2. Correct alignment 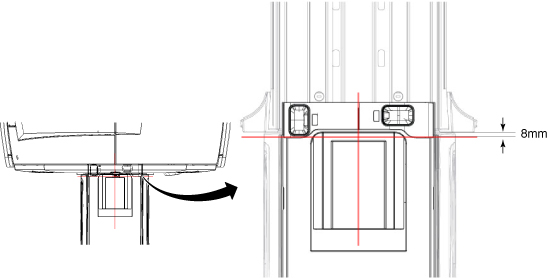
- The axial light must align with the cradle joint. The cradle joint end cover must be located 8 mm away from bridge end on each side.
- The sagittal light must align with the middle line of the cradle.
- If the laser lights are aligned correctly, make a mark with a pen in the locations of the axial light and the saggital light, as shown in the figure. These marks will be the reference for future alignment light checks. After you make these marks, this procedure is complete.
- If the laser lights are not aligned correctly, align them. See Aligning the laser light.