
- SIGNA MR355 / SIGNA MR360
- Service Manual
- 5856356-3EN Revision 5.0
- Basic Service Documentation. Copyright General Electric Company.
- 00000018WIA302C8F20GYZ
- id_131057852.0
- Jul 19, 2019 11:01:01 AM
HIS/RIS Setup and Troubleshooting
| Required persons | Preliminary requirements | Procedure | Finalization |
|---|---|---|---|
| 1 | Not Applicable | 15 minutes | Not Applicable |
| ||||||||
| Condition | Reference | Effectivity |
|---|---|---|
|
Acquire HIS/RIS, filming network information from the customer administrator. | - | - |
This procedure documents the set up and calibration of the system to a clinical hospital information system (HIS) or a radiology information system (RIS).
Setup
- From the Common Service Desktop, select the Configure button, select the Guided Install button, and in FE Mode login as root (password is operator).
- Under Connectivity, select HIS/RIS.
Figure 1. HIS/RIS Screen 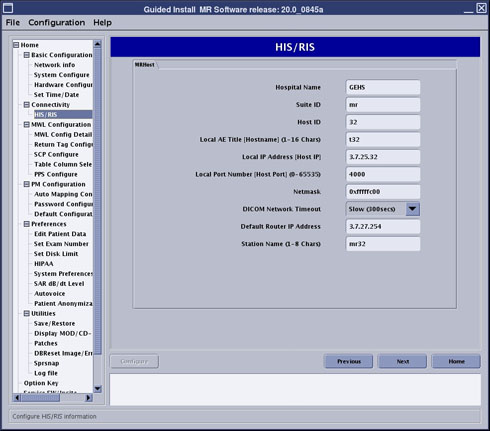
- Enter applicable information in all fields (as provided by site) and click the Configure button.
- Under MWL Configuration, select MWL Config Details. The detail field description shown
in Table 4.
Figure 2. MWL Config Details Screen 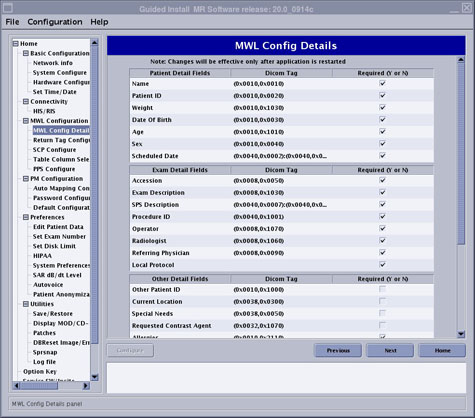
Figure 3. MWL Config Details Screen (Continued) 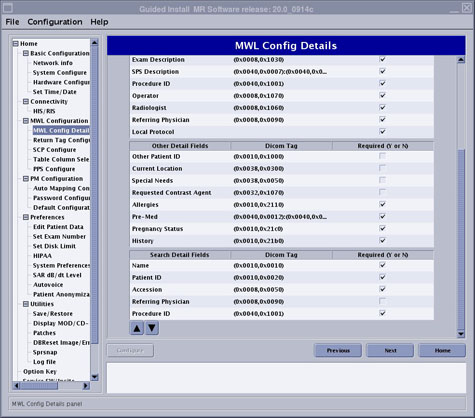
Table 4. Detail Field Description Detail Fields Category Attribute Description Search Detail Fields Name Patient Detail Fields Patient's full name Yes Patient ID Patient Detail Fields Primary hospital identification number or code for the patient. Yes Weight Patient Detail Fields Weight of the patient in kilograms Date of Birth Patient Detail Fields Date of birth of the named patient Age Patient Detail Fields Age of the Patient. Sex Patient Detail Fields Sex of the named patient. Enumerated Values: M = male
F = female
O = other
Scheduled Date Patient Detail Fields Date on which the Scheduled Procedure Step is scheduled to start. Accesssion Exam Detail Fields A departmental IS generated number that identifies the order for the Imaging Service Request. A RIS generated number that identifies the order for the Study. Yes Exam Description Exam Detail Fields Institution-generated description or classification of the Study (component) performed. SPS Description Exam Detail Fields Institution-generated description or classification of the Scheduled Procedure Step to be performed. Procedure ID Exam Detail Fields Identifier that identifies the Requested Procedure in the Imaging Service Request. Required if Sequence Item is present. Yes Operator Exam Detail Fields Name of operator(s) acquiring or creating RT Image. Radiologist Exam Detail Fields Names of the physician(s) reading the Study. Referring Physician Exam Detail Fields Name of the patient's referring physician. Yes Local Protocol Exam Detail Fields Other Patient ID Other Detail Fields Other identification numbers or codes used to identify the patient. Current Location Other Detail Fields Describes the current known location of the patient Special Needs Other Detail Fields Medical and social needs (e.g. wheelchair, oxygen, non-English-speaking, etc.) Requested Contrast Agent Other Detail Fields Contrast agent requested for use in the procedure Allegies Other Detail Fields Description of prior reaction to contrast agents. Pre-Med Other Detail Fields Medication to be administered at the beginning of the Scheduled Procedure Step, e.g. Nuclear Medicine radiopharmaceutical. Pregnancy Other Detail Fields Describes pregnancy state of patient. Enumerated Values: 0001 = not pregnant
0002 = possibly pregnant
0003 = definitely pregnant
0004 = unknown
History Other Detail Fields history - If any of fields, other than the defaults, are desired to appear in the Modality Worklist, select or deselect appropriately and click the Configure button.
- Under MWL Configuration, select Return Tag Configure.
Figure 4. Return Tag Configuration Screen 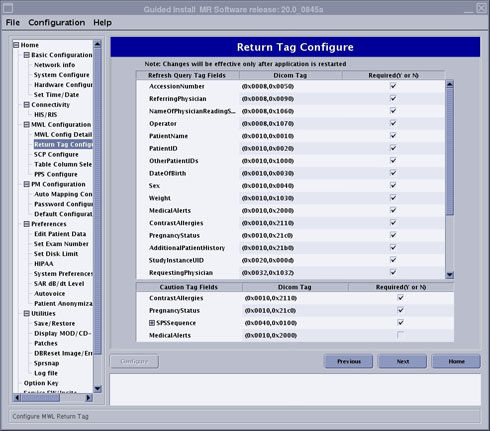
- If any fields, other than the defaults, are desired by the site to be refreshed in the Modality Worklist, select or deselect appropriately and click theConfigure button.
- Under MWL Configuration, select SCP Configure. Note: SCP means Service Class Provider, it is used for HIS/RIS server (which provides MWL service) configuration.
Figure 5. SCP Configure Screen 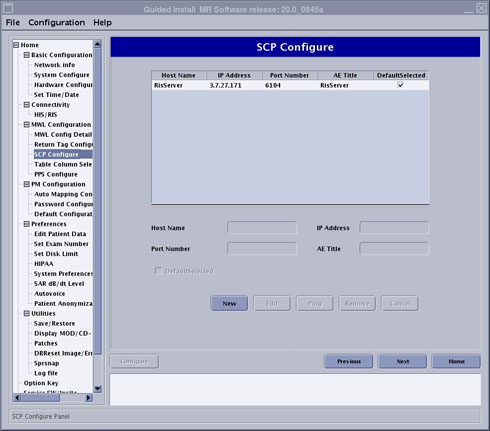
- Click the New button to setup a new item.
- Enter applicable information in all fields (as provided by site) and click the Configure button. Note: For the first time configure, please click "DefaultSelected" to enable configure button.
- To verify network connectivity, click the Ping button.
- Under MWL Configuration, select Table Column Selection Configure.
Figure 6. Table Column Selection Configuration Screen 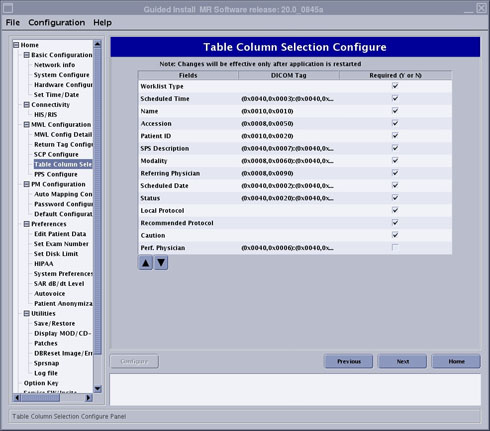
- Select or deselect any fields desired to be displayed in the patient record table (located at the top of the scan window) and click the Configure button.
- Under MWL Configuration, select PPS Configure. Note: At release of this document, PPS Configure is available with 1.5T systems only. PPS Configure will be available for 3.0T at a later time.
Figure 7. PPS Configure Screen 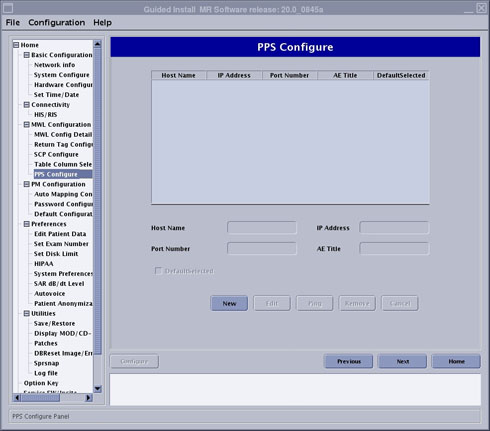
- Click the New button to setup a new setup.
- Enter applicable information in all fields (as provided by site) and click the Configure button.
Functional Check
- Click the Work List icon for the scan
screen (see Figure 8).
Figure 8. Work List Icon 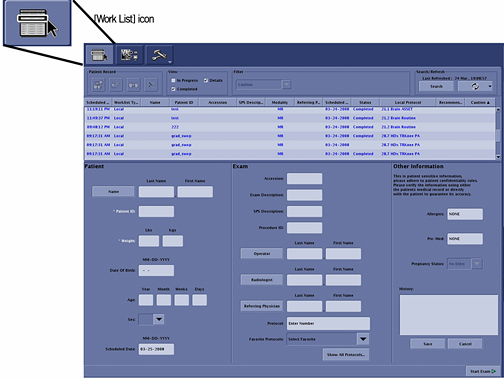
- To confirm the connectivity of the system to the RIS system,
go into the scan desktop and select the New Patient icon (see Figure 9).
Figure 9. New Patient Icon 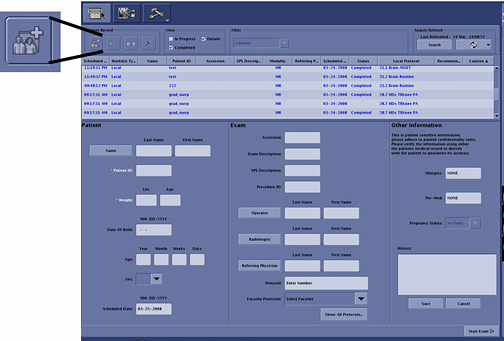
- On the scan screen enter the following:
- Patient ID:geservice
- Weight:111
- Click the Save button.
- In the Search/Refresh box, click the Search Data button (see Figure 10).
Figure 10. Search Button 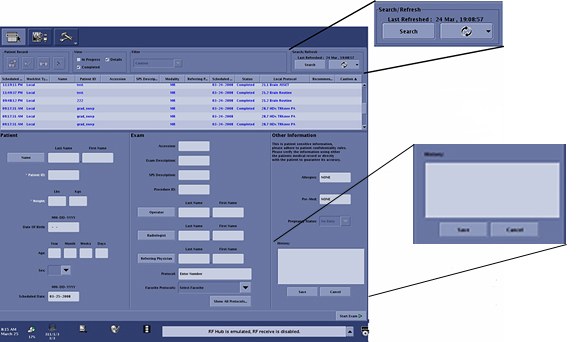
The Search Data window displays as shown in Figure 11.
Figure 11. Search Data Window 
From this page select how you want to pull information from the RIS system. The Get Patient List options are:
Enter a patient Name, Patient ID, Accession Number, or Procedure ID to define the search.
Selecting This System, which pulls the patient lists entered for this system.
Selecting This Modality pulls the patient list for all MR systems at this facility.
Selecting All Modalities pulls the patient list for all systems associated with this facility. Using this option may cause the scanner to hang if the facility has too large of Work List for all scanners at the site.
Selecting Date Range pulls patient lists for any set day or date range.
- After entering the proper Search Data, click the Search button (see Figure 12).
Figure 12. Search Details Selected 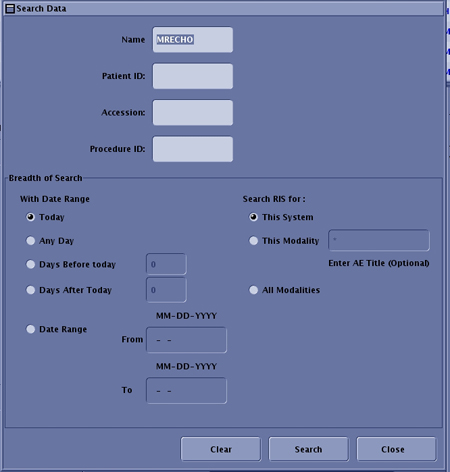
- The results appear in the list above the patient information
(see Figure 13).
Figure 13. Full Work List 
Troubleshooting
- From the Common Service Desktop, select the Guided
Install button, and in FE Mode login as root (see Figure 14).
Figure 14. Accessing HIS/RIS Setup 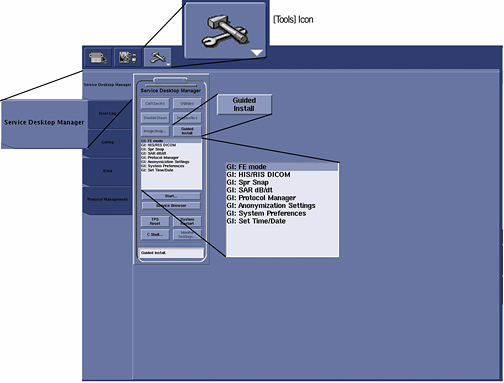
- Under Connectivity select HIS/RIS (see Figure 15).
Figure 15. HIS/RIS Setup Screen and Tabs - Ensure that the Hospital Name, Suite ID, Host ID, and Local AE Title are correct for the MR system. The Local Port Number (Host Port) should be set to 4000 (same as the DICOM (Digital Imaging and Communications in Medicine) networking port number for MR systems). These are the parameters that the hospital RIS system uses to identify our system (see Figure 15).
- Under MWL Configuration, select SCP Configuration (see Figure 16).
Figure 16. SCP Configure Screen Ensure the following information with the site network administrator:
Host Name is the site name.
AE Title is the Modality Work List (MWL)Application Entity (AE) title of the RIS system of the site.
IP Address is the internet protocol (IP) address of the RIS server.
Port Number is the port number of the RIS system of the site.
- Under Home, select Verification (see Figure 17.
Figure 17. Verification Screen 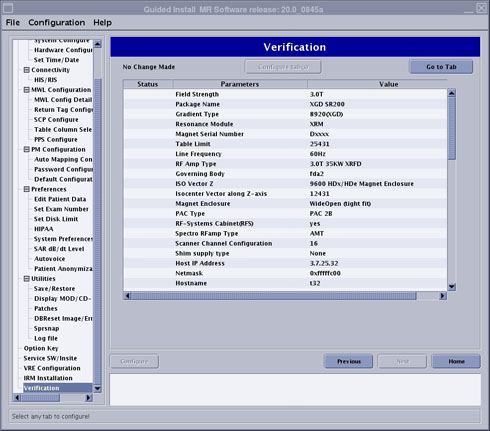
- Select Configure and confirm no errors.
- Select File>Quit.
Finalization
No finalization steps.