- id_2014042
- Version: 3.1
- Date: Dec 30, 2019 8:31:15 PM
Checking Internet connectivity prior to InSite Remote Service Platform (RSvP) upgrade
Makes sure an InSite1 connected system has Internet connectivity prior to a Remote Service Platform (RSvP) upgrade.
Procedure
- (For Customers connected through DNS) Configure and test DNS using the following instructions:
- Configure DNS:
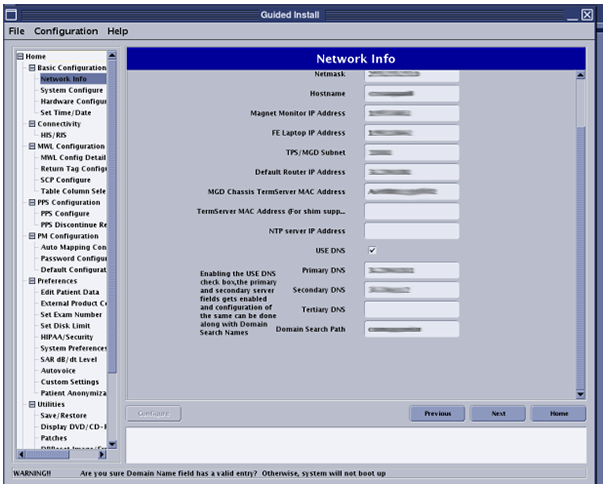
- The MR software supports DNS configuration. Check the USE DNS box and enter the DNS IP addresses on the Network Info tab of Guided Install.
Figure 1. Network info DNS entry
- The MR software does not support DNS configuration. Do the following to configure DNS:
- Launch Guided Install
- Make sure the Network Info tab has correct network configuration information for IP/Netmask/Gateway.
- Click on .
- Open a terminal and login as root.
- Type gedit /etc/nsswitch.conf and press Enter.
- Add dns to the entry at the end of the file: hosts: files dns.
- Type gedit /etc/resolv.conf and press Enter.
- Add Google or any other DNS entries:
- nameserver <site DNS IP address 1>
- nameserver <site DNS IP address 2>
- Save and quit the edit terminal.
- Restart the system.
- The MR software supports DNS configuration. Check the USE DNS box and enter the DNS IP addresses on the Network Info tab of Guided Install.
- Test connectivity using DNS:
- Execute the following command in a terminal: >> openssl s_client -connect insite.gehealthcare.com:443.note: If the system has connectivity, the digital certificate information will be displayed and the cursor will be waiting for the next command.
- Enter the following at the prompt exactly as written, including the spaces: GET / HTTP/1.0
- The system will respond with:
HTTP/1.0 200 OK
Server: BigIP
Connection: close
Content-Length: 148
<HTML><HEAD><TITLE>GE Healthcare Web Server</TITLE></HEAD><BODY><P><A HREF="http://gehealthcare.com/">GE Healthcare</A> Web Server</P></BODY></HTML>read:errno=0
- If the test fails, use a public IP to determine if DNS resolution is the cause of the failed test. Type the following command and then repeat 1.b.ii: >> openssl s_client -connect 198.169.189.25:443.
- Execute the following command in a terminal: >> openssl s_client -connect insite.gehealthcare.com:443.
- Configure DNS:
- (For Customers connected through a proxy) Execute the following command in a terminal:
- (For Proxy without login) >> env https_proxy=<proxy IP>:<port #> curl -k https://198.169.189.25:443
- (For Proxy with login) >> env https_proxy=http://<user>:<password>@<proxy IP>:<port #> curl -k https://198.169.189.25:443
The system should respond with:<HTML><HEAD><TITLE>GE Healthcare Web Server</TITLE></HEAD><BODY><P><A HREF="http://gehealthcare.com/">GE Healthcare</A> Web Server</P></BODY></HTML>read:errno=0