- id_12373706
- Version: 1.1
- Date: Jul 5, 2019 10:03:33 PM
Installing Codonics Printer for BrainWave or SAGE
Prerequisites
| Required persons | Preliminary requirements | Procedure | Finalization |
|---|---|---|---|
| 1 | Not Applicable | 15 minutes | Not Applicable |
| Condition | Reference | Effectivity |
|---|---|---|
|
Applications Software is installed and configured. |
- | - |
Procedure
- If applications are up and running, restart the computer by clicking System Restart and OK.
- From login screen, login as root . Do not
bring up Guided Install.note:
It is possible that the customer changed the default password. If you cannot log in, contact the customer for the correct password.
- Right Mouse click and bring up Configure Printer.
Figure 1. Configure Printers
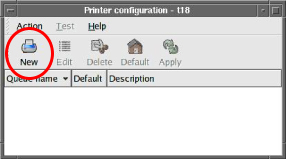
- Click on the New option Figure 1.
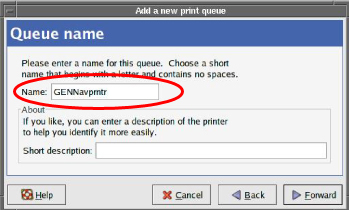
- Click on Forward. The screen shown below
appears.
Figure 2. Add a New Print Queue

- Enter name of the Codonics Printer as GENNavprntr (case sensitive). For BrainWave, you must use the name of GENNavprntr. For SAGE option, the name is not important.
To proceed, click Forward.
Figure 3. Queue Name
- Select Queue type as Networked UNIX (LPD) as shown below. To proceed, click Forward.
Figure 4. Queue Type
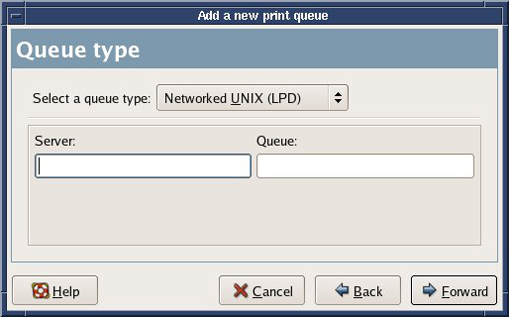
- Enter hostname or IP address for the Server, (example IP is 10.1.11.11).
- Enter queue name as 2.a-cvp, then select Forward.
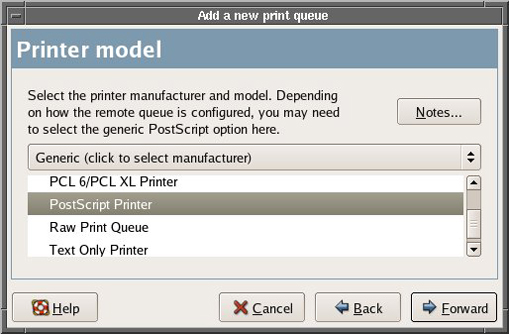
- For Printer Model, select Postscript printer, as shown below. To proceed, click Forward.
Figure 5. Printer Model
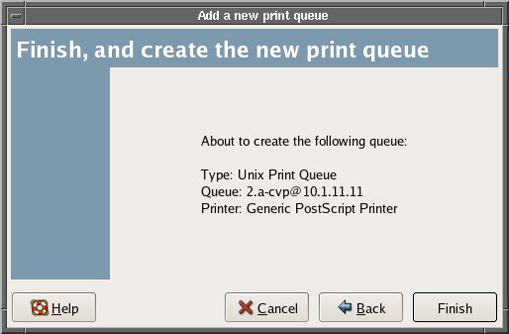
- At the screen shown below, click Finish.
Figure 6. Finish and Create the New Print Queue
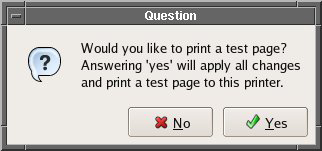
- At the screen shown below, click Yes to
apply changes and print a test page. The printer test page should
print successfully at this time.
Figure 7. Print Test Page
Finalization
- To verify SAGE printing, open the SAGE option. Select File then Print. A GUI will appear. In the Printer text field, remove the default printer and enter the name of the printer that was used in Step 6.