- id_12374513
- Version: 1.2
- Date: Oct 18, 2019 11:40:09 AM
Capturing Screen Shots Using GIMP
Prerequisites
| Required persons | Preliminary requirements | Procedure | Finalization |
|---|---|---|---|
| 1 | Not Applicable | Not Applicable | Not Applicable |
Overview
It may be necessary for you to capture screen shots from a hHost computer to share with the Online Center or other GE Service representative. The following procedure describes how to use the GNU Image Manipulation Program (GIMP) to capture screen shots.
Procedure
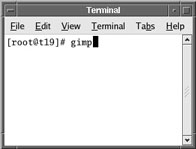
- To start GIMP, open a C-shell, type gimp at the prompt and press Enter. If GIMP is not
configured on the Host PC, follow the screen prompts to configure.
Figure 1. Starting GIMP
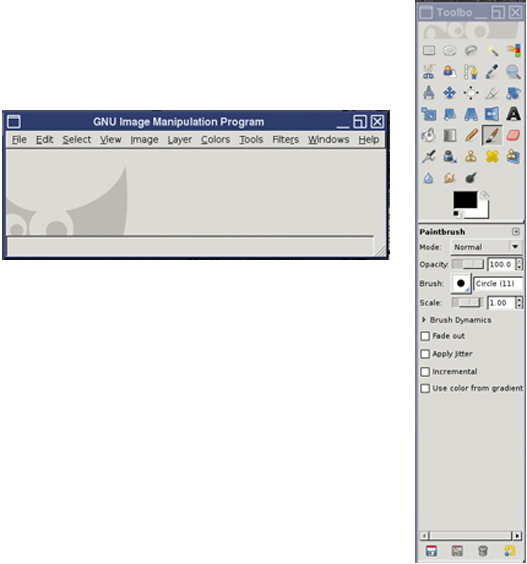
 note:
note:GIMP often launches in two windows shown below. The Layers, Channels, Paths, Undo window can be safely closed as it will not be used.
Figure 2. Gimp Windows for Pre DV Apps

Figure 3. GIMP Windows for DV Apps
- To capture a screen shot, move the GIMP windows if they are blocking any portion of the proposed shot.
- From The GIMP File menu, select Acquire(For Pre DV Apps) or create(For DV Apps) , then Screen Shot. (Both screens are shown below.)
Figure 4. GIMP File Menu for Pre DV Apps
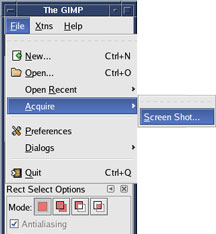
Figure 5. GIMP File Menu for DV Apps

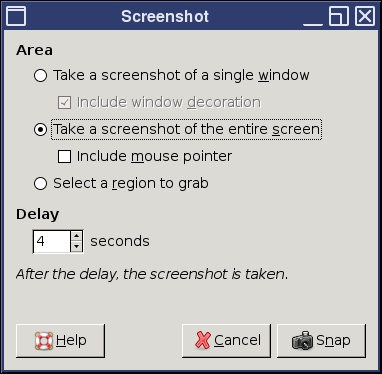
- When the Screen Shot dialog box displays,
select desired preference and click OK.
Figure 6. GIMP Screen Shot Window for Pre DV Apps
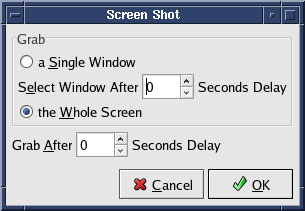
Figure 7. GIMP Screenshot Window for DV Apps
- Click on the screen or window to capture. The screen shot displays in a new GIMP window.
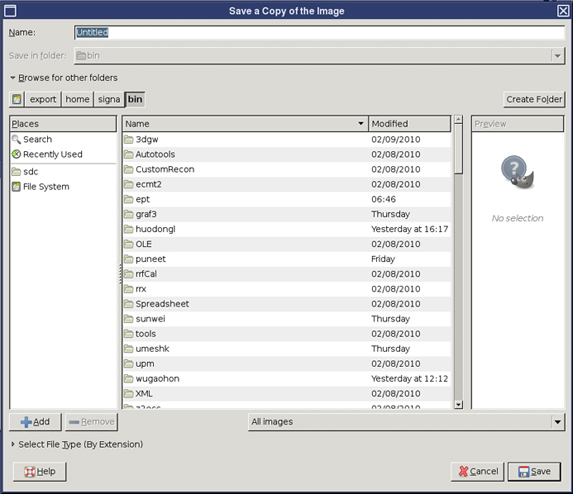
- To save the file, select Save As from the File menu.
- In the Save Image window, name the file,
select a file extension, then the directory where the file should
be saved.
Figure 8. Saving an Image for Pre DV Apps
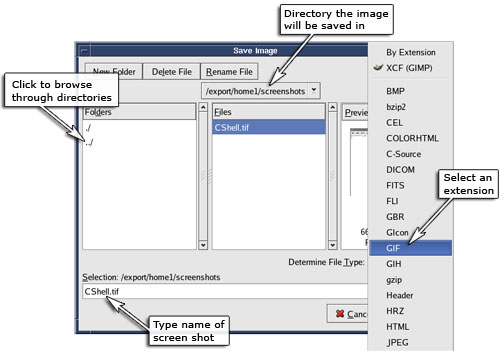
Figure 9. Saving an Image for DV Apps
Finalization
To locate the saved images, log onto the Host PC from your laptop, and browse to the appropriate directory. The files can then be moved to a local directory.