- id_2001628
- Version: 7.0
- Date: Aug 23, 2019 3:42:40 AM
Doing the EPI White Pixel test (Full mode)
This procedure uses echo planar image (EPI) scans and the raw data mode of recon to analyze the raw data for white pixel artifacts. These raw data artifacts can exhibit themselves as corduroy artifacts in images.
Prerequisites
| Personnel requirements | |||
|---|---|---|---|
| Required persons | Preliminary requirements | Procedure | Finalization |
| 1 | - | 45 minutes | - |
| Required conditions |
|---|
| Service key installed. |
| DQA Calibration. |
| Tools and test equipment | |||
|---|---|---|---|
| Item | Quantity | Part number | Manufacturer |
| Safety |
|---|
|
Before working in any GE Healthcare MR suite or performing any GE Healthcare service procedure, you must:
If you have any safety concerns at any time, do not begin work or immediately stop work and move to a safe location. Immediately contact your supervisor or site safety officer for instructions on how to proceed. |
There are two modes of operation for the EPI White Pixel Test.
- Mode 1 creates 48 images while iterating on Readout Axis (X, Y, Z), (readout gradient fundamental frequency), and placement of the data acquisition window over the attack knee and decay knee of the readout trains positive and negative lobes. In addition, Mode 1 generates various report fields and plot files that can be used to analyze white pixels. Mode 1 has been incorporated in the echo planar test (EPT) test to be run as a single test.
- Mode 2 prompts you to enter an image number that generated the most white pixels from the Mode 1 test and allows you to use the real-time display feature of EPI to loop on that condition for troubleshooting purposes.
Procedure
- Remove any phantoms from the cradle.
- Move the cradle from the home position, landmark, and then advance to scan.
Figure 1. EPI white pixel setup
- On the MR Service Desktop, start the Service Browser (if not already running).
- On the Image Quality tab, select .The GE Healthcare – Spike Noise Tool dialog is displayed.
- Select or verify the following variables:
- and Disable UTNS
- Options: Baseline Noise Test and Raw Data Analysis
Figure 2. EPI white pixel user interface
- Click Start for the Mode 1 – Full Sweep test. As the test runs, the Run Status is displayed. When the test is finished, the Pass/Fail Status displays PASS or FAIL.
- Click View Report to view the file's content. A file called sn_report.body is created showing a header file and the white pixel information (if any). If there are no white pixels detected, only the header information appears in the file. These output files are stored on the system in /usr/g/bin.
- To run Mode 2, follow the instructions above to start the tool, with the exception of selecting Mode 2 – Single Loop.
- When prompted for the image number, enter the image number (1-48) determined from the Mode 1 – Full Sweep test. See EPI White Pixel test data for details on how to choose the correct image number. A Mode 2 Scan prompt appears.
Figure 3. Mode 2 scan
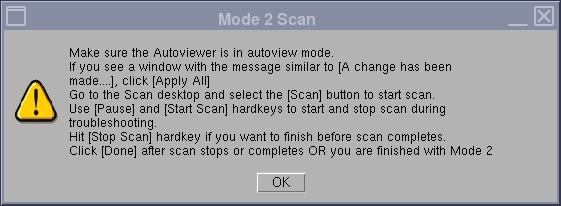
- Read the instructions on the Mode 2 Scan prompt.Leave the window open; do not click OK to close the window while in Mode 2. If you click OK, the test session will end and you will have to restart it.Mode 2 runs continuously for approximately four minutes for troubleshooting purposes (provided you do not press the Pause key).
- To repeat the looping process, return to the Scan Desktop and press Scan again. Use the hard keys to run the test as described above.