
- 00000018WIA30EDE030GYZ
- id_123736631.12
- Jan 8, 2020 1:32:25 PM
KASC Fan Replacement
Prerequisites
| Required persons | Preliminary requirements | Procedure | Finalization |
|---|---|---|---|
| 1 | Not Applicable | 30 minutes | For DV: 15 mins. For Voyager and Pioneer: 60 mins. |
| Item | Quantity | Effectivity | Part number | Manufacturer |
|---|---|---|---|---|
| Standard Tool | 1 | - | - | - |
| Item | Quantity | Effectivity | Part number | Manufacturer |
|---|---|---|---|---|
| KASC Fan | 1 | - |
Refer to FRU Manual. | - |
| ||||
Procedure
- Disconnect all connectors and cables from KASC, except for any SMB terminators on the detector boards. Leave the terminators in place.
Figure 1. 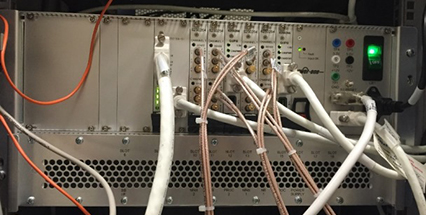
- Remove 18 screws and remove the KASC fan assembly.
Figure 2. KASC Fan Assembly 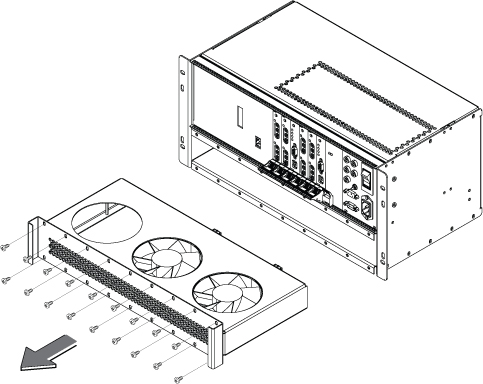
Finalization
- Remove LOTO from the reconstruction equipment. See the MR Service Safety Manual, PN 5452735.
- Turn the ICNs on per the ICN On/Off Procedure. Note:
For the first 3 or 4 minutes, LEDs come on only at the rear of the ICN, next to the power cables. After 3 to 4 minutes, you will hear the ICN fans come on and then the LED at the front of the ICN starts flashing.
- Perform a TPS reset, and then do a check scan to make sure the system operates correctly.