Discovery MR750w and SIGNA™ Architect T 3.0T System Service Methods
5690002-2EN
Revision
4
Object ID: 00000018WIA3036AE20GYZ
Topic ID: id_13107172 Version: 3.1
Date: Oct 11, 2021 8:47:14 PM
Rear cover removal and installation
Prerequisites
Table 1. Personnel requirements
Required persons
Preliminary requirements
Procedure
Finalization
1
Not Applicable
60 minutes
Not Applicable
Table 2. Tools and test equipment
Item
Quantity
Effectivity
Part number
Manufacturer
Cut-Resistant Gloves
1 Pair
-
-
-
Nonmagnetic Titanium Service Tool Kit, Large Set
1
-
5112581
-
Table 3. Replacement parts
Item
Quantity
Effectivity
Part number
Manufacturer
Rear Covers
2
-
See FRU Manual
-
Table 4. Safety
Warning
Strong magnetic field
Ferrous materials can become dangerous projectiles in the presence of the magnetic field that the magnet produces.
Do not bring any ferrous tools or equipment into the magnet room.
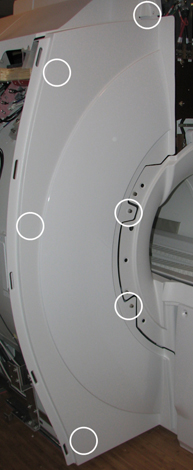
About this task
This document contains the procedures for Rear Cover removal
and Installation. The Rear Covers consist of two halves. The Right
Rear Cover must be removed to access the Body Hybrid Module.
Note: Removal of the Rear Covers is not required to replace the Gradient Coil or Rear End Bell.
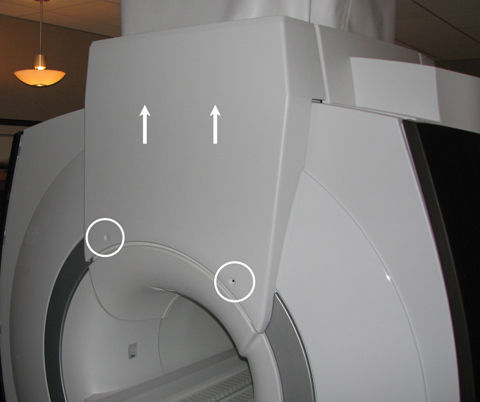
Procedure
Remove the Rear Pedestal Covers (five screws, two at the top
of each cover and one holding both covers at the lower back).
Remove the two Rear Cable Cover screws and slide the cable cover
straight up to disengage from the upper hooks.