
- Discovery MR750w and SIGNA™ Architect T 3.0T System Service Methods
- 5690002-2EN Revision 4
- 00000018WIA303FC030GYZ
- id_123749351.11
- Oct 11, 2021 3:47:41 PM
Bore Light Replacement
Prerequisites
| Required persons | Preliminary requirements | Procedure | Finalization |
|---|---|---|---|
| 1 | Not Applicable | 10 mins. for rear bore lights, 90 mins. for front bore lights (450w); 10 mins. for rear or front (450w GEM or 750w GEM) | Not Applicable |
| Item | Quantity | Effectivity | Part number | Manufacturer |
|---|---|---|---|---|
| Non-Magnetic Service Tool Kit | 1 | - |
5112581 | - |
About this task
Overview
Use this procedure to replace the front and rear bore lights.
Preliminary Steps
Procedure
- Perform LOTO on the PDU. See the MR Service Safety Manual, PN 5452735.
- Move the patient table away from the magnet.
Front and Rear Bore Light Replacement
Procedure
- Remove the two screws holding the bore light cover to the assembly
and end bell.
Figure 1. Bore Light Receptacle 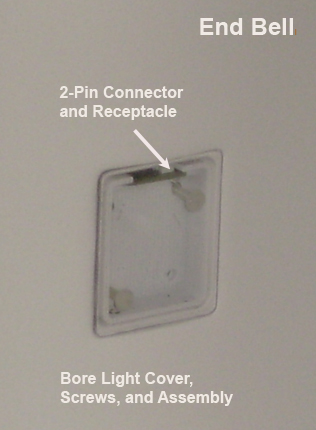
Figure 2. Bore Light Cover and Assembly 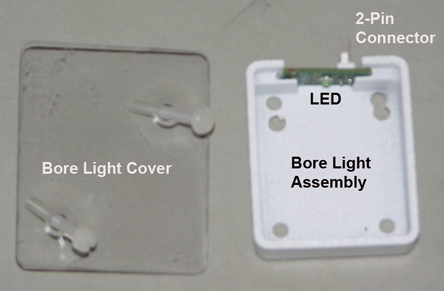
Finalization
Finalization
-
Remove LOTO from the PDU. See the MR Service Safety Manual, PN 5452735.
-
Press the bore light button on the operator control panel to test the bore lights.