
- SIGNA MR355 / SIGNA MR360
- Service Manual
- 5856356-3EN Revision 5.0
- Basic Service Documentation. Copyright General Electric Company.
- 00000018WIA30FA7F20GYZ
- id_131065724.0
- Feb 21, 2021 9:04:37 PM
SV25.2 and earlier (DVD load)
Prerequisites
| Required persons | Preliminary requirements | Procedure | Finalization |
|---|---|---|---|
| 1 | - | 120 minutes | - |
| Item | Quantity | Effectivity | Part number | Manufacturer |
|---|---|---|---|---|
| Blank DVD for SaveInfo procedure | as needed | - | - | - |
| Host OS Software DVD | 1 | - | - | - |
| VRE OS Software DVD | 1 | - | - | - |
| Operator Manual DVD | 1 | - | - | - |
| Condition | Reference | Effectivity |
|---|---|---|
|
Ensure that you have read the information in Security Levelsbefore proceeding. Once HIPAA/Security setting is configured, the choice cannot be changed without reinstalling the software. “Typical Security Settings” is the recommended security level, unless the customer has system networked options such as FUS, BrainWave, CADStream, or other third party devices. In that case, select the option “Security settings for systems networked to certain optional devices”. | - | - |
About this task
IMPORTANT: Make sure that the latest Service Pack is loaded. See the latest revision of MR Service Pack Software Matrix DOC1667089, available from the online documentation library.
If more information is needed for how to load Service Packs, refer to Installing Software Patches (General Guide).
This procedure provides instructions for loading host system software for a new system or an upgrade for SV25.1 only.
For a new installation, you will need to know several system-specific options. The tables in Guided Install Site Configuration Options lists the types of information you will need to know about the site and the site’s hardware.
During the software load procedure, you will install the site’s service license (SSA) key. The key must be ordered in advance. See Service Licensing for information about ordering the license key.
For set time, refer to Reconfiguring the system .
Prepare for Software Load
Procedure
- Confirm that all the correct DVDs are available and ready to use.
- If you are installing on a new system, use the tables in Guided Install Site Configuration Options to identify the types of information you will need to have about the site and the site’s hardware.
Save Client Information (Existing System)
Procedure
Notice
Insert a blank DVD.Notice - Perform SaveInfo.
Load Host OS Software
Procedure
Load MR Application Software
Procedure
Load GI Configuration Information from SaveInfo DVD and Complete MR Application Software Load (Existing Systems)
Procedure
- Go to Preferences > HIPAA/Security and
select the security option appropriate for the site per the customer.
For more information about security options, refer to Security LevelsNote: The HIPPA security screen is mandatory for SV25.1 and later systems. For SV25.0 and previous systems, the HIPPA screen is optional.Note: “Typical Security Settings” is the recommended security level, unless the customer has system networked options such as FUS, BrainWave, CADStream, or other third party devices. In that case, select the option “Security settings for systems networked to certain optional devices”.Note: For the DoD sites, SIGNATM Secure Advanced is the default selection. For the DoD sites or sites that choose the high security setting, the FE must change to a complex password for the root login. We also recommend that the customer changes their user password.
Figure 1. Security Settings 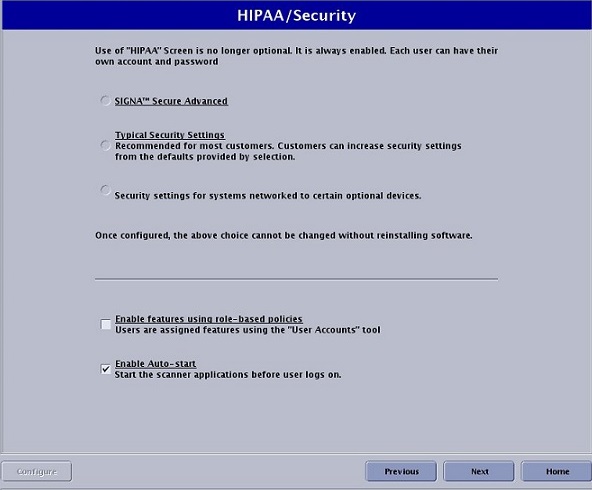
- The Service License screen appears, where you install the site’s
service license key (ordered previously). See Service Licensing . Just keep here till other
SW install.
Figure 2. Service License Screen 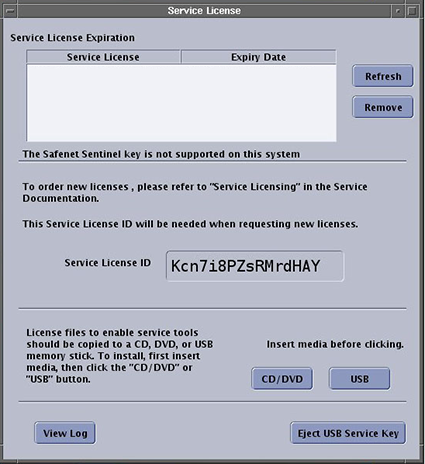 Note: The Service License screen is displayed continuously when the user logs on as root.
Enter GI Configuration Information (New Systems)
Procedure
Load ICN Configuration
Procedure
- The DVD ejects, manually push the DVD back, it pops up a window,
click OK.Note:When a Security Warning appears, see Figure 3. Remember to select Hide Options before click Run
Figure 3. Security Warning 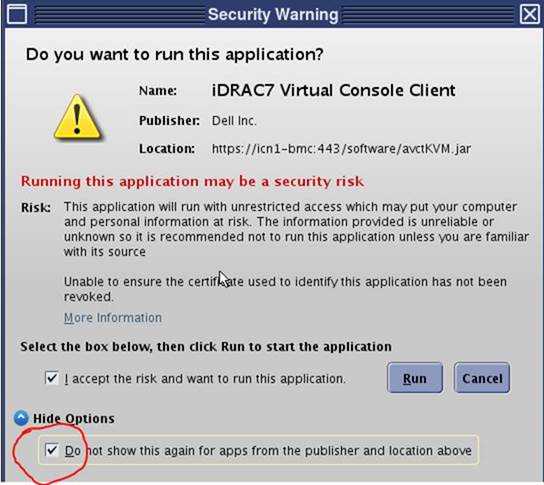
It starts to copy OS content from VRE OS disk to host machine. This process takes about 10 minutes.