
- Optima MR450w BASE 1.5T System Service Methods
- 5690012-2EN Revision 3
- 00000018WIA303D4840GYZ
- id_20149175.0
- Feb 22, 2021 9:54:34 PM
Removing the GOC hard drive - Dell T5820
Remove the solid state drive (SSD) from the host computer.
Prerequisites
| Personnel requirements | |||
|---|---|---|---|
| Required persons | Preliminary requirements | Procedure | Finalization |
| 1 | - | 15 minutes | - |
| Tools and test equipment | |||
|---|---|---|---|
| Item | Quantity | Part number | Manufacturer |
| Nonmagnetic Titanium Service Tool Kit, Small Set (can be used on magnets with magnetic fields > 1.5T) | 1 | 5113258 | - |
| ESD Mat | 1 | - | - |
| ESD Strap | 1 | - | - |
| Required conditions |
|---|
|
Use an antistatic wrist strap and mat while performing this procedure to prevent electrostatic discharge (ESD). Access to both the front and rear of the operator console is required. Move the console away from walls and remove obstacles in the room. |
About this task
Procedure
- Remove the two screws that secure the left side panel of the GOC.
Figure 1. GOC left side panel 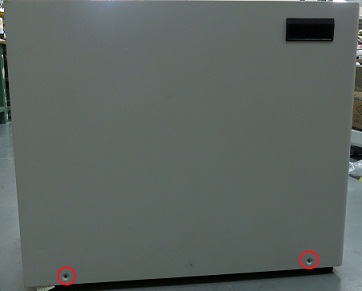 Note: The side panel has a short ground lead connecting it to the main chassis. When removing the side panel, do not strain this ground lead.
 - Disconnect the short ground lead that connects the side panel to the GOC main chassis at the center of the lead.
Figure 2. Left side panel ground lead 
- Remove the side cover.
- Press the latch.
Figure 3. Latch 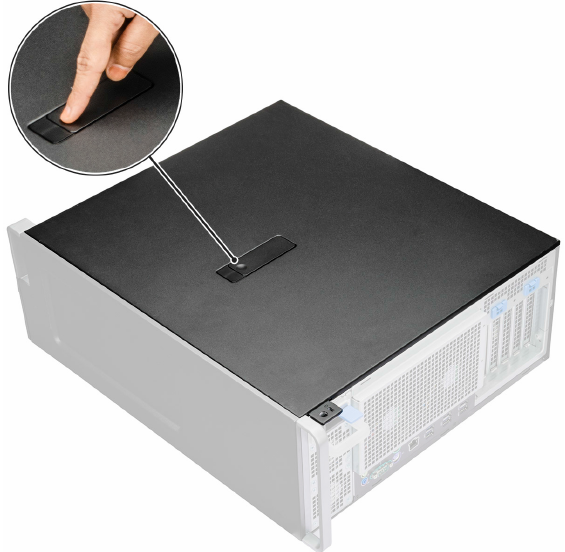
- Pull the latch upward and rotate it to release the cover.
Figure 4. Release the cover 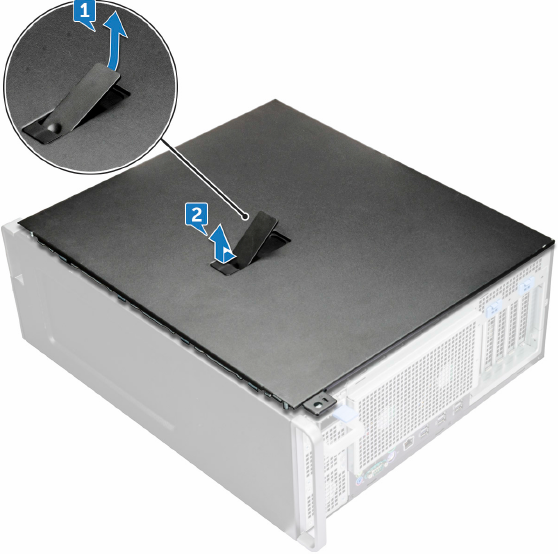
1 Pull the latch upward 2 Rotate the latch to release the cover
- Press the latch.
- Remove the HDD bezel.
- Rotate forward and lift the HDD bezel away from the system.
Figure 5. Remove HDD bezel 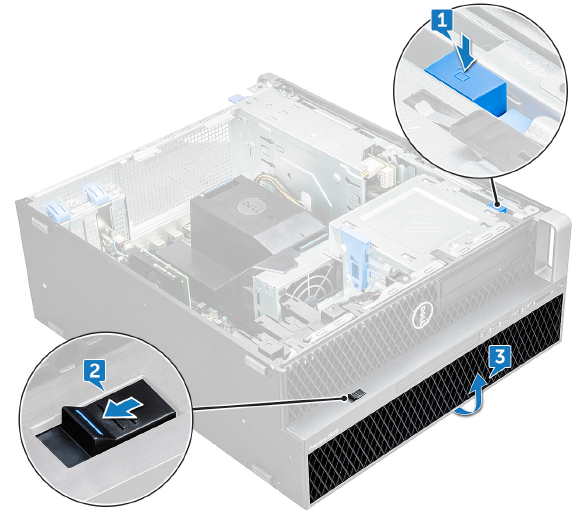
1 Blue unlock button 2 Slide the latch to the unlock position 3 Rotate forward and lift the HDD bezel
- Rotate forward and lift the HDD bezel away from the system.
- Remove the HDD bracket.
- Press the release button to unlock the latch.
Figure 6. Unlocking the latch 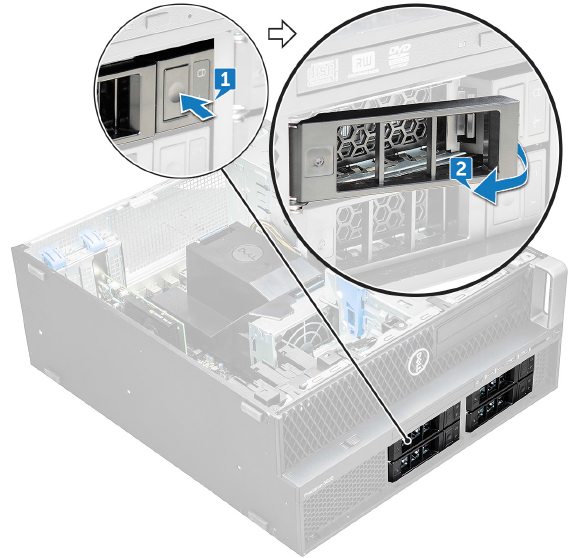
1 Release button 2 Unlock the latch - Pull the latch to slide the bracket out of the HDD slot.
Figure 7. Sliding the bracket out 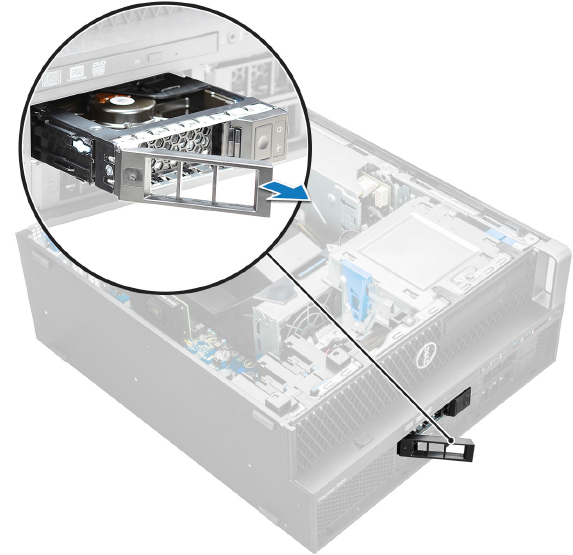
Figure 8. SSD 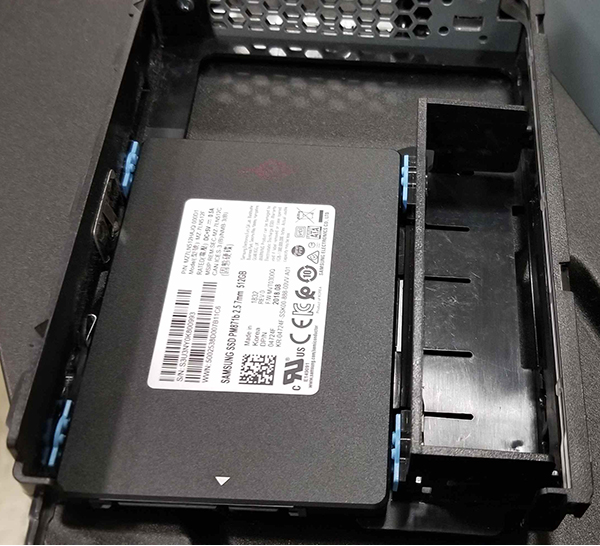
- Press the release button to unlock the latch.
- Remove the HDD.
- Expand the bracket on both sides.
Figure 9. Expand brackets 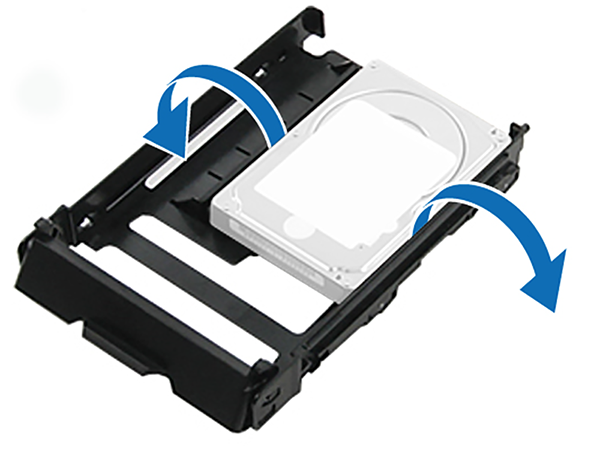
- Lift the hard drive out of the brackets.
Figure 10. Lift hard drive out of bracket 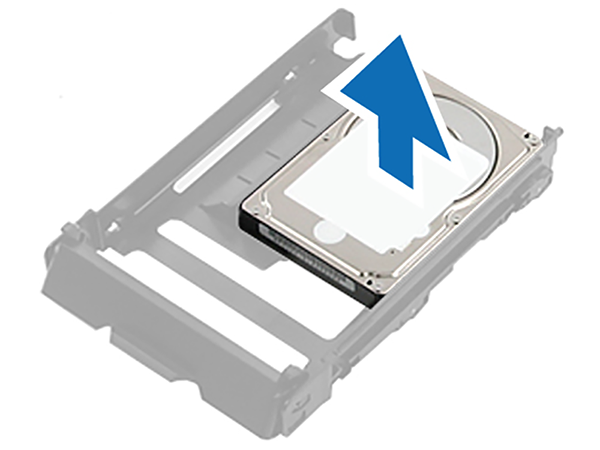
- Expand the bracket on both sides.