- Discovery MR750 3.0T System Service Methods
- 5690009-2EN Revision 4
- 00000018WHA307E62GYZ
- id_20014777.0
- Feb 3, 2021 10:18:39 PM
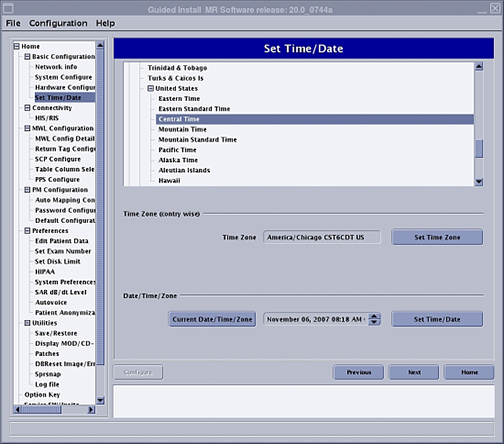
Setting the time, time zone, and date
Set the time, time zone, and date in Guided Install.
Prerequisites
| Personnel requirements | |||
|---|---|---|---|
| Required persons | Preliminary requirements | Procedure | Finalization |
| 1 | - | 5 minutes | - |
About this task
Note: The Set Time/Date option is not set using the Configure button. This window has separate buttons for configuring the host computer time and date.
If available, NTP server configuration can be done to synchronize the MR Scanner date/time automatically with an NTP server on site. An NTP server and IP address are required. See Synchronizing NTP server time.
Procedure
- On the Set Time/Date page, set the time, time zone, and date appropriately.
Figure 1. Set time zone/date