- Discovery MR750 3.0T System Service Methods
- 5690009-2EN Revision 4
- 00000018WIA306FC410GYZ
- id_20044566.0
- Feb 24, 2021 1:14:09 AM
Replacing coil plug connector spindle
About this task
Procedure
- Confirm that all components (shown below) are included in the HDv P-Port Replacement Spindle Tip Kit.Note: Counter Sunk Screw is 8 mm long and has a red coating. A hexagonal socket is required.
Figure 1. Spindle tip and M3 counter sunk screw 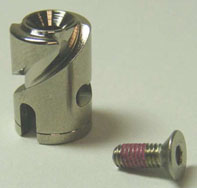
- Place the unpopulated connector found in Spindle Tip Replacement Tool kit (5150668-33) into the coil plug connector, and rotate the handle clockwise to lock the position as shown.
Figure 2. Placing unpopulated connector into plug 
Figure 3. Rotating unpopulated connector to lock in position 
- Using the T10 Torx or a 2 mm Allen wrench, loosen the screw on the unpopulated connector (as shown) with only one rotation counterclockwise.
Figure 4. Loosening screw on unpopulated connector 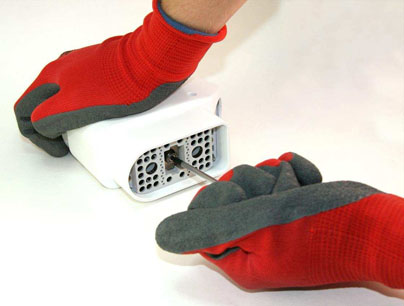
- Loosen and remove the screw from the plug using either the T10 Torx or a 2 mm Allen wrench as shown. Discard the screw.Note: The screw from the plug must not be reused. If the screw is reused, it may loosen and the spindle may fall off.
Figure 5. Removing screw from plug 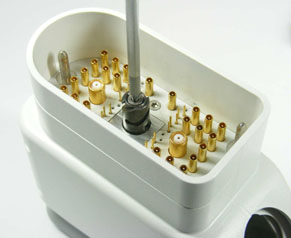
- Replace the spindle tip and the counter sunk screw, and turn the screw using a 2 mm Allen wrench, but do not tighten.
Figure 6. Spindle tip and screw replaced 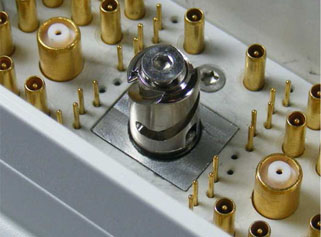
- Hand tighten the screw, and turn it an additional 1/10 turn (1.24 N m) with the 2 mm Allen wrench as shown.
Figure 7. Tightening screw in unpopulated connector