- id_2001754
- Version: 18.0
- Date: Feb 14, 2020 4:00:24 PM
Doing a check scan
A check scan is done at the conclusion of many procedures. This functional check assures the unit is in good clinical working order.
Prerequisites
| Personnel requirements | |||
|---|---|---|---|
| Required persons | Preliminary requirements | Procedure | Finalization |
| 1 | - | 15 minutes | - |
| Tools and test equipment | |||
|---|---|---|---|
| Item | Quantity | Part number | Manufacturer |
| DQA Phantom Positioner | 1 | 5554497 | - |
| Safety |
|---|
|
Before working in any GE Healthcare MR suite or performing any GE Healthcare service procedure, you must:
If you have any safety concerns at any time, do not begin work or immediately stop work and move to a safe location. Immediately contact your supervisor or site safety officer for instructions on how to proceed. |
|
Procedure
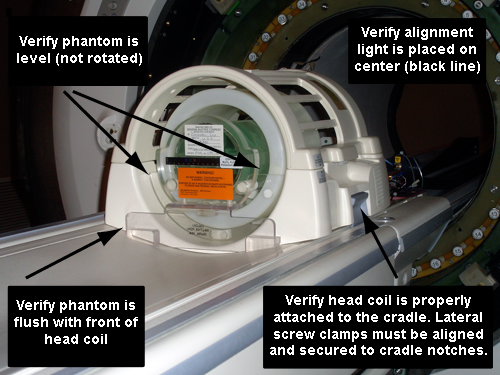
- Attach the head coil to the cradle and position the DQA phantom inside the cradle.
- Landmark on the center line of the phantom. The laser must be in the middle of the line. Press Advance to Scan.
Figure 1. Phantom orientation, split-top head coil
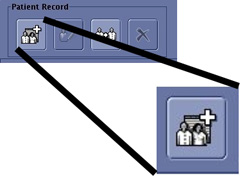
- Click the New Worklist icon.
Figure 2. New worklist icon
- Select a Patient ID workflow (other than geservice).
Figure 3. Entering a new work list
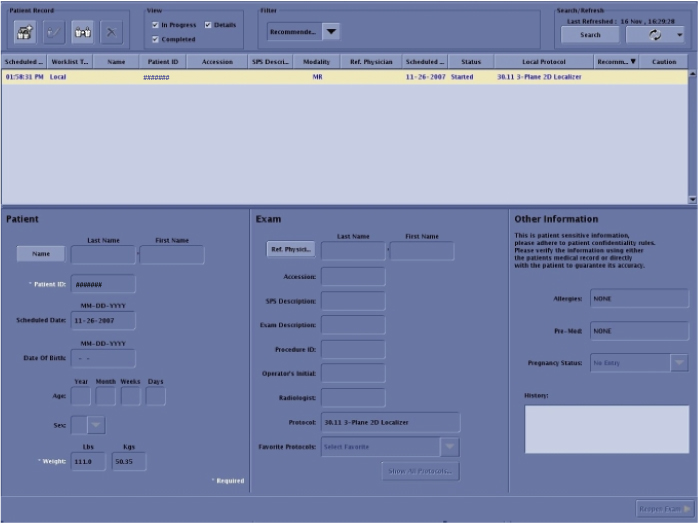
- Enter for weight: 111.
- Click Show All Protocols....
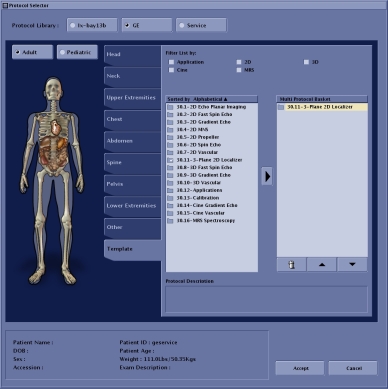
- When the Protocol Selector menu opens, click Protocol Details.
- Select the Protocol Library: GE.
Figure 4. Setting protocols
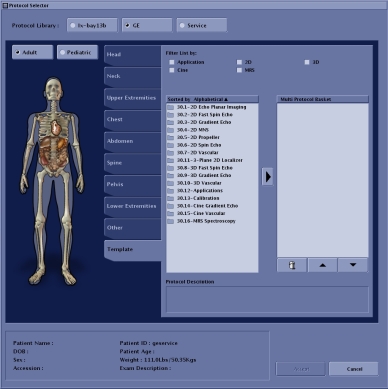
- Select Adult.
- Click the Template tab.
- Select 3 - Plane 2D Localizer and click the arrow to move the selection to the box on the right.
Figure 5. Protocol selected
- Click Accept.
- Click Save.
- Click Start Exam.
- Enter the following image parameters.
Figure 6. Image parameters
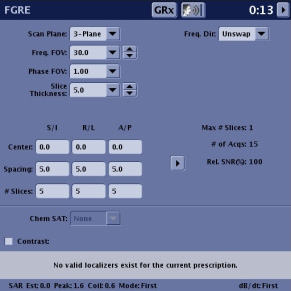
Option Description Frequency field of view (FOV) (Freq. FOV) 30.0 Phase FOV 1.00 Slice Thickness 5.0 - Click Save RX.
- Click Scan.
- Review the images to confirm that the orientation is correct.
Figure 7. Check scan image orientation
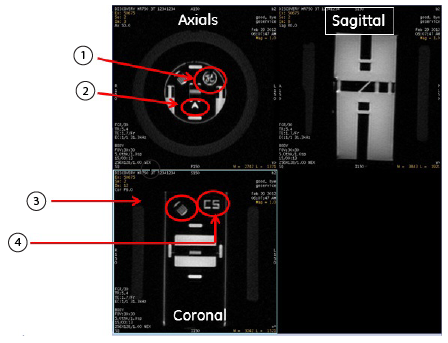
Axials: 1 GE logo in upper right corner 2 A is displayed Coronal & Sagittal: 3 Comb in upper left corner 4 CS displayed in upper right corner