- id_2001449
- Version: 4.0
- Date: Aug 23, 2019 3:56:15 AM
Configuring HIS/RIS
This procedure documents the set up and calibration of the system to a clinical hospital information system (HIS) or a radiology information system (RIS).
Procedure
- From the Common Service Desktop, click , and in FE Mode login as root (password is operator).
- Under Connectivity, select HIS/RIS.
Figure 1. HIS/RIS screen
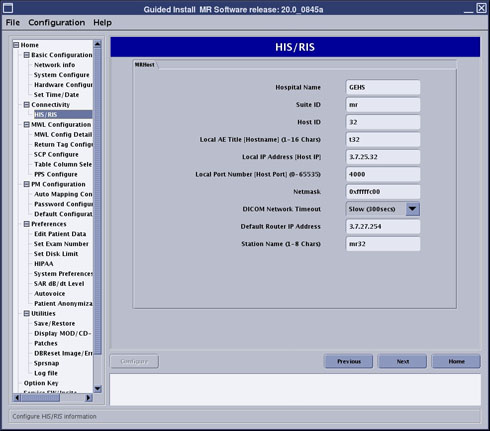
- Enter applicable information in all fields (as provided by site) and click Configure.
- Under MWL Configuration, select MWL Config Details.
Figure 2. MWL Config Details screen
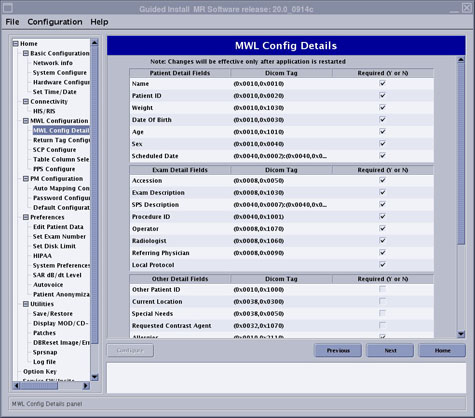
Figure 3. MWL Config Details screen (continued)
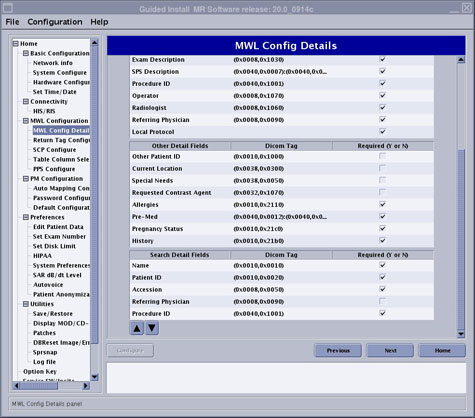
- If any fields, other than the defaults, are desired to appear in the MWL Config Details, select or deselect appropriately and click Configure.
- Under MWL Configuration, select Return Tag Configure.
Figure 4. Return Tag Configure screen
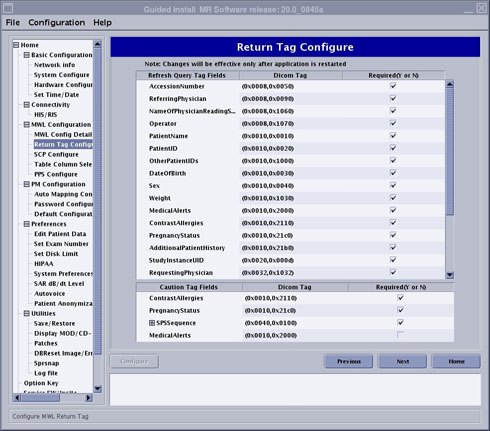
- If any fields, other than the defaults, are desired by the site to be refreshed in the Modality Worklist, select or deselect appropriately and click Configure.
- Under MWL Configuration, select SCP Configure.
Figure 5. SCP Configure screen
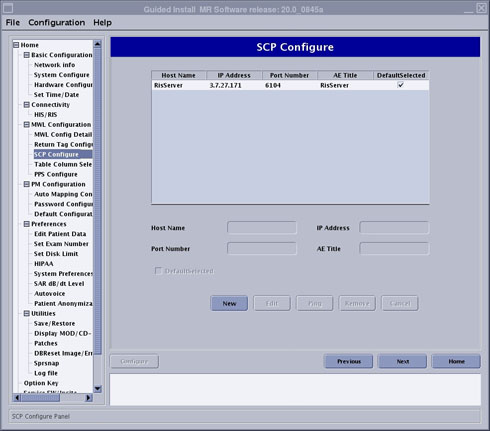
- Click New to setup a new item.
- Enter applicable information in all fields (as provided by site) and click Configure.
- To verify network connectivity, click Ping.
- Under MWL Configuration, select Table Column Selection Configure.
- Select or deselect any fields desired to be displayed in the patient record table (located at the top of the scan window) and click Configure.
- Under MWL Configuration, select PPS Configure.
Figure 6. PPS Configure screen
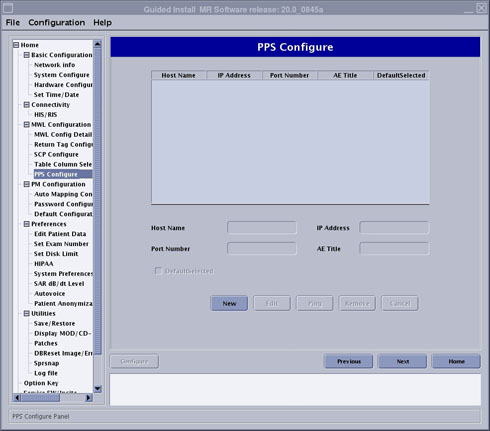
- Click New to start a new setup.
- Enter applicable information in all fields (as provided by site) and click Configure.